Loading ...
Loading ...
Loading ...
ASSEMBLY INSTRUCTIONS
TOOLS NEEDED
! ',I:',',IiIIIII:IZ I'
Phillipsscrewdriver Combinationsquare
Adjustablewrench Straightedge
r_w_ =W1F_G
For your safety, never connect plug to power source
receptacle until all assembly and adjustment steps are
completed, and you have read and understood the safety
and operating instructions.
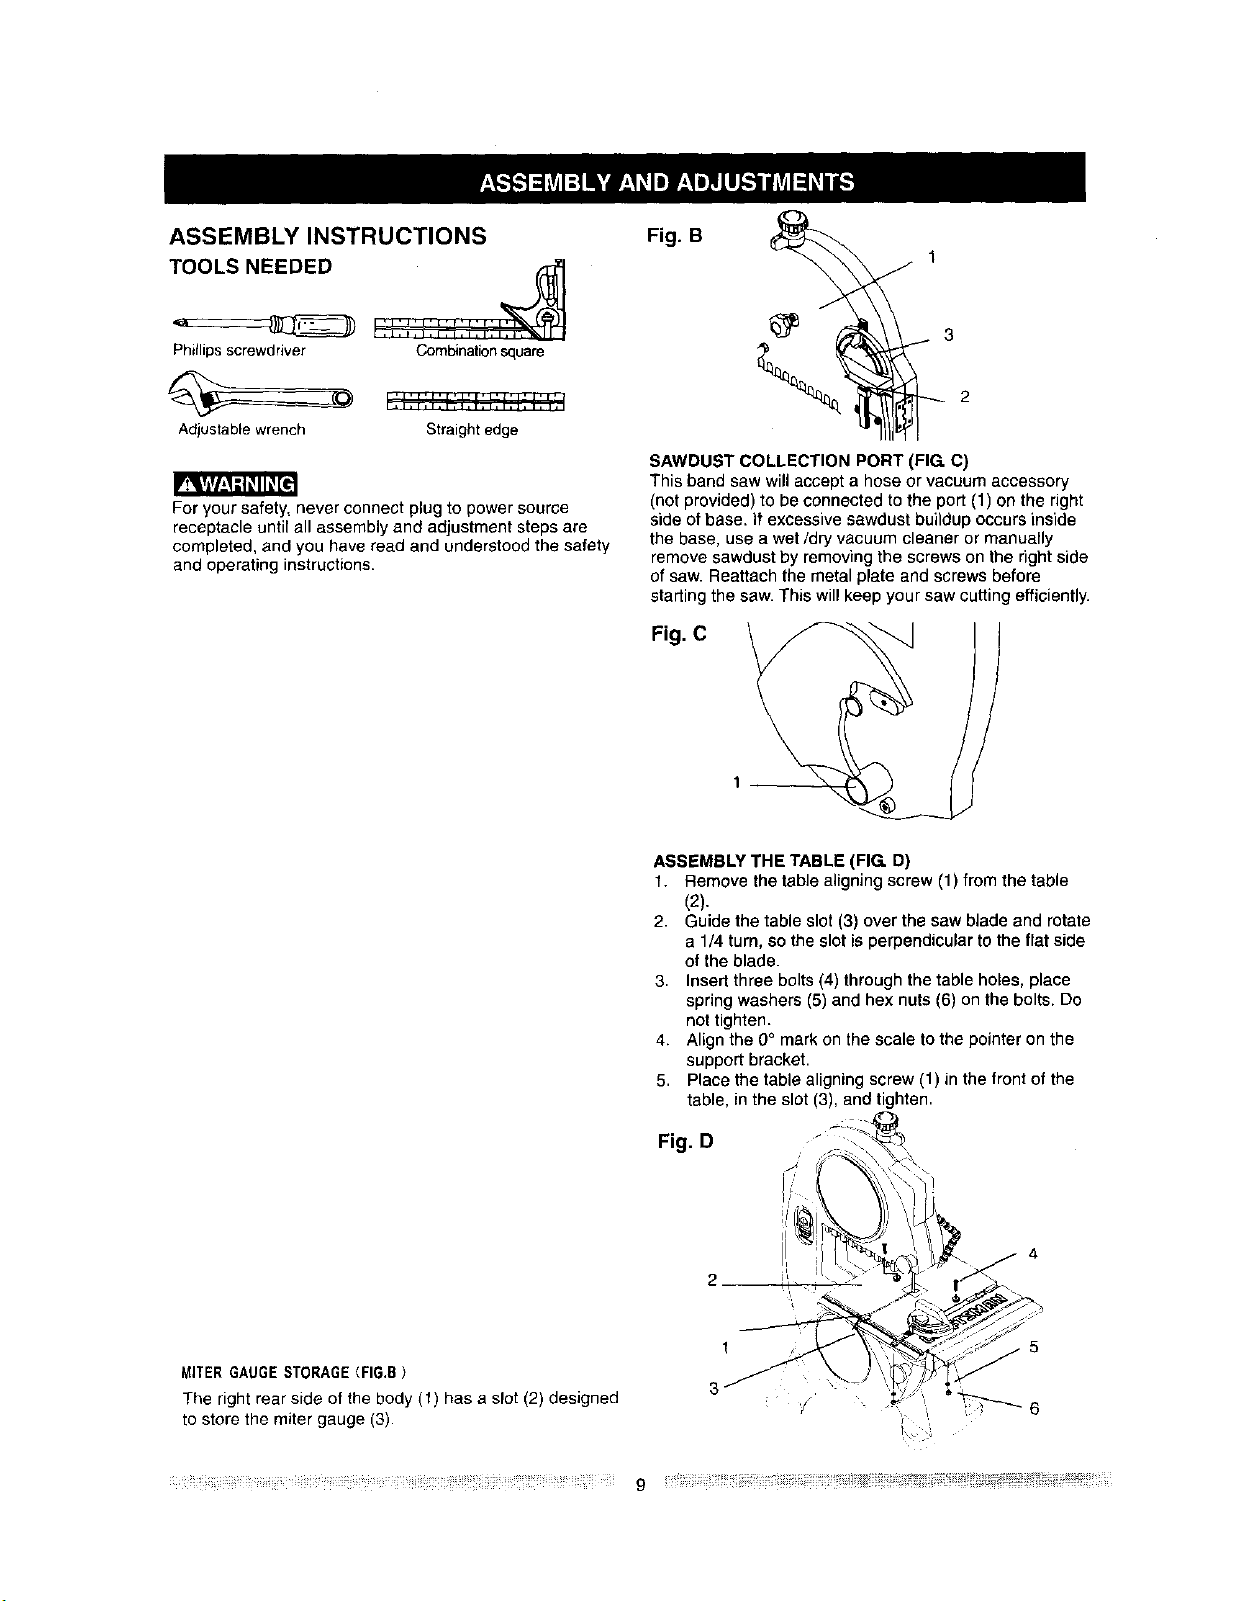
Fig. B
SAWDUST COLLECTION PORT (FIG. C)
This band saw willaccept a hose or vacuum accessory
(not provided) to be connected to the port (1) on the right
side ofbase. It excessive sawdust buildup occurs inside
the base, use a wet/dry vacuum cleaner or manually
remove sawdust by removing the screws on the dgbt side
of saw. Reattach the metal plate and screws before
starting the saw. This will keep your saw cutting efficiently.
Fig. C
MITERGAUGESTORAGE(FIG.B}
The right rear side of the body (t) has a slot (2) designed
to store the miter gauge (3).
ASSEMBLY THE TABLE (FIG. D)
1. Remove the table aligning screw (1) from the table
(2).
2. Guide the table slot (3) over the saw blade and rotate
a 1/4 turn, so the slot is perpendicular to the flat side
of the blade.
3. Insert three bolts (4) through the table holes, place
spring washers (5) and hex nuts (6) on the bolts. Do
not tighten.
4. Align the 0° mark on the scale to the pointer on the
support bracket.
5. Place the table aligning screw (1) in the front of the
table, in the slot (3), and tighten.
Fig. D
2--
t
3
4
_ii!ili!!i_iiii!_iii_ili_i_i_ii!__i_!i_i!_i;!iiii_iiii!_i!_i_i!!!!!!i!i!i!ji!!!!ii?!!_!i!ii!i_!!!i?!iiii_!_!_!_!II_!I_!II!I-_! g !!_?_iii_i_!i_i!i_ii_ili;F!_!_!!i_ii!i!_!!_i!!!!_ii_ii_i!_!_ ii!_Fi_iiii:iiiil
Loading ...
Loading ...
Loading ...