Loading ...
Loading ...
Loading ...
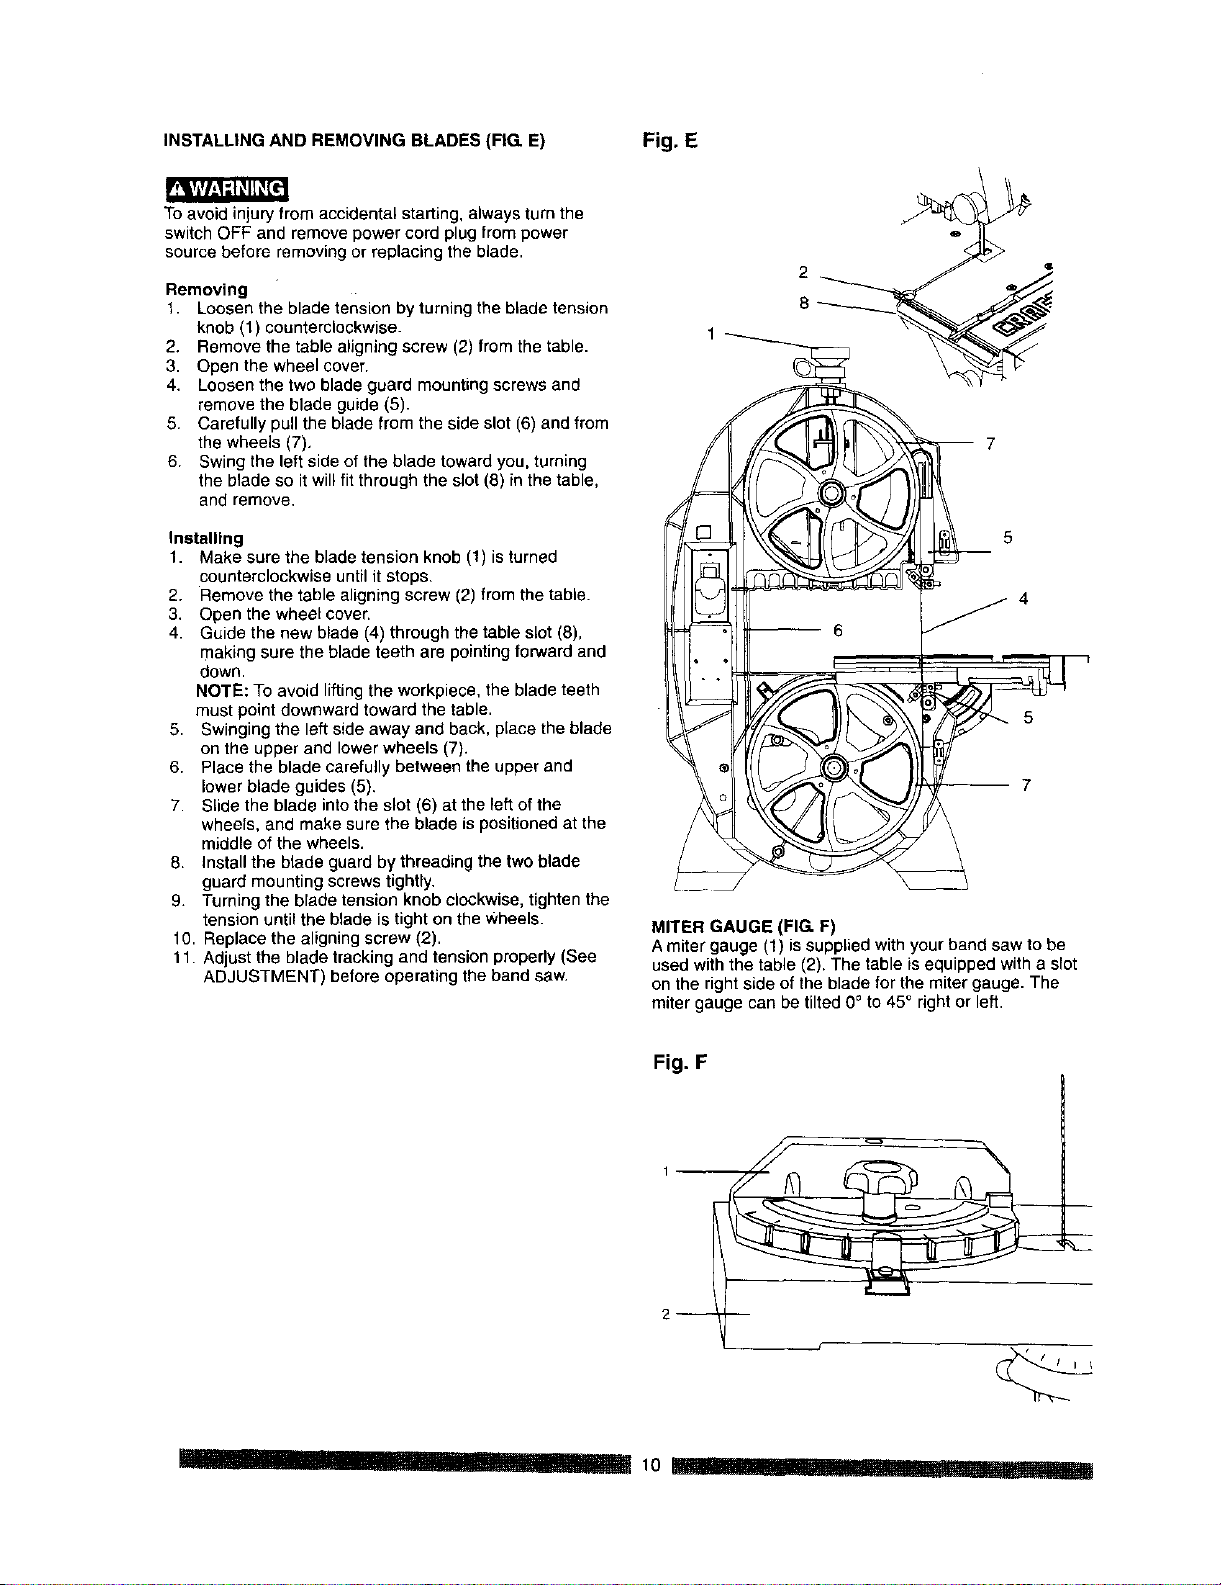
INSTALLINGAND REMOVING BLADES (FIG E) Fig. E
To avoid injuryfrom accidental starting, always turn the
switch OFF and remove power cord plug from power
source before removing or replacing the blade.
Removing
1. Loosenthe blade tension by turningthe blade tension
knob (1) counterclockwise.
2. Remove the table aligning screw (2) from the table.
3. Open the wheel cover.
4. Loosenthe two blade guard mountingscrews and
removethe blade guide (8).
8. Carefully pull the blade from the side slot (6) and from
the wheels (7),
6. Swing the left side ofthe blade toward you, turning
the blade so it willfit through the slot (8) in the table,
and remove.
Installing
1. Make sure the blade tension knob (1) isturned
counterclockwise until it stops.
2. Remove the table aligning screw (2) from the table.
3. Open the wheel cover.
4. Guide the new blade (4) through the table slot (8),
making sure the blade teeth are pointing forward and
down.
NOTE: To avoid lifting the workpiece, the blade teeth
must point downward toward the table.
5. Swinging the left side away and back, place the blade
on the upper and lower wheels (7).
6. Place the blade carefully between the upper and
lower blade guides (5).
7. Slide the blade into the slot (6) at the left of the
wheels, and make sure the blade is positioned at the
middle of the wheels.
8. Install the blade guard by threading the two blade
guard mounting screws tightly.
9. Turning the blade tension knob clockwise, tighten the
tension until the blade is tight on the wheels.
10. Replace the aligning screw (2).
11. Adjust the blade tracking and tension properly (See
ADJUSTMENT) before operating the band saw.
2
m 7
5
-- 7
MITER GAUGE (FIG. F)
Amiter gauge (1) is supplied with your band saw to be
used with the table (2). The table isequipped with a slot
on the right side of the blade for the miter gauge. The
miter gauge can be tilted 0° to 45° right or left.
Fig. F
2--
pl I'_ .I.... 10 -- _1[ I 'I' _I[I' _._! ......
Loading ...
Loading ...
Loading ...