Loading ...
Loading ...
Loading ...
Alwaysstop engine,allow engine to cool, disconnectsparkplugwire, and
ground against enginebeforeperforming any type of maintenanceon your
machine.
GENERALEECOMMENDATIONS
Alwaysobservesafetyruleswhenperforminganymaintenance.
Thewarrantyonthislawnmowerdoesnotcoveritemsthat havebeen
subjectedto operatorabuseornegligence.Toreceivefull valuefrom
warranty,operatormustmaintaintheequipmentas
instructedhere.
Changingof engine-governedspeedwill voidenginewarranty.
All adjustmentsshouldbe checkedat leastonceeachseason.
Periodicallycheckall fastenersandmakesurethesearetight.
E
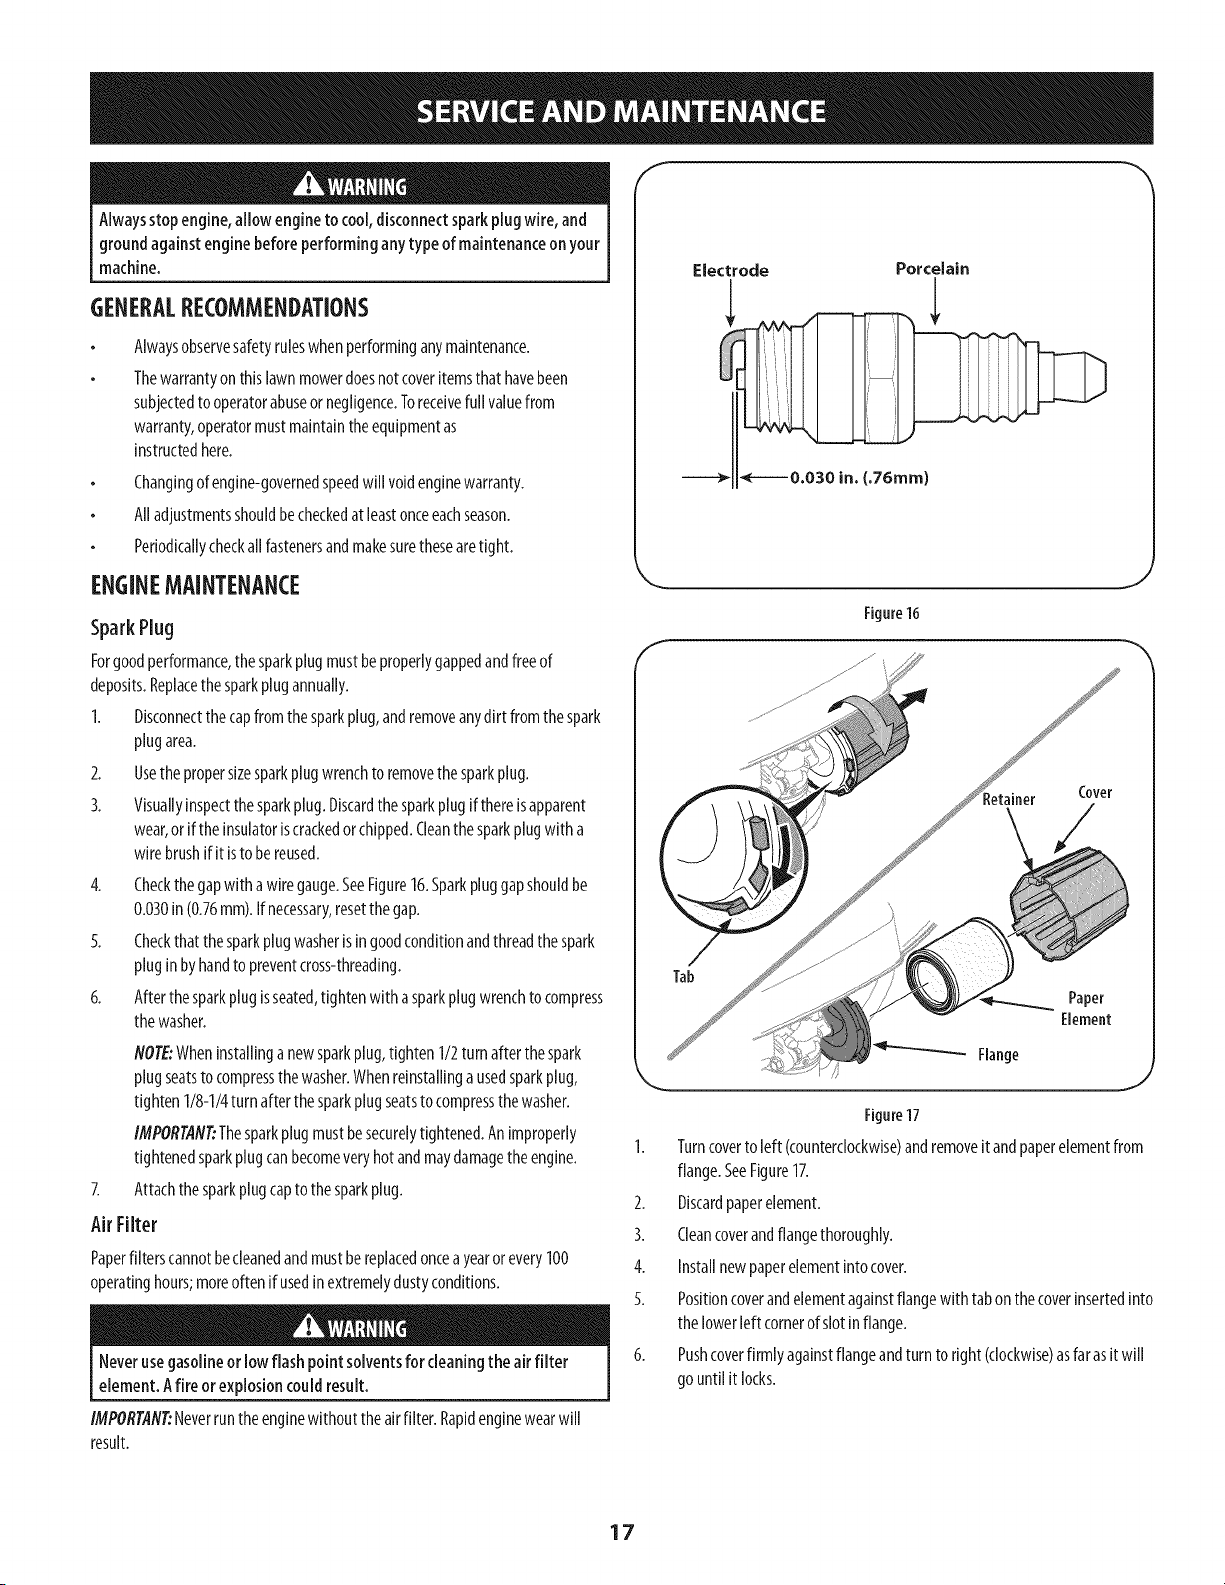
Electrode
Porcelain
ENGINEMAINTENANCE
SparkPlug
Forgoodperformance,the sparkplugmustbe properlygappedandfreeof
deposits.Replacethesparkplugannually.
1. Disconnectthe capfrom the sparkplug,andremoveanydirt from the spark
plugarea.
2. Usethe propersizesparkplugwrenchto removethe sparkplug.
3. Visuallyinspectthesparkplug.Discardthesparkplugif thereisapparent
wear,orif theinsulatoriscrackedor chipped.Cleanthesparkplugwith a
wirebrushif it isto be reused.
4. Checkthegapwitha wiregauge.SeeFigure16.Sparkpluggapshouldbe
0.030in(0.76ram).If necessary,resetthe gap.
5. Checkthatthe sparkplugwasherisin goodconditionandthreadthespark
pluginbyhandto preventcross-threading.
6. Afterthe sparkplugisseated,tightenwith asparkplugwrenchto compress
thewasher.
NOTE:Wheninstallinga newsparkplug,tighten1/2turn after thespark
plugseatsto compressthewasher.Whenreinstallingausedsparkplug,
tighten1/8-1/4turn afterthesparkplugseatsto compressthewasher.
IMPORTANT:Thesparkplug mustbesecurelytightened.An improperly
tightenedsparkplugcanbecomeveryhotandmaydamagetheengine.
Attachthesparkplugcapto the sparkplug.
AirFilter
Paperfilterscannotbecleanedandmustbereplacedonceayearor every100
operatinghours;moreoften if usedinextremelydustyconditions.
Neveruse gasolineor low flash point solventsfor cleaningthe air filter
element. Afire or explosioncouldresult.
IMPORTANT:Neverruntheenginewithout the airfilter. Rapidenginewearwill
result.
Figure16
J
Tab
Paper
Element
Flange
J
Figure17
1. Turncoverto left (counterclockwise)andremoveit andpaperelementfrom
flange.SeeFigure17.
2. Discardpaperelement.
3. Cleancoverandflangethoroughly.
4. Installnewpaperelementinto cover.
5. Positioncoverandelementagainstflangewith tabonthecoverinsertedinto
thelowerleft cornerof slotinflange.
6. Pushcoverfirmlyagainstflangeandturn to right (clockwise)asfarasit will
go until it locks.
17
Loading ...
Loading ...
Loading ...