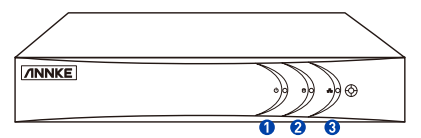
HDD LED: Turns red when data is being read from or written to HDD.
Network LED: Turn yellow when network is connected.
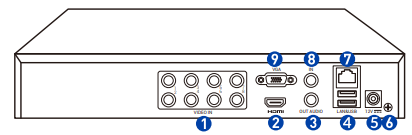
Real Panel
VIDEO IN: BNC interface for TVI and other analog video input.
HDMI: HDMI video output connector.
AUDIO OUT: RCA connector for audio output
USB Port: USB port for mouse, USB drive and other additional devices.
Power Supply: 12V DC power supply
GND: Ground(needs to be connected when NVR starts up).
Network Interface: Connector for network
AUDIO IN: RCA connector for audio input
VGA: VGA video output connector.
Important reminder
You can record and play back only after the hard disk is installed. Otherwise, you can only preview. *Make sure that the plug is firmly connected to the power socket.
Do not drop the camera or subject it to physical shock to avoid damage.
Do not touch the lens of camera with fingers. If cleaning is necessary, use clean cloth with a bit of ethanol and wipe it gently.
Do not place the camera in extremely hot, cold(the operating temperature shall be -40°C to 60°C), dusty or damp locations, and do not expose it to high electromagnetic radiation.
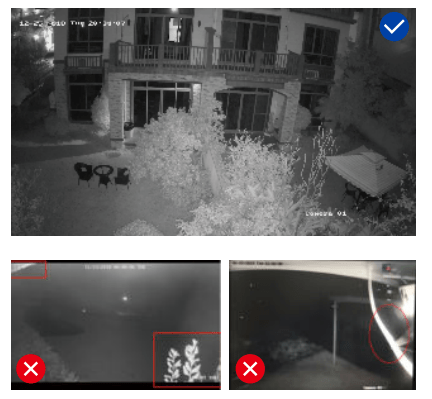
The recommended installation height of the camera is more than 2 meters.
In the scope of camera monitoring, it should try to avoid large areas of all black objects, open spaces, water and other objects that absorb infrared light, otherwise the night vision effect will be reduced.
The installation angle of the camera is very important. Do not obstruct the edges of the image, as this will result in poor image quality, and do not aim the camera at the sun other extra bright places.
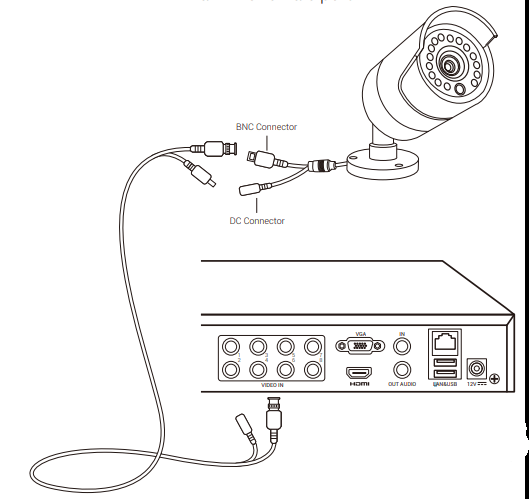
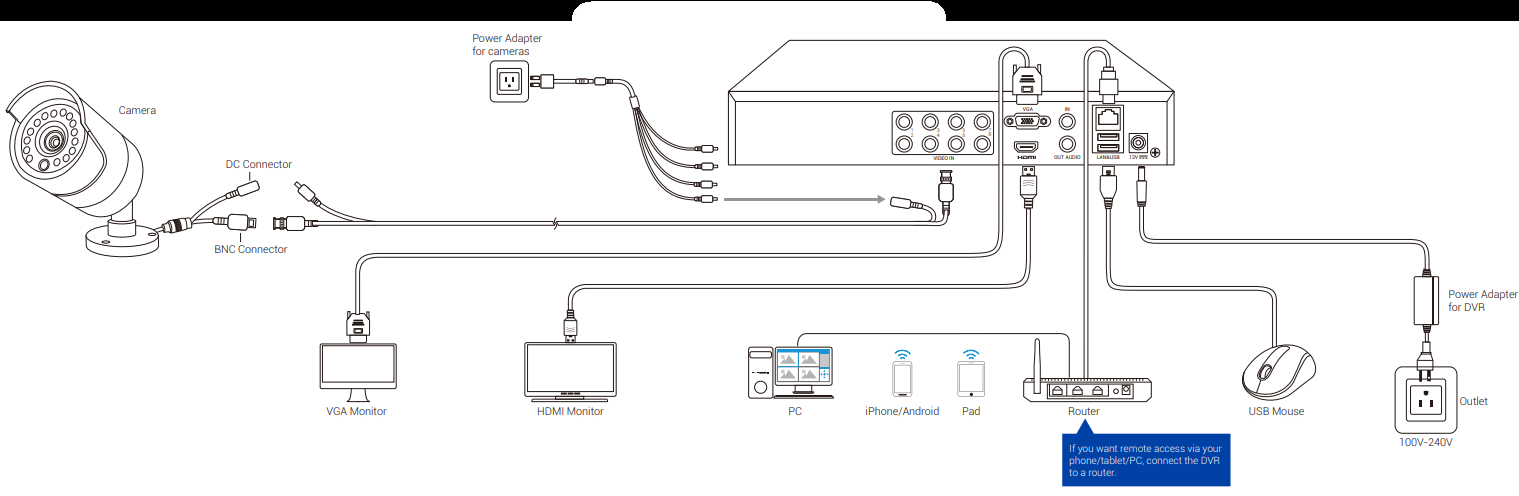
A: Connect your Camera to the video cable
Connect Camera’s BNC female and DC male port to the video cable’s BNC male and DC female port.
Connect the video cable’s BNC port to the DVR’s BNC video in port.
B: Connect the video cable to the DVR.
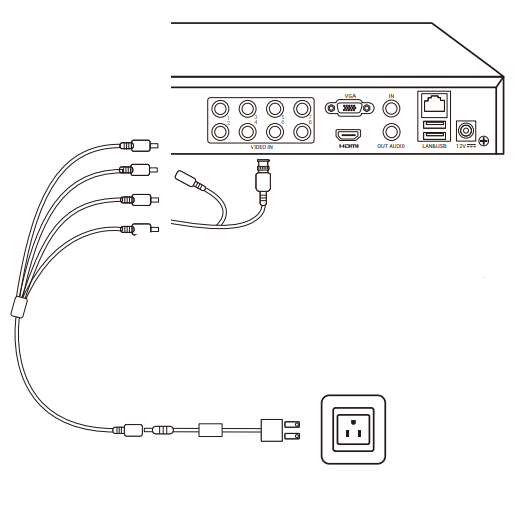
C: Connect the video cable to the 1 to 4 power splitter cable
Connect the video cable’s DC port to the 1 to 4 power splitter cable’s DC female port.
Connect the 1 to 4 power splitter cable’s DC Male port to the camera’s power DC port.
D: Connect the 1 to 4 power splitter cable to the camera’s power.
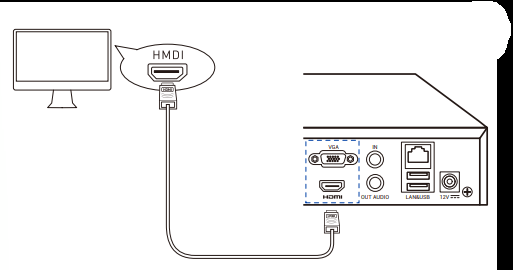
E: Connect your DVR to a HD TV/monitor.
Connect your DVR to a HD TV/monitor via a HDMI or VGA cable for live view
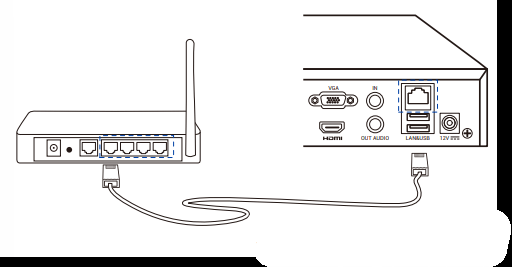
F: Connect your DVR to the router
Connect your DVR’s RJ-45 port to the router’s LAN by network cable (Not included) for remote view.
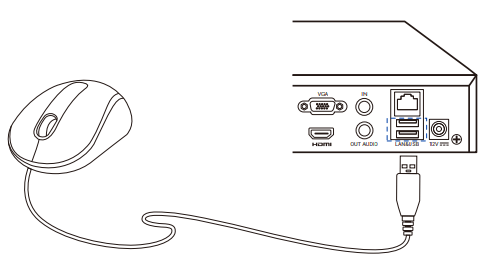
G: Connect the mouse to the DVR
Connect the mouse’s USB port to the DVR’s USB port.
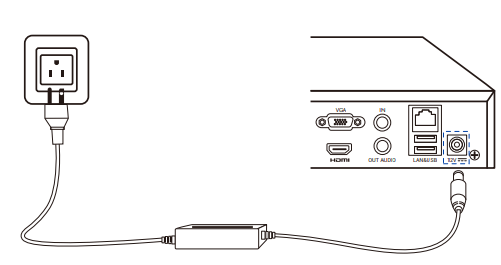
H: Connect the DVR’s power adapter
Connect the DVR’s power adapter to the DVR’s 12V input port.
I: Test the camera
We recommend that you test the camera locally before fixing the camera.
J: Install the camera
Install the camera to the desired location, please disconnect the power before installation.
Connection Diagram
System setup
We suggest you follow the wizard to set you DVR, finished it step by step.
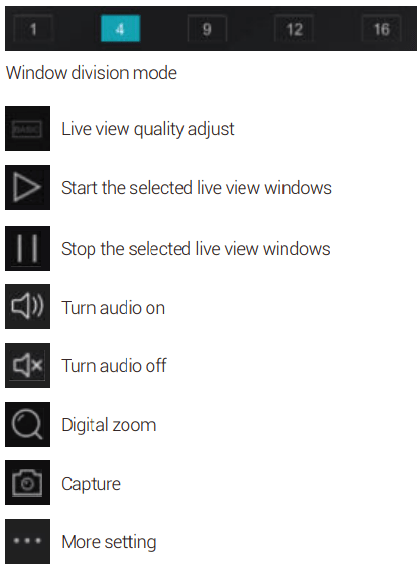
Wizard setup:
Create your password
Set Reserved E-mail, back up GUID file,
Set unlock pattern,security question
Setting signal input status
Choose system language
Configure time zone
Configure the IP Address and P2P function
Configure Port and other settings
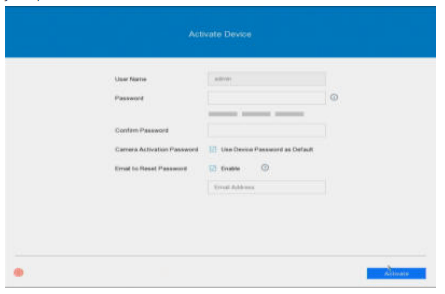
A: Create your password
For the first-time access, you need to activate the device by setting an admin password. Input your password three times to create it. And we recommend you reset your password monthly to protect your product better.
B: Set the P2P function
You need to manually create a verification code, which consists of 6 to 12 digits or letters, and then confirm it (ABCDEF is not allowed). Download our free APP Annke Vision, then follow the APP prompt to scan the SN QR code to add device step by step. The device can be successfully added only if the P2P’s status is online. You can also go to Main Menu - Configuration- Network Settings - Platform Settings to scan and add the device.
C: VGA/HDMI Output Resolution Adjust
Default DVR output resolution is 1024*768. For better viewing, please adjust the DVR output resolution to a higher level if your monitor support.
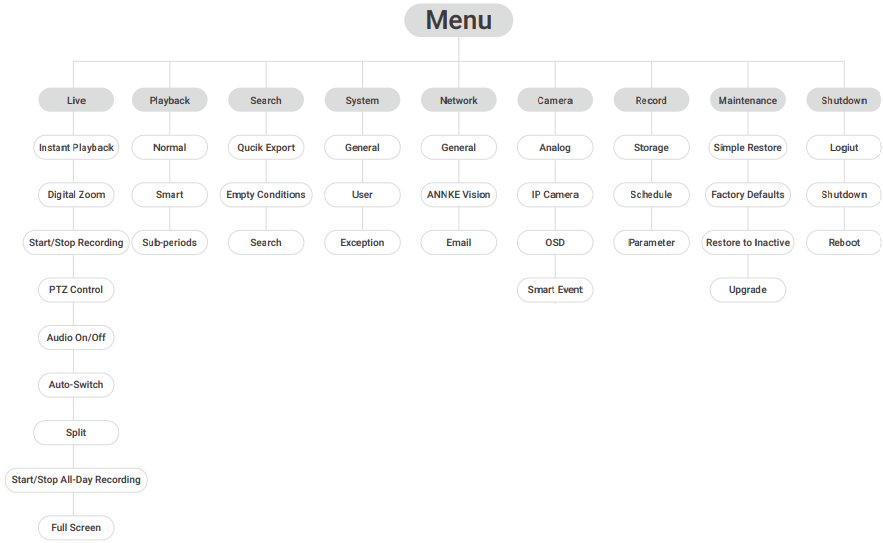
D: Menu Structure
The interface may be different between different models and different software versions. B: Set the P2P function
Remote Control
A: Connect DVR to internet
Connect your DVR to your router by a network cable, go to Menu > Configuration > Network > Platform Access, make sure the status of P2P shows Online.
B: Install Annke Vision APP
Download our free Annke Vision APP from Google Play or Apple Store, or just scan the QR code below to download the app .
After install the app, select the correct country or region where your device located, and click Register to sign up for an account by your mobile phone number or email address.
C: Add device
Select “” or click the icon “” in the upper right corner to add a device. You can go to Menu > Configuration > Network > Platform Access interface to scan the SN QR code,fellow the hint and finish it.
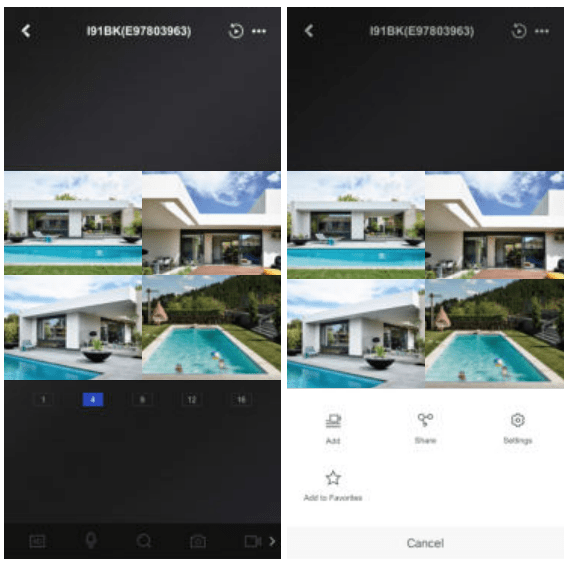
D: Live view and playback
Click Device name to start live view, you can also playback the video , share device and do other operates.
If you have any question, Please go to help.annke.com first and submit a request to the support team. We will give you a satisfactory solution soon!


 ” or click the icon “
 ” in the upper right corner to add a device. You can go to Menu > Configuration > Network > Platform Access interface to scan the SN QR code,fellow the hint and finish it.