Documents: Go to download!
User Manual
- User Manual - (English)
- User Guide - (English)

- Introduction
- Using Apps for iPhone and Android
- Q&A
Table of contents
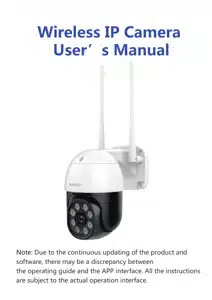
USER MANUAL Wireless IP Camera
Introduction
Creating an Account
To use the camera, you will need to set up an account with MIPC.
To create an account:
● In the MIPC app on your mobile device,press I am a new user Sign up .
● The Sign Up page opens. Create a User name and a Password.
Logging in to the MIPC Account
● Locate the Sign in link:
● Enter your user name and password in the appropriate fields.
● Click Sign in.
Wi-Fi Connection Setup through Wi-Fi Mode
Before connecting to your camera, please confirm your home Wi-Fi network is 2.4G. Meanwhile, please choose 2.4G WiFi to connect your phone. Additionally, please put this camera more close to your router, it will help you to connect your home Wi-Fi successfully.
- After successfully register and sign in, you should be brought to the camera list screen. You can see it’s initially empty because you have not added any camera for it (Figure 1);
- Select “add device” by clicking the plus icon at the top of left and select the device mode (Figure 2), which will direct you to the QR Code Scan page;
- Scan the QR code at the camera (Figure 3); a device ID should be automatically filled in the “device ID” input box (Figure 4) if it scans successfully, and then click “Add”.
- Select “Two-dimensional code connected”mode
- Enter the WIFI password ( Attention: Support 2.4G WIFI, not support 5G WIFI. The password is not supposed to include special symbol, should completed in letters and numbers )
- When the camera start up, there will be drips voice ( means camera is connecting the network ), if no drips voice please press “reset” button and hold on till the camera voice “reset successfully”, then wait the camera start up.
- Put the two-dimensional code on your phone at camera lens, wait the camera connect network.
- Finish adding camera
Using Apps for iPhone and Android
Camera List Previews
The camera list panel contains all cameras you have added to your account. Each preview picture has various indicators for online, password changed status,offline or alarm.
More (Account Settings)
The MIPC app offers you access to view, monitor and configure your devices.The app also has an option to view or configure your Account information. MIPC enables you to configure two types of settings: Account settings and Device settings. For information on Device settings, see Overview of the Settings Page
When you click the Account option, the following options appear:
● My folder
● Settings
● Exit
Any videos or snapshots that you take manually, or any scheduled videos that you choose to download to your mobile device are stored in your My folder location. The Settings page for iOS and Android are very similar. Minor differences are Account Settings for Mobile Devices indicated below. The Settings page for mobile devices contains the following options:
● Notification Center: Set the alarm mode, select the sound or vibration.
● In the Password section:
User admin password: Enter the Old password, and a new password, and then enter the new password again in the Confirm password field.
User guest password: If you wish to allow someone access to your Camera, you can assign them a user guest password, which can be disabled at any time. Guests can view what the cameras are broadcasting and can move the cameras, but they will not be able to make any changes in the settings or use the remote microphone.
● Connect email: Enter an email address. This is the email account to which Notification is sent when you ask to reset your password.
● Software version:
At the bottom of the screen, there is a Clear cache button. Click this to clear the cache on your mobile device. The original snapshots and/or videos stored on either your SD card or your Storage Device are not deleted when you click Clear Cache
Watch a Camera’s Live Video
When the first time you watch the live video, APP will prompt user to set the camera password (please remember this password), then click Next into the next step to set the camera name, then skip the cloud storage buying, when finish above settings it will auto back to the camera list.
- Back button
- Camera name
- Video playback shortcut button
- Camera settings
- Time stamp
- Current network speed
- Speaker switch
- Screen adjustment (brightness, contrast, saturation, sharpness)
- Resolution button
- Full screen
- Record(Record to the album)
- Take photos(Storage to the album)
- Microphone(Hold the button to speak)
- Alarm bells
- Cloud recording
- SD recording
- Playback button
Camera settings
- About (include camera name, model, firmware version, camera ID)
- Date (Set the date, time and time zone)
- Upgrade (Update the firmware version)
- Restart
- Factory Reset
- Device PW (User could set or change the camera password, and set the guest password. Camera admin password can change the camera settings, guest password can only watch the video)
- Notifications (Could set the time of motion detection, sound detection and human detection. Also could set the notification switch )
- Record (Can set loop recording, alarm recording and record mode)
- Peripheral (Switch and sensitivity adjustment for sound detection, human detection)
- SD Card (Format of SD card, turn on or off)
- Record Box (Camera can connect the cloud box to storage the video)
- Cloud Storage (User can buy the cloud storage)
- Ethernet
- WIFI
- Flip the Screen
- OSD (Can set the time stamp)
- Sound (Adjust the volume of speaker and MIC. Also the tone)
- Frequency (50HZ/60HZ)
- Motion (Turn on the motion detection and adjust the sensitivity)
- Indicator light (Some product don’t have this)
- Alarm (To sound away intruders or animals)
- Video streaming
- Remove the device
Motion detection setting
Select the Motion in Settings (User can turn motion detection on or off as needed, also the sensitivity 0-100, 0 is the lowest, 100 is the highest)
And now the notification detection, select “motion detection” to turn on the notification, click “+” to set the time of make notification, click Save to finish the motion detection setting.
Attention: After turn on the motion detection, you must turn on the alarm and set the time, otherwise there will be only the video but don’t make alert
Sound detection setting
Select the Peripheral in settings, click the Sound Detection (Users can turn on or off sound detection as needed, also the sensitivity 0-100, 0 is the lowest, 100 is the highest), then click Save to finish.
Now the Alarm, select the Sound Detection and turn on the switch, select “+” to set the time to make alarm, then click Save to finish.
Attention: After turn on the sould detection, you must turn on the alarm and set the time, otherwise there will be only the video but don’t make alert
Human detection settings
Select the Peripheral in settings, click the Human Detection (Users can turn on or off human detection as needed, also can turn on or off the detection frame), then click Save to finish.
Now the Alarm, select the Human Detection and turn on the switch, select “+” to set the time to make alarm, then click Save to finish.
Attention: After turn on the human detection, you must turn on the alarm and set the time, otherwise there will be only the video but don’t make alert
Record setting
Select the Record in Settings, choose the Continuous Recording or Alarm Recording, choose the event recording, then set the time and save to finish.
Camera password and camera sharing
Select the Device PW in Settings, users can change the password and visitor setting here.
Visitor settings and user sharing
Enable the Visitor settings, enter the camera admin password, then set the visitor password (visitor password is used to share watching video), then click “A click to generate the QR code”. Other users need to download “MIPC” APP, register and login, add the camera, scan the QR code.
Q&A
Q: Do I have to subscribe cloud service to use the camera?
A: No! We never force customers to subscribe the cloud service. Just connect to the power then you can see the live stream on your phone.
Q: Does the camera need to connect the power supply?
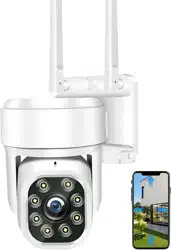
A: Yes, it needs to be plugged into an outlet for continuous power. Wireless means that this Wi-Fi camera transmits data via 2.4 GHz WiFi. The Adapter and power cord are included in the package.
Q: Does the camera support other APP?
A: No. This CCTV camera currently only supports MIPC App.
Q: How long is the power cord?
A: It is 9.8 ft long, about 250cm.
Q: How do I mount on the wall?
A: First make sure the position of the screw holes, drill holes and put in the screw plugs, then fix the camera with screws.
Q: Does the camera support Micro SD card? If yes, which kind of SD card should I use?
A: Yes, this security camera supports up to 8-512G Micro SD card/Class 10/ Fat 32 format. Micro SD card is not including in package. Its suggested that you buy the Micro Sd card from Sandisk, Sony, Kingston, Toshiba, Samsung.
Q: It prompts that the “WiFi password is an error” (the WiFi password cannot be identifying) what should I do?
A: (Note that the WiFi SSID you create must be no more than 32 characters and must not contain special characters Letters are distinguished between uppercase and lowercase) It is suggested that you resetting a new Wi-Fi password only consist of letter and number. You can press the reset button to restart and reconnect WiFi again.

