Loading ...
Loading ...
Loading ...
English 9
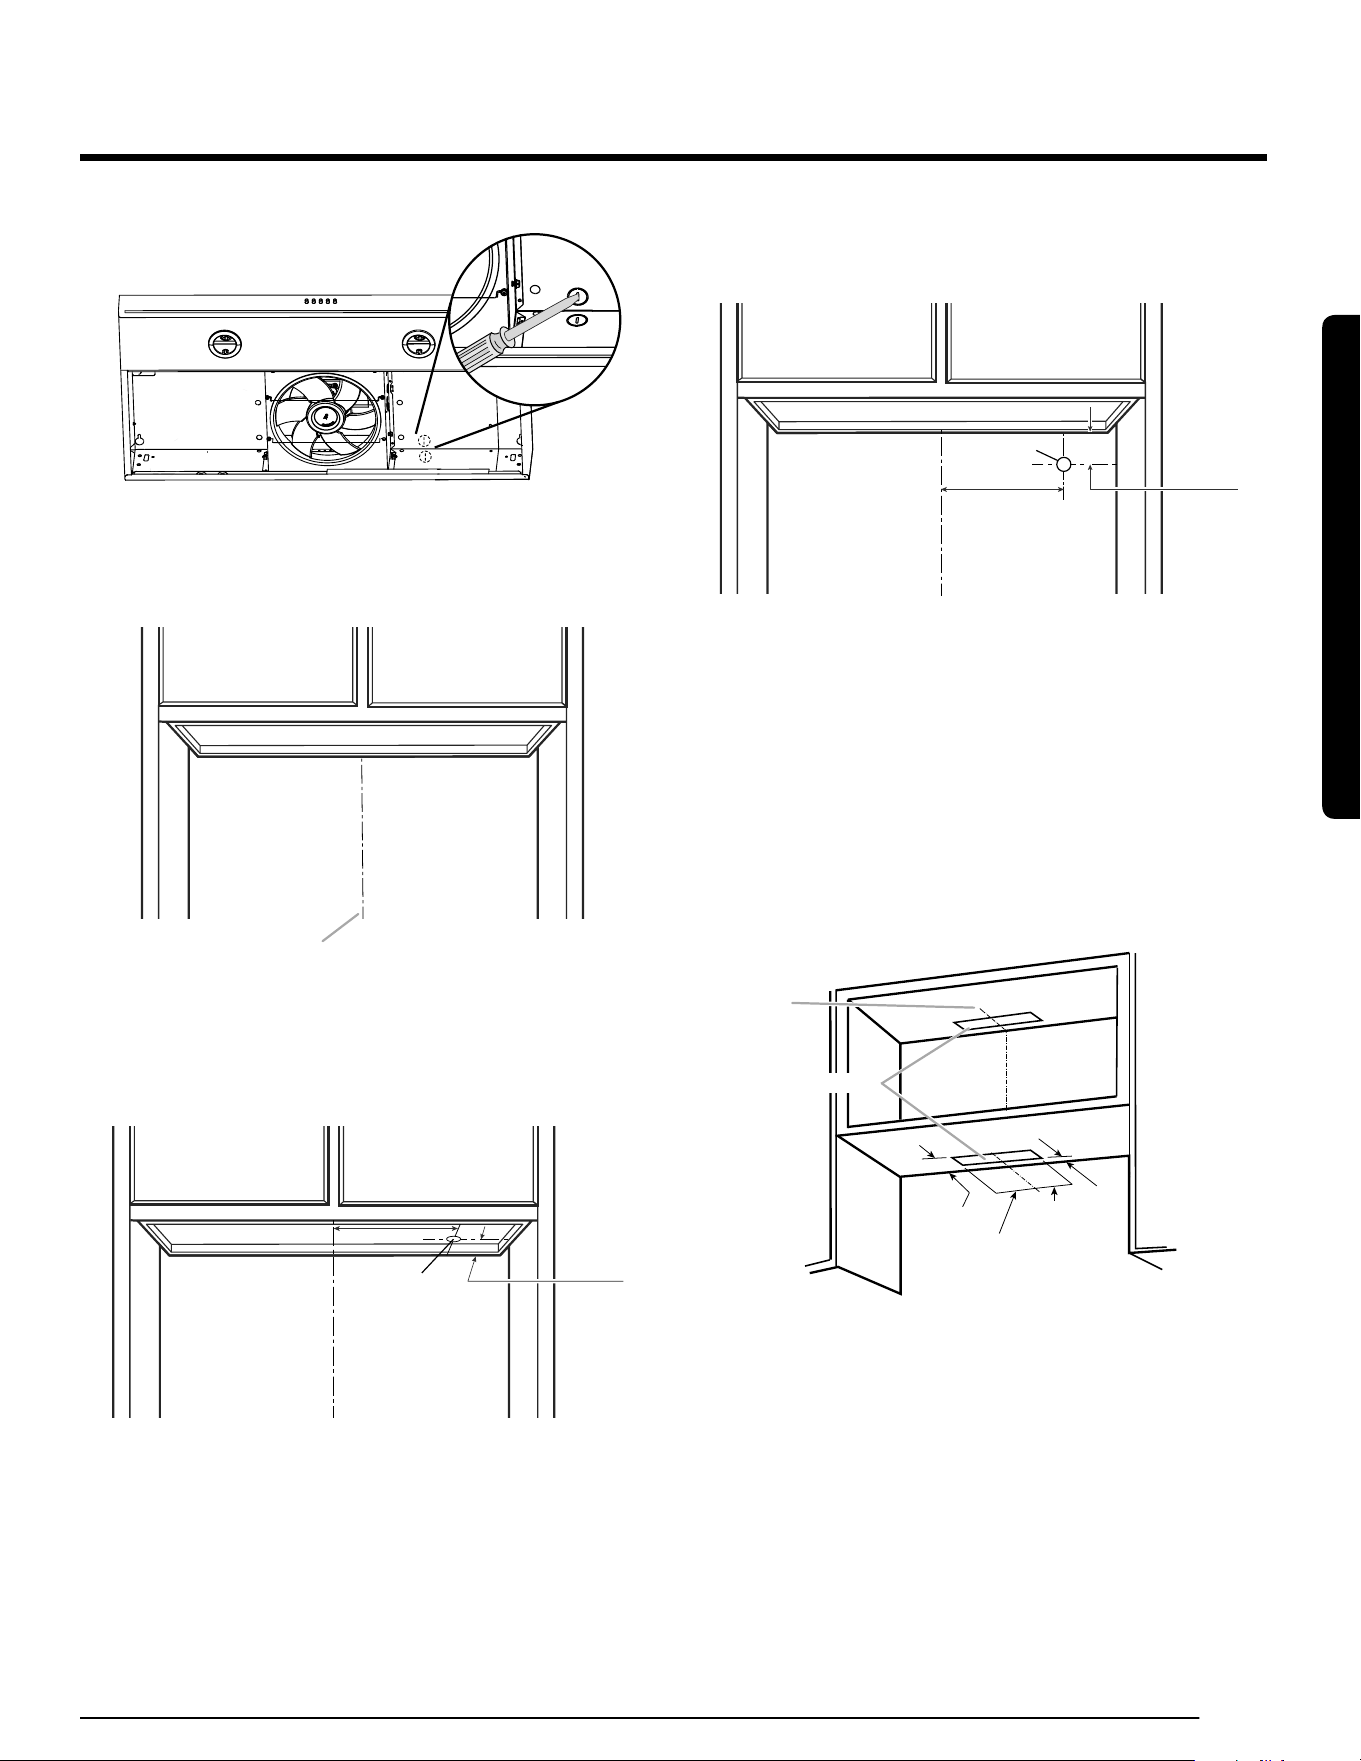
3. Using a at head screwdriver, remove the appropriate power supply
knockout.
Mark Hole Locations
1. Determine and clearly mark a vertical centerline on the wall and
cabinet bottom.
A
A. Centerline
To wire through top:
1. Mark a line distance (A) from the right of the centerline on the
underside of the cabinet. Mark the point on this line that is 2” (5.08
cm) from the rear wall. Drill a
7
⁄8″ (2.2 cm) diameter hole (B) through
the underside of the cabinet at this point.
AA
B
2”
(5.08 cm)
A
A. 8
2
/
5
" (21.3cm)
To wire through wall:
1. Mark a line distance (A) from the right of the centerline on the
underside of the cabinet. Mark the point on this line that is
7
⁄8″ (2.2 cm)
from the underside of the cabinet. Drill a
7
⁄8″ (2.2 cm) diameter hole (B)
through the rear wall at this point.
B
A
7⁄8”
(2.2 cm)
A. 8
2
/
5
" (21.3cm)
Mark and Cut Vent Opening
For a non-vented (recirculating) installation: skip "Mark and Cut Vent
Opening" step.
For 3¼" x 10" (8.3 x 25.4 cm) Rectangular Vent System
Roof Venting
To make a 4” x 10½” (10.16 cm x 26.7 cm) rectangular cutout on the
underside of cabinet top and bottom:
1. Mark lines 1½” (3.95 cm) and 4
4
⁄5” (12.25 cm) from the back wall on
the centerline of the underside of cabinet. Mark lines 5¼” (13.3 cm) to
the right and left of the centerline on the underside of cabinet.
Cabinet cutouts
5
1
/4
*1
1
/2 (3.95 cm)
(13.3 cm)
5
1
/
4
(13.3 cm)
*From wall, not cabinet frame
*4
4
/5
(12.25 cm)
Centerline
2. Use saber or keyhole saw to cut a rectangular opening for vent.
3. Repeat steps 1-3 for the underside of the top of the cabinet.
Installation Instructions
Installation Instructions
Loading ...
Loading ...
Loading ...