Loading ...
Loading ...
Loading ...
21
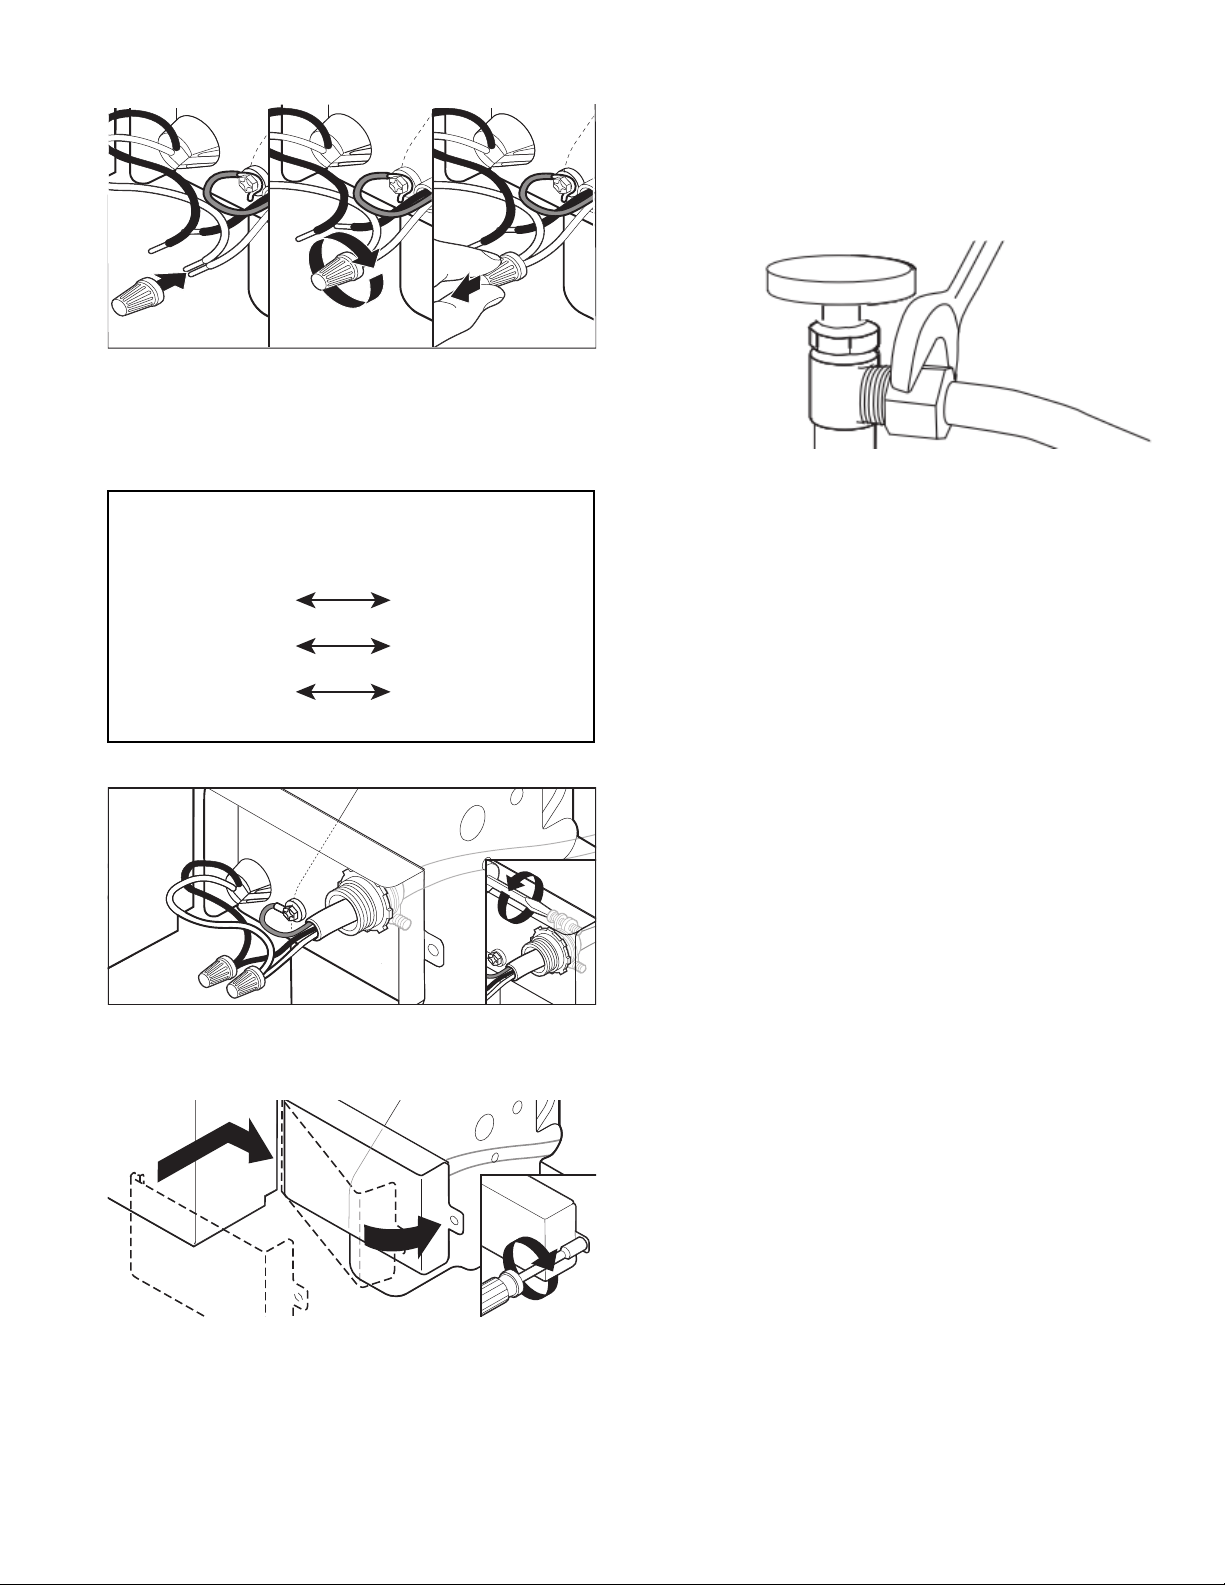
53. Direct wire – connect remaining wires
Select UL-listed/CSA-approved twist-on wire connectors of
the proper size. Connect wires, black to black and white to
white, using the twist-on wire connectors.
NOTE: Do not pre-twist stranded wire. Twist on wire
connector. Gently tug on wires to be sure both are secured.
Wiring configuration
Power supply
wire:
Terminal box
wire:
white
white
black
black
ground wire
ground connector
54. Direct wire – secure cable in strain relief
Tighten strain relief screws to secure cable.
55. Direct wire – reinstall terminal box cover and
wires
Place wires inside terminal box. Insert tabs on left side of
cover. Make sure wires are tucked inside box. Close cover
ensuring wires are not pinched. Use 1/4" nut driver or Torx
®
T20
®
screwdriver and previously removed screw to secure
cover.
Connect Water Line to House
Shutoff Valve
NOTE: If using a flexible braided hose, replace inlet hose after 5
years to reduce the risk of hose failure. Record hose installation or
replacement dates on the hose for future reference
56. Attach water supply line
Attach the water supply line (copper tubing or flexible braided
line) to the hot water line using a connection configuration
that is in compliance with local codes and ordinances. The
water supply to the dishwasher should have a manual shutoff
valve located under the sink.
Connect Drain Hose
57. Connect drain hose
Connect drain hose to waste tee or waste disposer using one
of the following options:
n Option A: Waste disposer – no air gap
n Option B: No waste disposer – no air gap
n Option C: Waste disposer – with air gap
n Option D: No waste disposer – with air gap
IMPORTANT: The drain hose connection of the disposer or a
waste tee must be made before the drain trap and at least
20" (508 mm) above the floor where the dishwasher will be
installed.
Helpful Tip: To reduce vibration of the hose, keep the hose
away from the floor.
Loading ...
Loading ...
Loading ...