Loading ...
Loading ...
Loading ...
Roughing Off
Roughing off and other heavy work requires a firm grip and
solid positioning of the chisel against the rest. This is best
obtained by the tool-rest hand positioned illustrated, The wrist
is dropped down so that the heel of the hand below the little
finger acts as a sliding guide against the rest The handle
hand controls chisel position.
Figure 23
Finish Cut@ng
Finish cuing requires more contro_ - with less force. Finish
cutting is better done with the palmof the tool-rest hand
turned up.The wdst is still held down, and the side of the
index finger acts as a guide along the rest In this position,
control of the chisel is shared by both hands. The fingers of
the tool-rest hand are free to assist in positioning the too[.
Figure 24
Intricate Cutting
Intricate, delicate cutting requires extreme control with prsdd-
calty no force. This is best accomplished by guiding the chisel
with the fingers of the tool-rest hand. The hand is held palm up
with the vcdst high. The little finger is placed against the rest to
steady the hand, The chisel does not touch the rest and the
handle hand is completely secondary to the food-rest hand.
NOTE: The first and second positions are equally good for
scraping operations, but the third positionis practically never
used for scraping.
Figure 25 "
Cuffing to Depth
Many scraping operations and cuttingto depth with the part-
ing tc_4 can be easily accomplished with the one hand. The
chiselis grasped firmly with theindex finger on top to press it
down against the reel It is thrust straight into the work.
Holding the tool in this manner leaves the other hand free to
hold a pattern or calipers, etc., to check work in progress.
Figure 26
MAKING STANDARD CUTS
,THE ROUGHING OFF-CUT
Reducing a square orodd shaped workplace down to a cylin-
der of approximate size for finish turning is called "roughing
off". Faceplate turnings and large diameter spindlesshould
first be partly reduoed by sawing, but small spindles are easily
turned down entirely with the large (el,.) gouge.
• Start the first cut about 1" from tailsfock end - then run it
toward the ta_stock and off the end of the workpieca.
• Next. start another cut 1" nearer the headstock- and run it
back towards the tailstock, to merge with the firsl cut.
• Continue cutting in this manner until 1 to 2" from the head-
stock is left uncut. Reverse the direction of tool travel and
work one or two cuts in succession toward theheadstock
and off this end of the workplace.
• Never start a cut directly at the end - if the chisel catches
the end, itwill damage the workplace.
• Never take tong cuts while corners remain on the work, as
this tends to tear long sliversfTom the corners.
• The first sedan of cuts should not be too deep. It is better
to partially reduce the work to a c!lieder all along its
length. After that, start a second series of cuts to complete
reducing it to a cylinder.
• Once a cylinder has been formed, step lathe up to next
faster speed. Further reductions in size can now be
accomplished by cutting as deeply as desired at any spot
along the work. At this stage, long cuts san be made from
the center to either end.
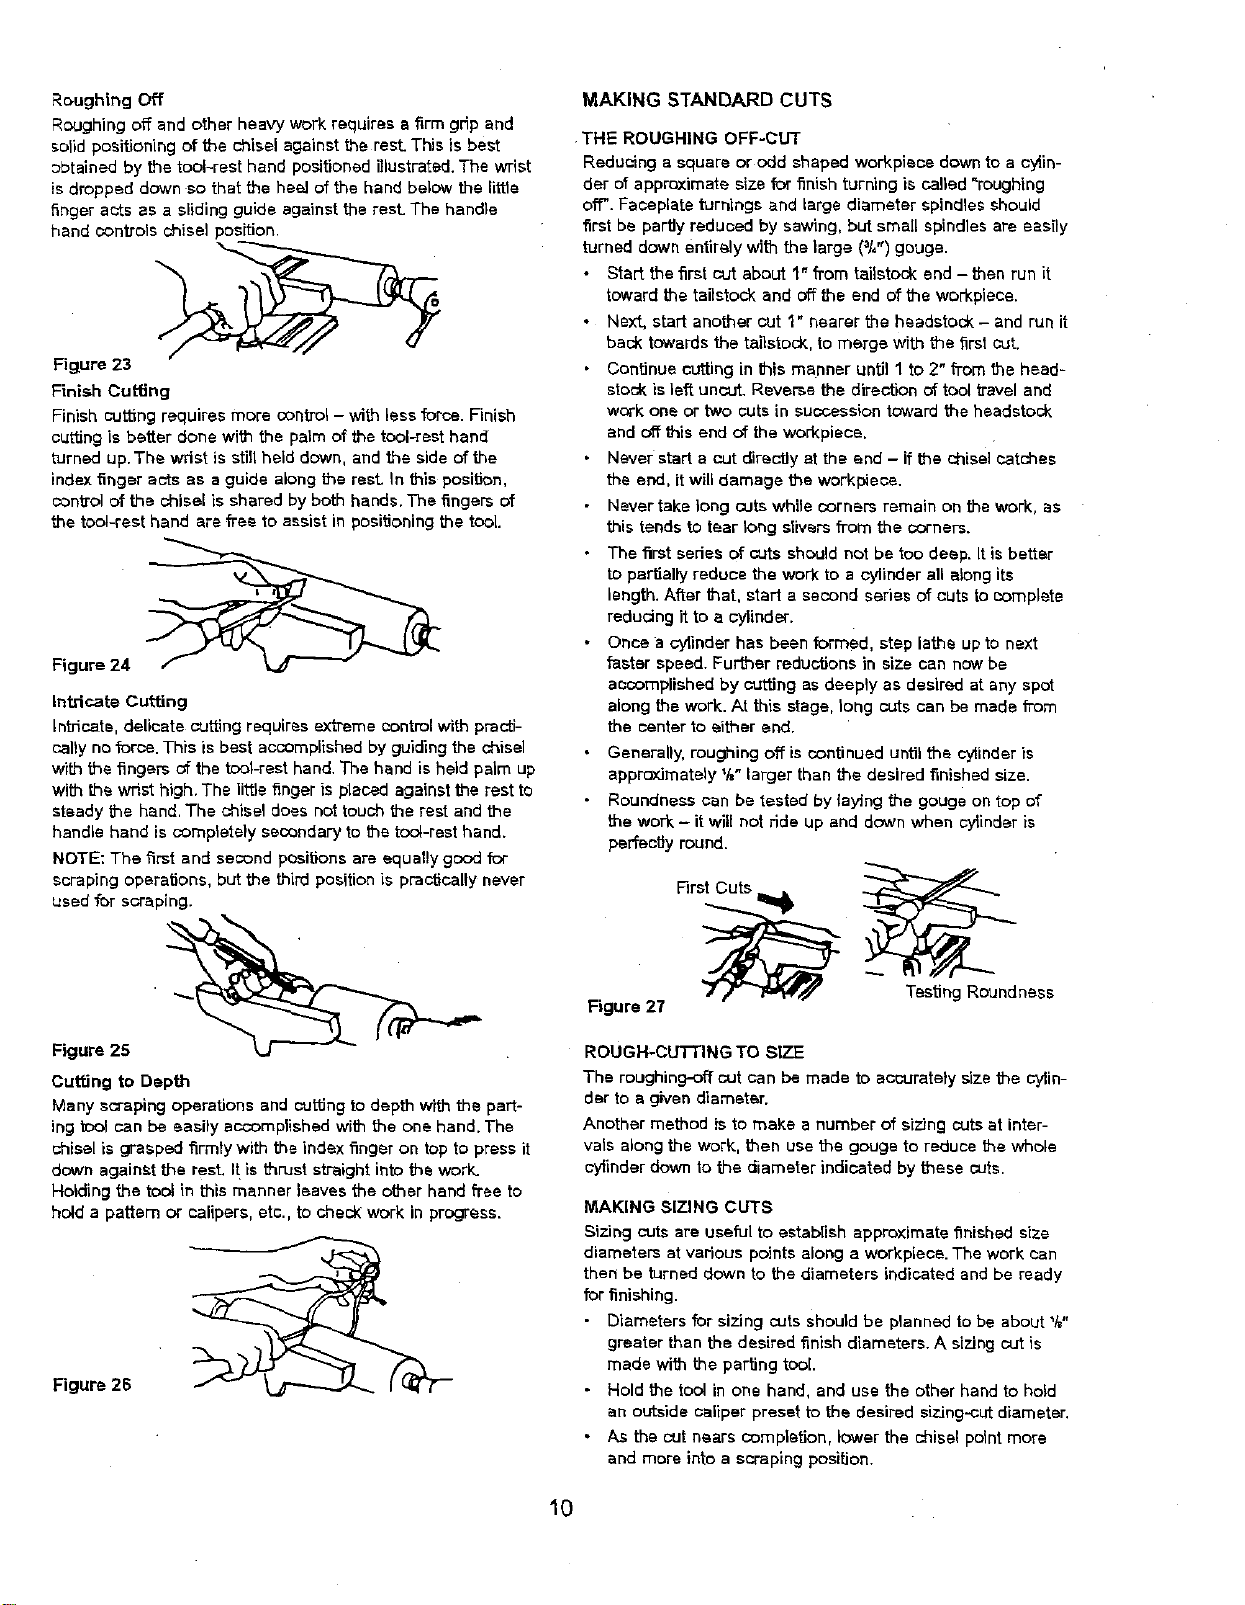
Generally, roughing off is continued until the cylinder is
approximately V." larger than the desired finished size.
Roundness cen be tested by laying the gouge on top of
the work - it will not ride up and down when cytinder is
perfectly round.
Figure 27
Testing Roundness
ROUGH-CUTTING TO SIZE
The roughing-off cut can be made to acouratefysize the cylin-
der to e g'rcendiameter.
Another method is to make a number of sizing cuts at inter-
vals along the work, then use the gouge to reduce the whole
cyfinder down to the diameter indicated by these cuts.
MAKING SIZING CUTS
Sizing cuts are useful to establish approximate finished size
diameters at various points along a workplace. The work can
then be turned down to the diameters indicated and be ready
for finishing.
• Diameters for sizing cuts should be planned to be about 1/_,,
greater than the desired finish diameters. A sizing cut is
made with the parting too[.
- Hold the tool in one hand, and use the other hand to hold
an outside caliper preset to the desired sizing-cutdiameter.
• /ks the cut nears completion, lower the chisel point more
and more into a scraping position.
10
Loading ...
Loading ...
Loading ...