
Loading ...
Loading ...
Loading ...
12
outlet directly behind the ice maker will make under-counter installation easier.
NOTE:
1. All installations must be in accordance with local plumbing code requirements. Professional
installation is recommended.
2. Make certain that the pipes are not pinched or kinked or damaged during installation.
3. Check for leaks after connection.
Tools required:
½” (13mm) open-end wrench
Phillips style screwdriver
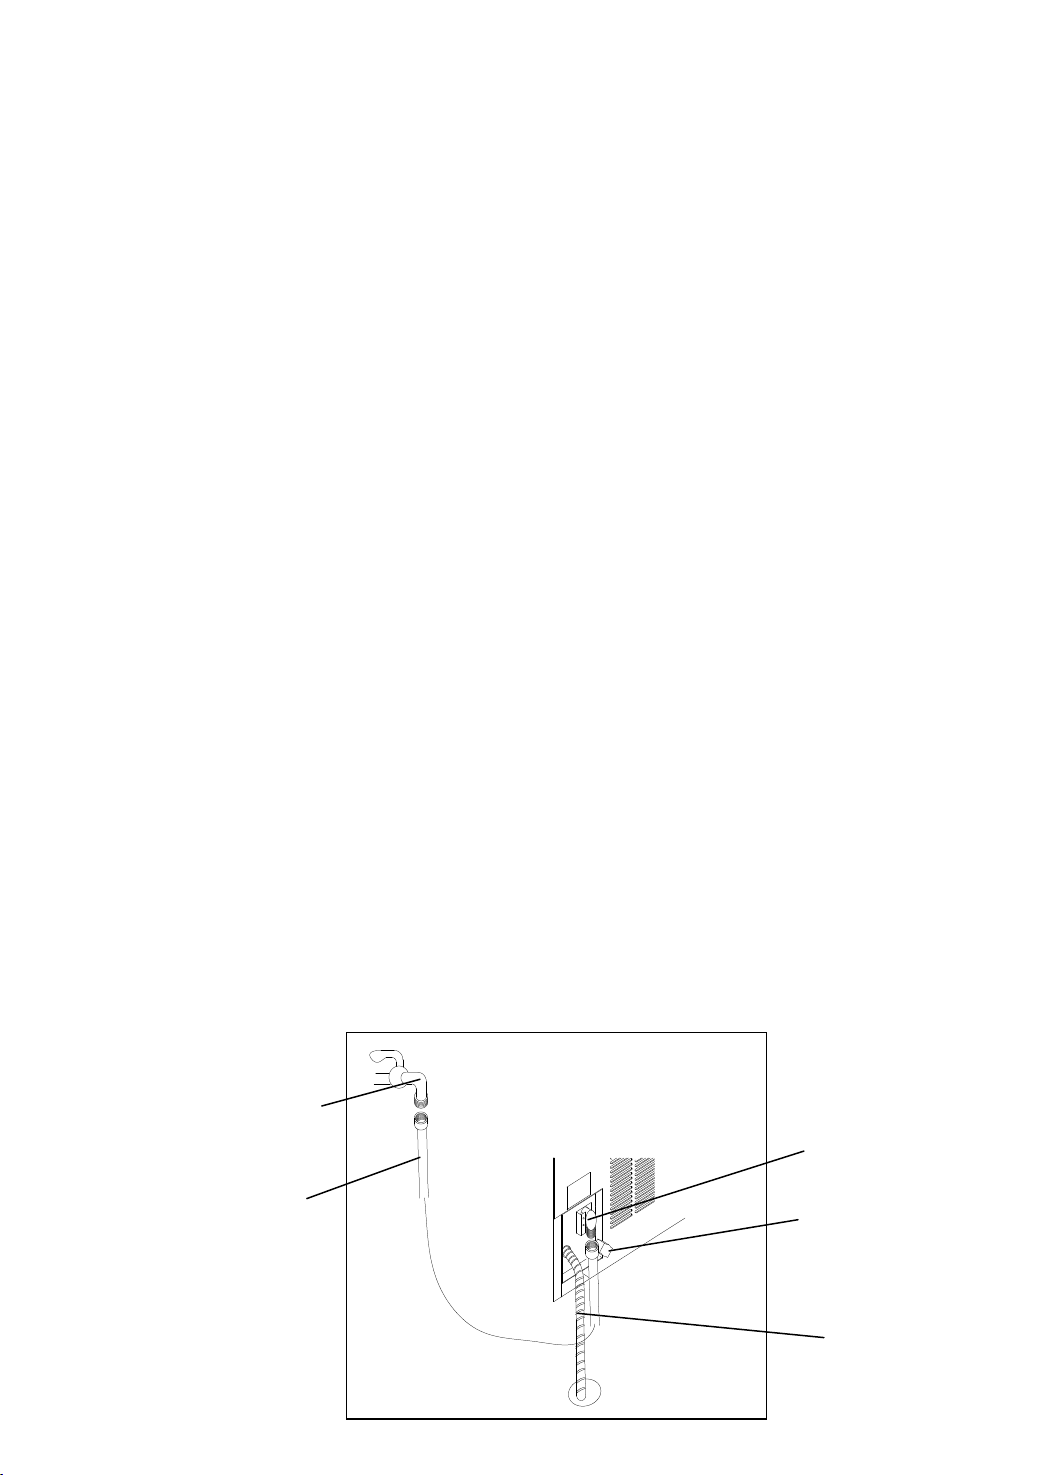
Connecting the water line:
1. Turn off main water supply. Turn on nearest faucet long enough to drain the
line of water.
2. Find a ½″ (13mm) to ¾″ (19mm) vertical cold water pipe near the installation
location. The distance should be less than 10 feet (3.5M). The water supply pipe
provided with the ice maker is about 10 feet (3.5M) in length.
3. A shut-off valve must be installed to the main water supply. If the water tap has
a plain piece of copper tubing, attach a ¼″ (6.35mm) O.D. compression union
to the tubing and remove the nut.
4. Connect the fittings of the water supply pipe to the tap and water inlet valve.
Tighten ½ turn with the appropriate sized wrench.
5. Turn on main water supply and tap. Check for water supply connections leaks.
Tighten any connections (including connections at the valve) or any fittings that
leak.
Connecting the drain line:
A gravity drain system is used in this type ice maker.
NOTE: When there is a drain line near the ice maker, it is the best choice to drain the water
through the drain water pipe provided with icemaker.
Water tap (1/4″ o.d.)
Water inlet valve
Nut of the water
draining hole
Water supply pipe
Drain pipe
Loading ...
Loading ...
Loading ...