Loading ...
Loading ...
Loading ...
Page 13
www.123filter.com | (678) 261-7611 | support@123filter.com
(4) Equipment Installation
Step 1. Confirm proper installation conditions, then unpack the equipment and verify that all
accessories are present. Prepare the installation tools and confirm that the water inlet and outlet
pipes, power supplies, sewage pipes, and floor drains at the installation site meet the appropriate
requirements.
Step 2. Close the indoor water inlet valve completely, then open any faucets in the room to remove
the remaining water in the indoor water pipe.
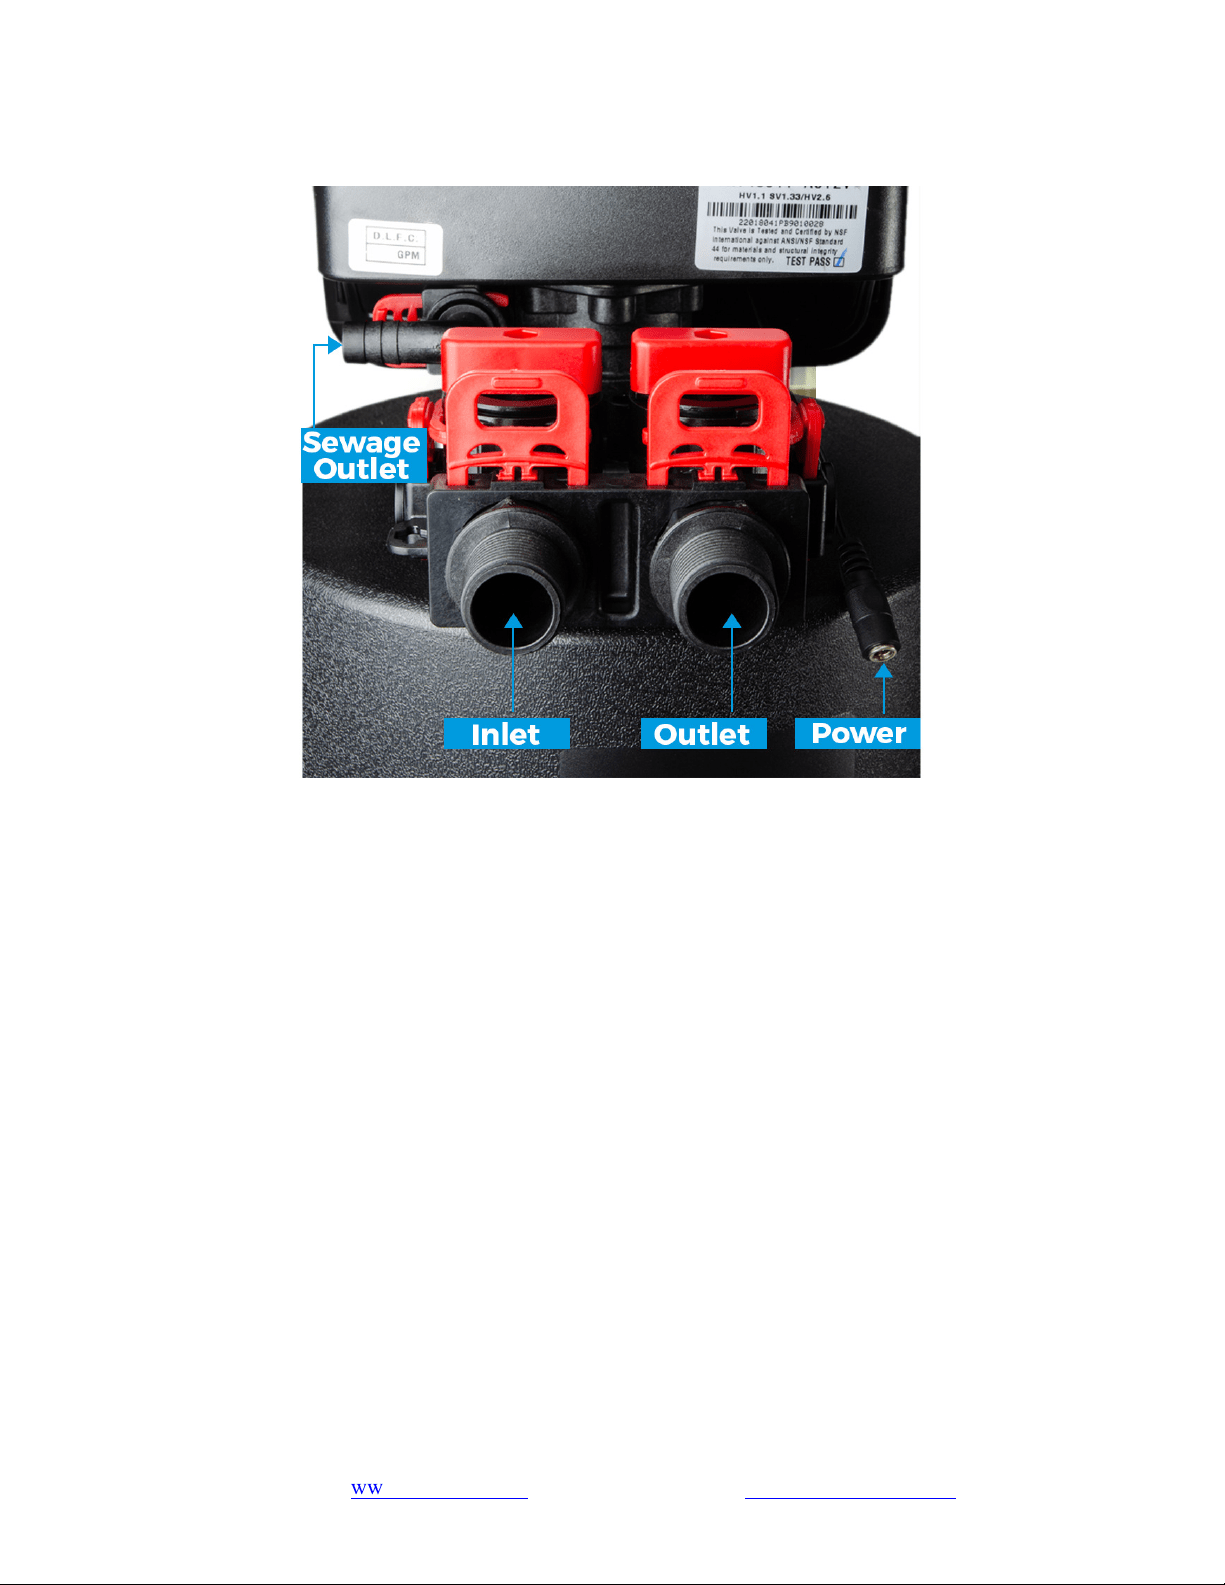
Step 3. Connect the water inlet and outlet pipes. Pay attention to the direction of the water inlet and
outlet and prevent the connection pipes from bearing stress. The water inlet is connected to the
stainless steel braided hose. The other end is connected to the water inlet channel. The water outlet
is connected to the stainless steel braided hose. The other end is connected to the water outlet.
Step 4. Connect the equipment drain hose and clamp to ensure a secure connection.
Step 5. The sewage outlet is inserted into the sewage pipe and the stainless steel clamp is locked and
clamped tightly outside to prevent high water pressure during sewage discharge, which will cause
the sewage hose to break loose and leak sewage.
Step 6. Plug in the power adapter and connect the other end of the socket to supply power.
Step 7. Place the bypass in the bypass position.
Step 8. Slowly turn on the main water supply.
Step 9. Open a cold water tap nearby and let the water run a few minutes till the water runs clean or
until the system is free of foreign material caused by plumbing work.
Loading ...
Loading ...
Loading ...