Loading ...
Loading ...
Loading ...
TABLEEXTENS(ONS
See Figures 12- 13.
Table extensions can be installed on either the left or the
right side of the base.
To instal(:
[] Insert the ends of the table extensions into the holes in
the side of the base and adjust the extensions to the
desired length.
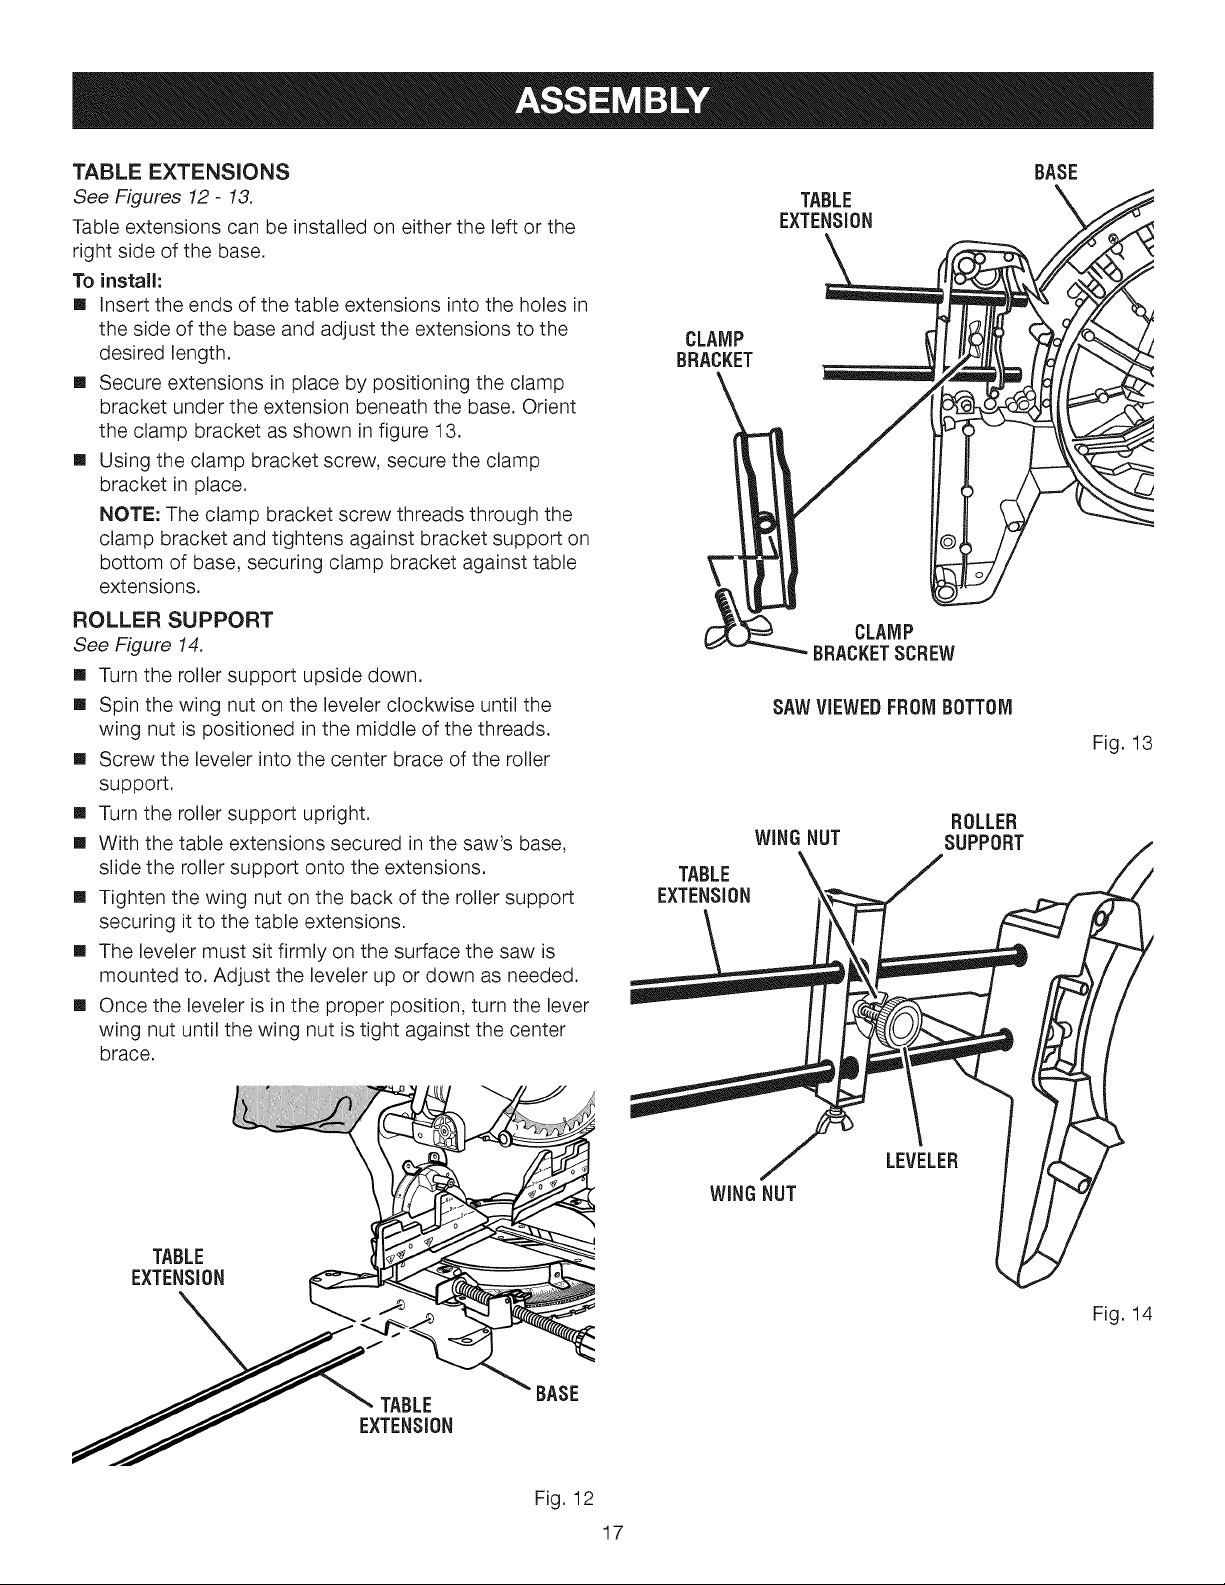
[] Secure extensions in place by positioning the clamp
bracket under the extension beneath the base. Orient
the clamp bracket as shown in figure 13.
[] Using the clamp bracket screw, secure the clamp
bracket in place.
NOTE: The clamp bracket screw threads through the
clamp bracket and tightens against bracket support on
bottom of base, securing clamp bracket against table
extensions.
ROLLER SUPPORT
See Figure 14,
[] Turn the roller support upside down.
[] Spin the wing nut on the leveler clockwise until the
wing nut is positioned in the middle of the threads.
[] Screw the leveler into the center brace of the roller
support.
[] Turn the roller support upright.
[] With the table extensions secured in the saw's base,
slide the roller support onto the extensions.
[] Tighten the wing nut on the back of the roller support
securing it to the table extensions.
[] The leveler must sit firmly on the surface the saw is
mounted to. Adjust the leveler up or down as needed.
[] Once the leveler is in the proper position, turn the lever
wing nut until the wing nut is tight against the center
brace.
TABLE
EXTENSION
CLAMP
BRACKET
CLAMP
BRACKETSCREW
SAWVIEWEDFROMBOTTOM
WING NUT
TABLE
EXTENSION
ROLLER
SUPPORT
BASE
Fig. 13
WING NUT
LEVELER
TABLE
EXTENSION
BASE
Fig. 12
17
Fig. 14
Loading ...
Loading ...
Loading ...