Loading ...
Loading ...
Loading ...
41
Instructions for Connecting Piping to Indoor Unit
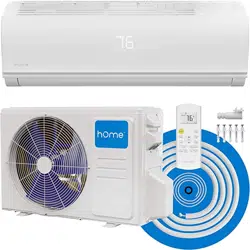
1. Align the center of the two pipes that you will
connect.
Indoor unit tubing Flare nut Pipe
2. Tightentheflarenutastightlyaspossibleby
hand.
3. Using a spanner, grip the nut on the unit tubing.
4. While�rmlygrippingthenutontheunit
tubing, use a torque wrench to tighten the
flarenutaccordingtothetorquevaluesinthe
Torque Requirements table below. Loosen the
flaringnutslightly,thentightenagain.
Refrigerant Piping Connection
TORQUE REQUIREMENTS
OUTER DIAMETER
OF PIPE
MM
TIGHTENING
TORQUE
N•M
FLARE DIMEN
SIONB
MM
FLARESHAPE
Ø6.35 (Ø 0.25”) 18~20(180~200kgf.cm) 8.4~8.7 (0.33~0.34”)
R0.4~0. 8
4
5
°
±
2
90
°
±
4
B
Ø9.52 (Ø 0.375”) 32~39(320~390kgf.cm) 13.2~13.5 (0.52~0.53”)
Ø12.7 (Ø 0.5”) 49~59(490~590kgf.cm) 13.2~13.5 (0.52~0.53”)
Ø16 (Ø 0.63”) 57~71(570~710kgf.cm) 19.2~19.7 (0.76~0.78”)
Ø19 ( Ø 0.75”) 67~101(670~1010kgf.cm) 23.2~23.7 (0.91~0.93”)
DONOTUSEEXCESSIVETORQUE
Excessive force can break the nut or damage the
refrigerant piping. You must not exceed torque
requirements shown in the table above.
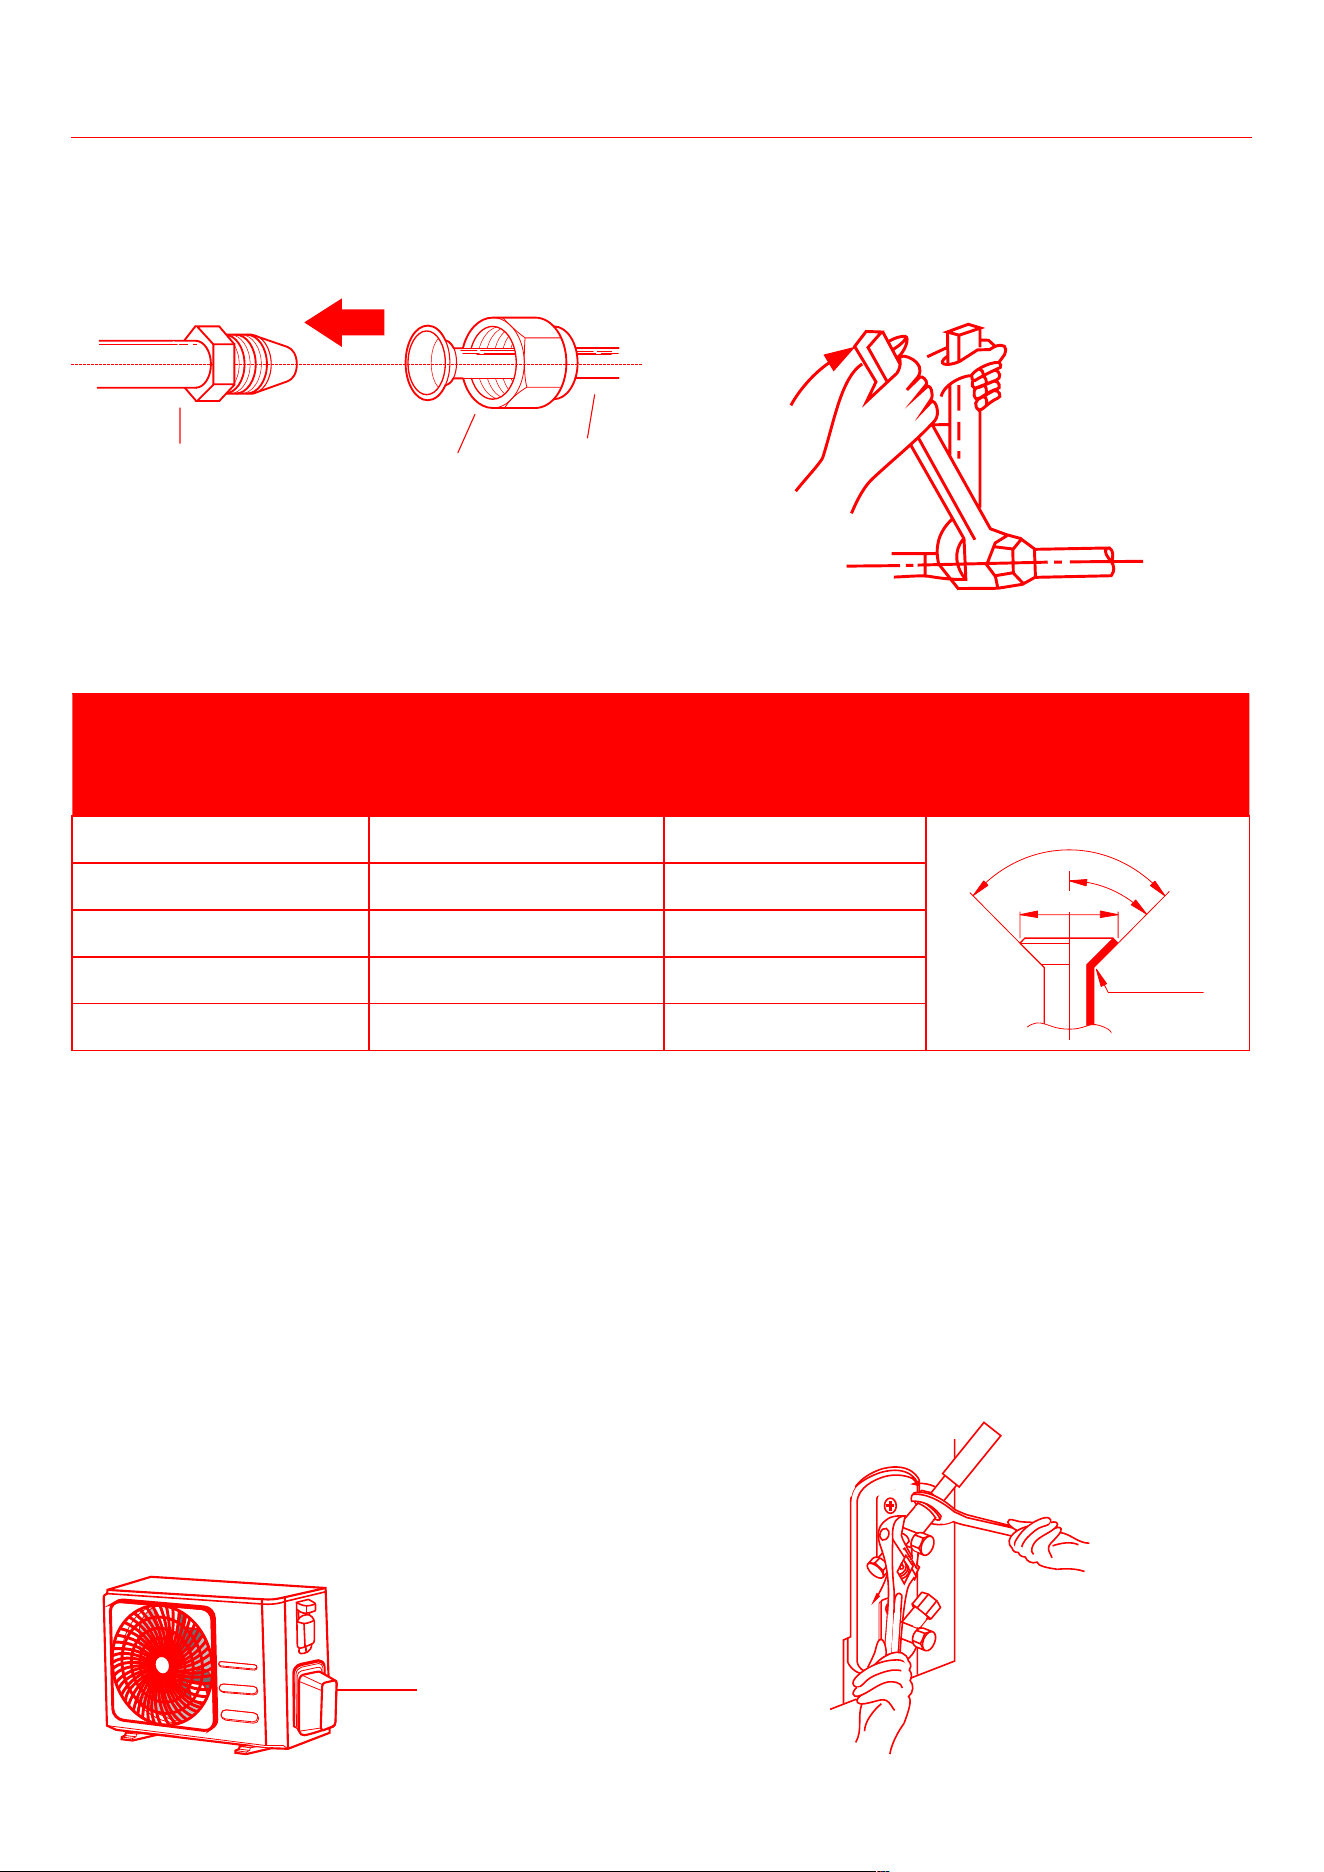
Instructions for Connecting Piping to Outdoor
Unit
1. Unscrew the cover from the packed valve on
the side of the outdoor unit.
2. Remove protective caps from ends of valves.
3. Alignflaredpipeendwitheachvalve,andtighten
theflarenutastightlyaspossiblebyhand.
4. Using a spanner, grip the body of the valve. Do
not grip the nut that seals the service valve.
Valve cover
5. While�rmlygrippingthebodyofthevalve,
useatorquewrenchtotightentheflarenut
according to the correct torque values.
6. Loosentheflaringnutslightly,thentighten
again.
7. Repeat Steps 3 to 6 for the remaining pipe.
USE SPANNER TO GRIP MAIN BODY OF VALVE
Torquefromtighteningtheflarenutcansnapoff
other parts of valve.
Loading ...
Loading ...
Loading ...