Loading ...
Loading ...
Loading ...
1_ DHCP setting
• Set "DHCP" to "On".
The network information is automatically set.
° Set "DNS" to "On".
The DNS server is obtained automatically from the
DHCP server.
==J .....
If a connection cannot be established even
if "DHCP" is set to "On".
° Set "DHCP" to "Off".
Set "IP Address", "Subnet Mask", and
"Gateway" manually.
° Set "DNS" to "Off".
Set the DNS server address manually.
Proxy setting I
If the provider you are using requires a proxy setting to be
configured, set the corresponding proxy server address.
}r_ NTP Server setting I
The player automatically accesses an internet server to
adjust its clock via the network time protocol.
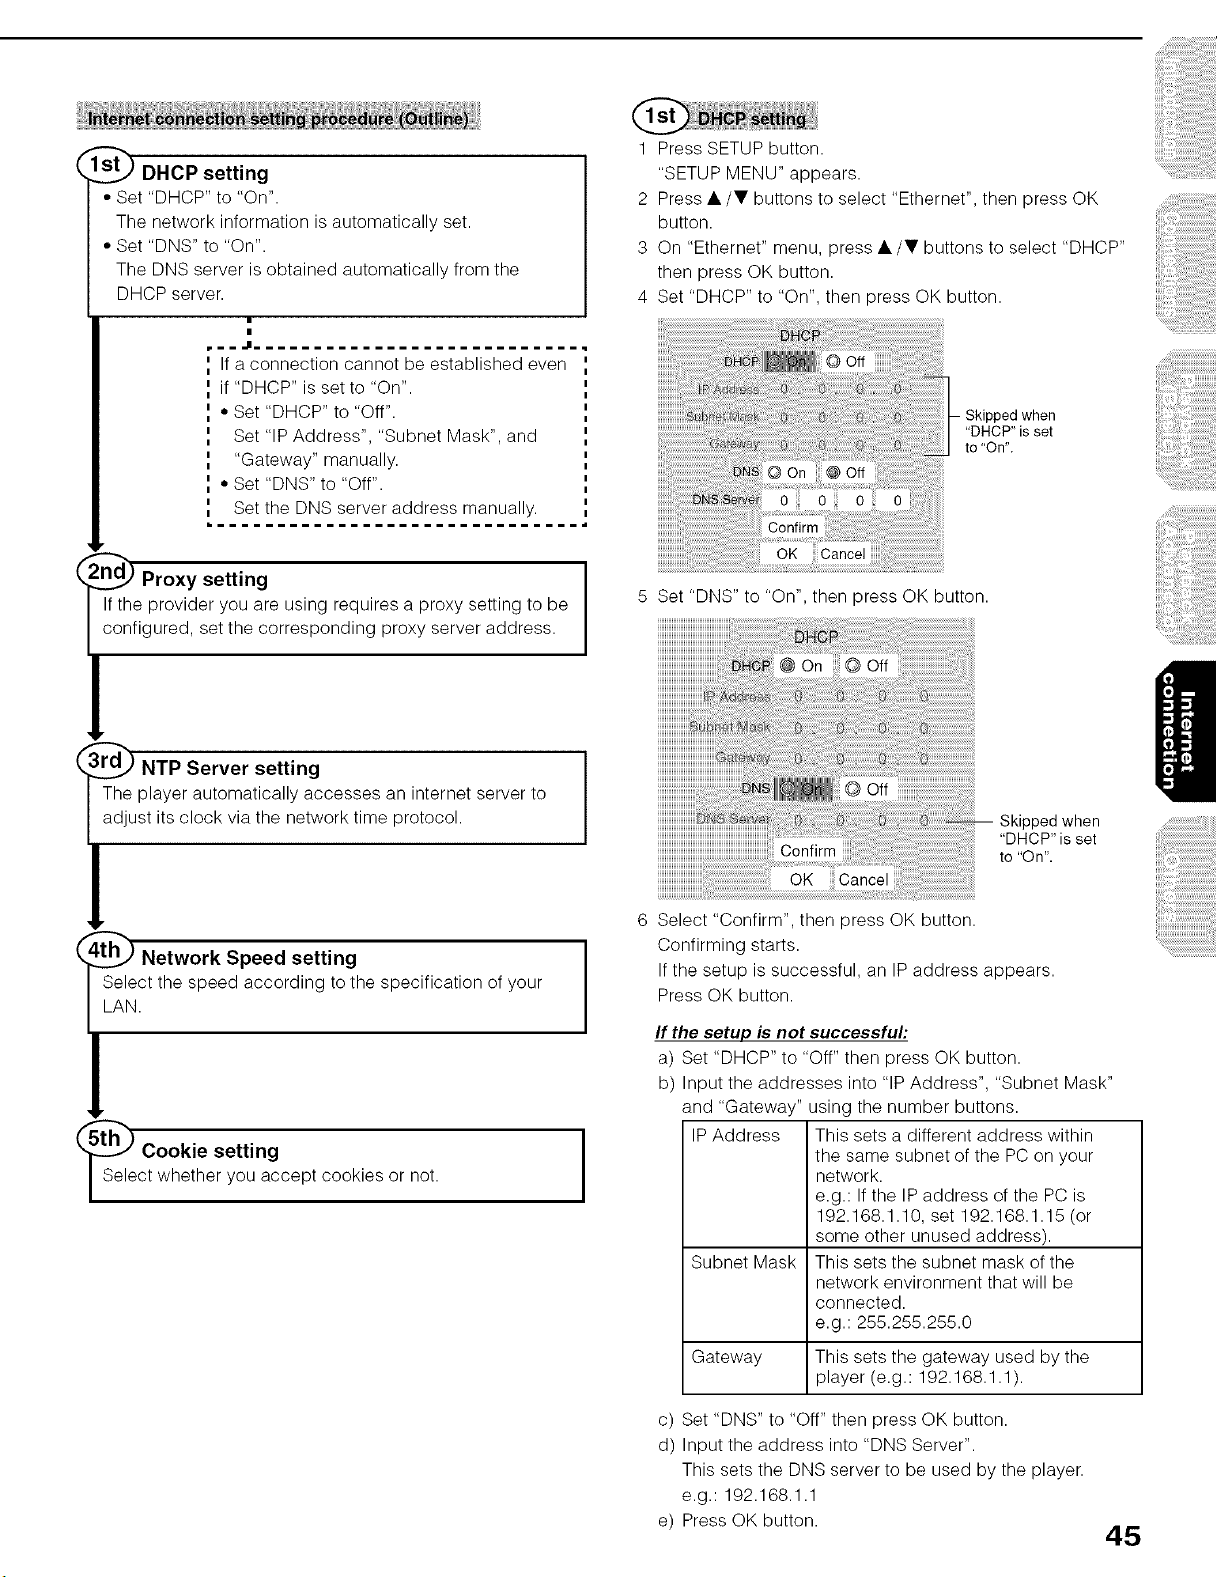
1 Press SETUP button.
"SETUP MENU" appears.
2 Press •/Y buttons to select "Ethernet", then press OK
button.
3 On "Ethernet" menu, press •/Y buttons to select "DHCP"
then press OK button.
4 Set "DHCP" to "On", then press OK button.
"DHCP" is set
to "On".
5 Set "DNS" to "On", then press OK button.
Skipped when
"DHCP" is set
to "On".
Network Speed setting I
Select tile speed according to tile specification of your
LAN.
(St_ Cookie setting
Select whether you accept cookies or not.
6 Select "Confirm", then press OK button.
Confirming starts.
If the setup is successful, an IP address appears.
Press OK button.
If the setup is not successful:
a) Set "DHCP" to "Off" then press OK button.
b) Input the addresses into "IP Address", "Subnet Mask"
and "Gateway" using the number buttons.
IP Address This sets a different address within
the same subnet of the PC on your
network.
e.g.: If the IP address of the PC is
192.168.1.10, set 192.168.1.15 (or
some other unused address).
Subnet Mask This sets the subnet mask of the
network environment that will be
connected.
e.g.: 255.255.255.0
Gateway This sets the gateway used by the
player (e.g.: 192.168.1.1).
c) Set "DNS" to "Off" then press OK button.
d) Input the address into "DNS Server".
This sets the DNS server to be used by the player.
e.g.: 192.168.1.1
e) Press OK button.
45
Loading ...
Loading ...
Loading ...