Loading ...
Loading ...
Loading ...
ut
DECK2
: _ 1
' .
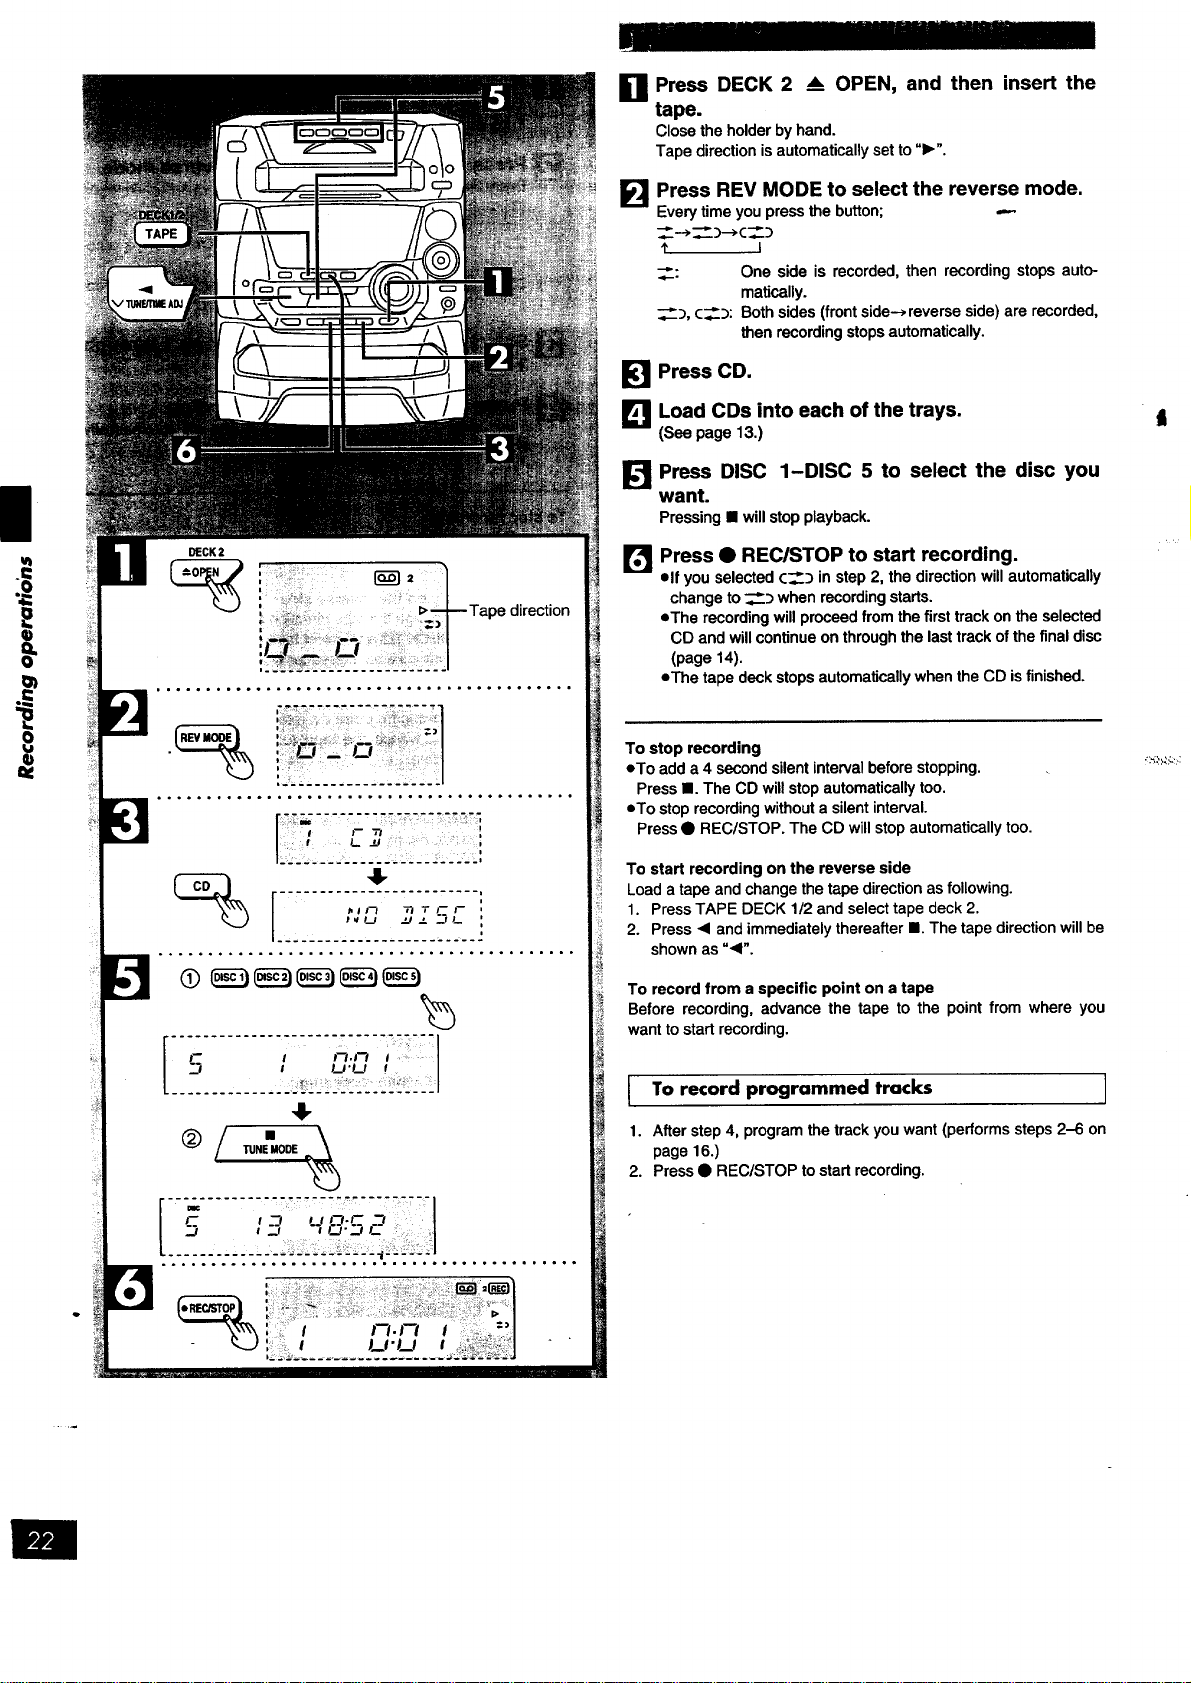
, +Tape direction
!_r _ • I
,.,o,o.,....o.......o....o,o..oo.o..,..o..
..°.°.,,°,o°°°,,,°°o,.,,,,.,..°,,.., ..... •
r : I f- 7./ i
TUNEMODE
r I
l :3 ,_, ",O'_L
_..-........ :: .'.-: _...._.- :._.:J..............
0 Press DECK 2 _ OPEN, and then insert the
tape.
Closetheholderbyhand•
Tapedirectionisautomaticallysetto"1_".
FI
Press REV MODE to select the reverse mode.
Every time you press the button; ---
1' I
__: One side is recorded, then recording stops auto-
ma_o_lly.
_, c___:Bothsides(frontside-_,reverseside)arerecorded,
then recording stops automatically.
Press CD.
J_l Load CDs into each of the trays.
(See page 13.)
J_ Press DISC 1-DISC 5 to select the disc you
want.
Pressing • will stop playback.
f:l
Press • REC/STOP to start recording.
elf you selected c___ in step 2, the direction will automatically
change to _:_ when recording starts.
eThe recording will proceed from the first track on the selected
CD and will continue on through the last track of the final disc
(page 14).
eThe tape deck stops automatically when the CD isfinished.
To stop recording
eTo add a 4 second silent interval before stopping.
Press •. The CD will stop automatically too.
eTo stop recording without a silent interval.
Press • REC/STOP. The CD will stop automatically too.
To start recording on the reverse side
Load a tape and change the tape direction as following.
1. Press TAPE DECK 1/2 and select tape deck 2.
2. Press • and immediately thereafter III. The tape direction will be
shown as "•".
To record from a specific point on a tape
Before recording, advance the tape to the point from where you
want to start recording.
To record programmed tracks ]
1. After step 4, program the track you want (performs steps 2-6 on
page 16.)
2. Press • REC/STOP to start recording.
•_'.,_>_::,.,:
Loading ...
Loading ...
Loading ...