Loading ...
Loading ...
Loading ...
PUSH STICK
PUSH STICK AND PUSH BLOCK
Make the Push Stick using a piece of 1 x 2, or rip one from
a wide board, say 11-1/2 in. wide, and set the rip fence
9-7/8 in. from the sawblade.
Make the Push Block using a piece of 3/8 in. and 3/4 in.
plywood.
The smaP piece of wood 3/8 in. x 3/8 in. x 2-1/2 in. should
be GLUED to the plywood ... DO NOT USE NAILS. This
is to prevent dulling the sawblade in the event you
mistakingly cut into the push block.
Position the handle in the center of the plywood and fasten
together with glue and wcodscrews.
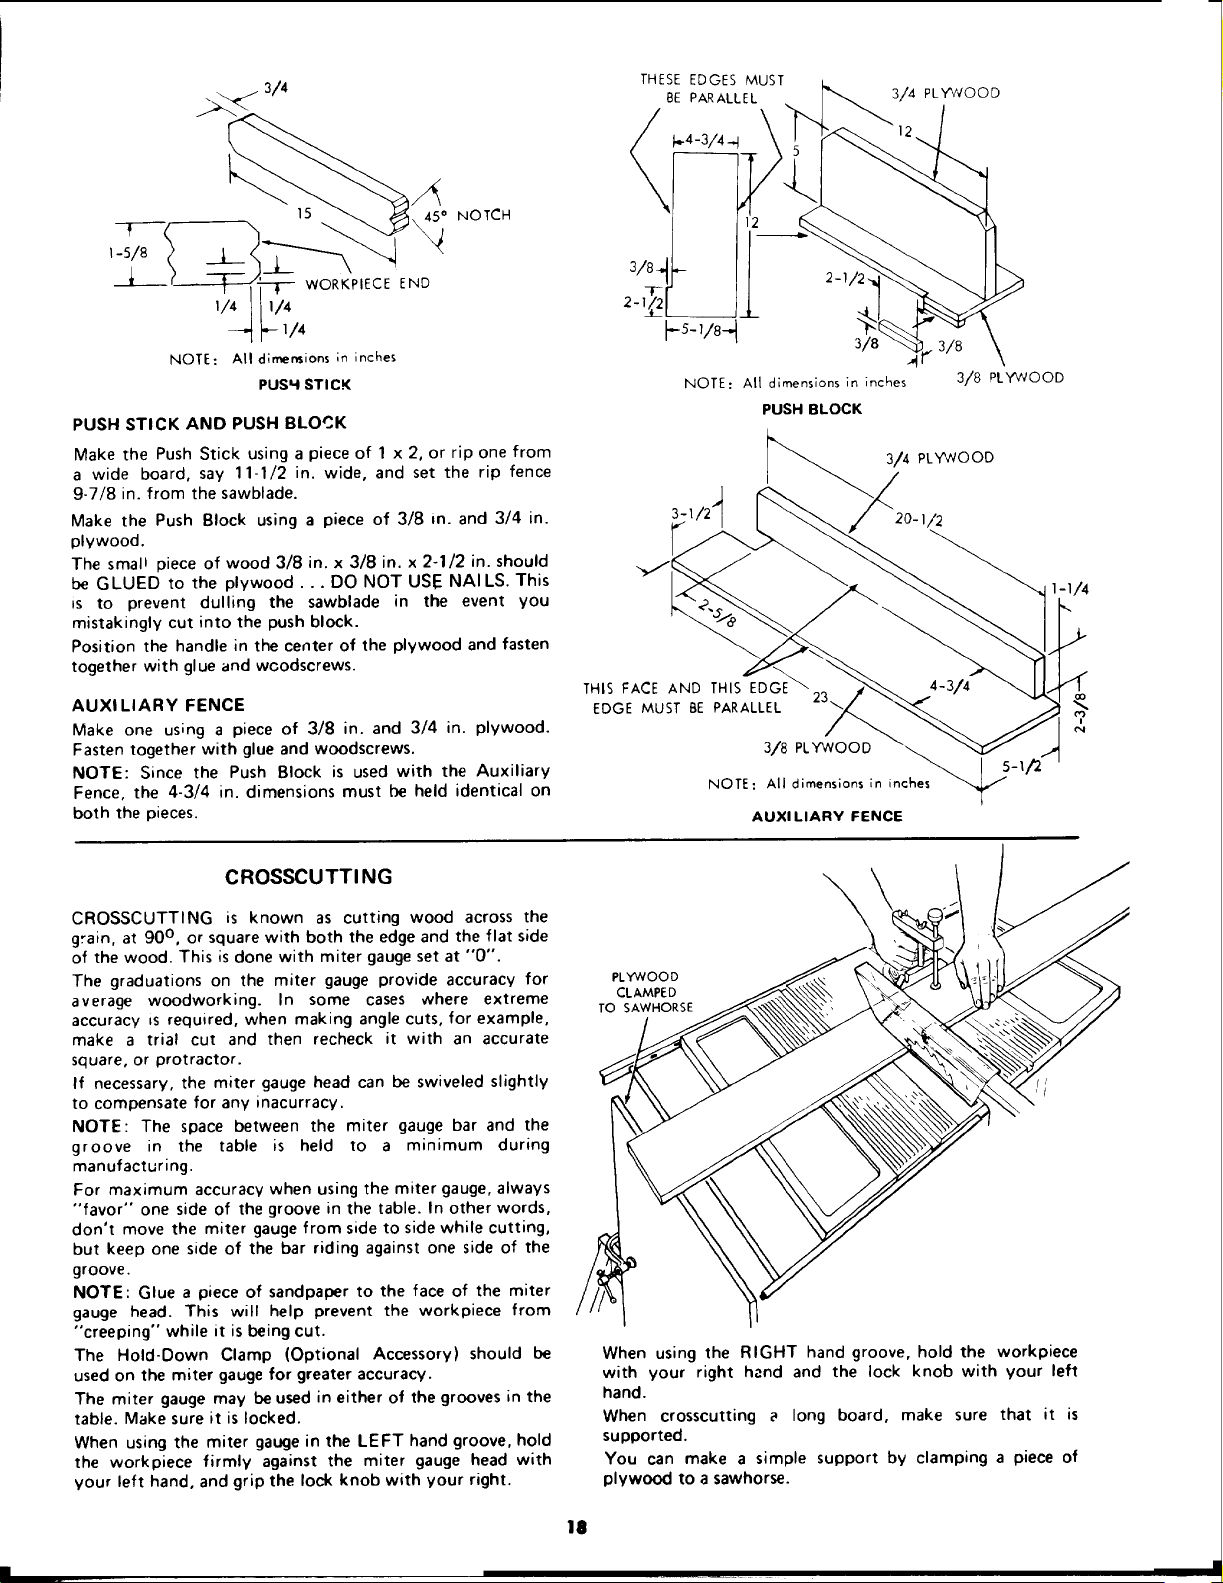
AUXILIARY FENCE
Make one using a piece of 3/8 in. and 3/4 in. plywood.
Fasten together with glue and woodscrews.
NOTE: Since the Push Block is used with the Auxiliary
Fence, the 4-3/4 in. dimensions must be held identical on
both the pieces.
THESE EDGES MUST
BE PARALLEL
F,-4-3,/4 -,.J
PLYWOOD
318
NOTE: All dimensions in inches
PUSH BLOCK
3/8 PLYWOOD
3-I/2"_
3/4 PLYWOOD
2o-i/2
1-1/4
THIS FACE AND THIS EDGE
EDGE MUST BE PARALLEL
3/8 PLYWOOD c_5 _1/,2
NOTE: All dimensions in in
AUXI LIARY FENCE
CROSSCUTTI NG
CROSSCUTTING is known as cutting wood across the
grain, at 90 °, or square with both the edge and the flat side
of the wood. This is clone with miter gauge set at "0".
The graduations on the miter gauge provide accuracy for
average woodworking. In some cases where extreme
accuracy =s required, when making angle cuts, for example,
make a trial cut and then recheck it with an accurate
square, or protractor.
If necessary, the miter gauge head can be swiveled slightly
to compensate for any inacurracy.
NOTE: The space between the miter gauge bar and the
groove in the table is held to a minimum during
manufacturing.
For maximum accuracy when using the miter gauge, always
"favor" one side of the groove in the table. In other words,
don't move the miter gauge from side to side while cutting,
but keep one side of the bar riding against one side of the
groove.
NOTE: Glue a piece of sandpaper to the face of the miter
gauge head. This will help prevent the workpiece from
"creeping" while it is being cut.
The Hold-Down Clamp (Optional Accessory) should be
used on the miter gauge for greater accuracy.
The miter gauge may be used in either of the grooves in the
table. Make sure it is locked.
When using the miter gauge in the LEFT hand groove, hold
the workpiece firmly against the miter gauge head with
your left hand, and grip the lock knob with your right.
PLYWOOD
CLAMPED
TO SAWHORSE
\
When using the RIGHT hand groove, hold the workpiece
with your right hand and the lock knob with your left
hand.
When crosscutting a long board, make sure that it is
supported.
You can make a simple support by clamping a piece of
plywood to a sawhorse.
18
Loading ...
Loading ...
Loading ...