Loading ...
Loading ...
Loading ...
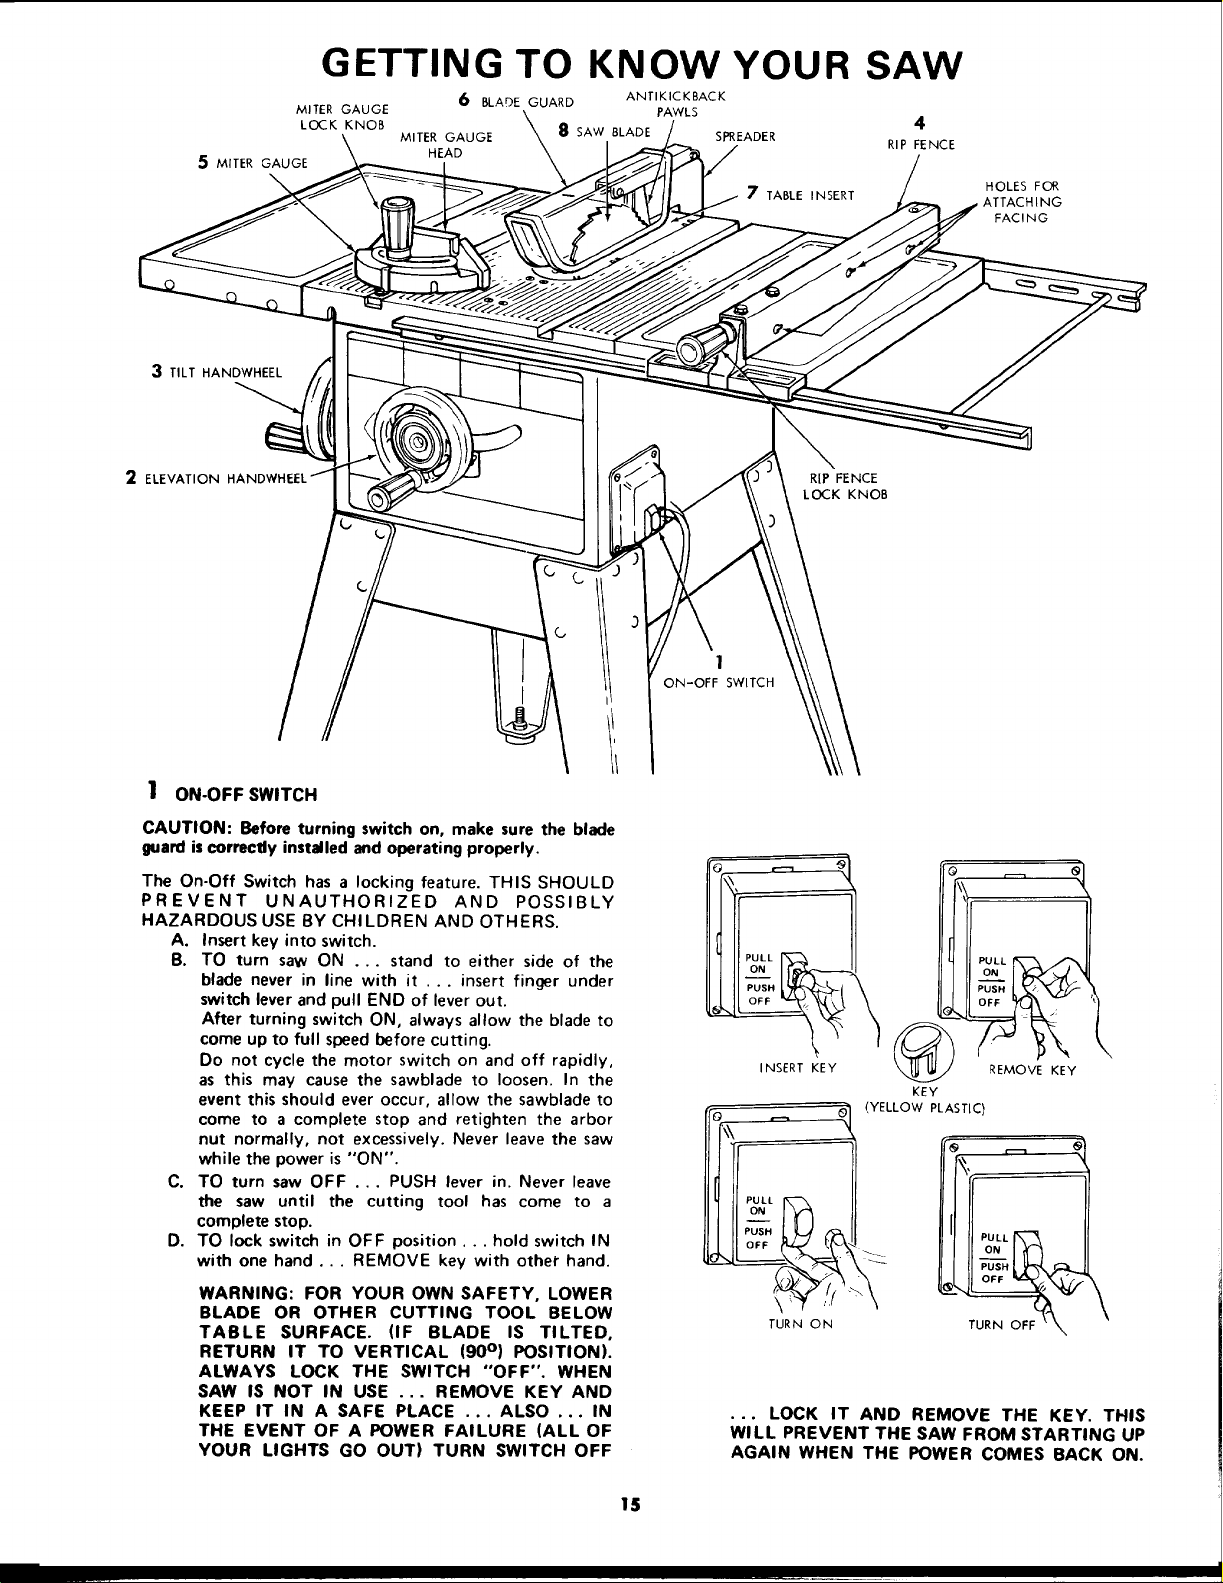
GETTING TO KNOW YOUR
6 BLAOE GUARD ANTIKICKBACK
MITER GAUGE PAWLS
LOCK KNOB 8 SAW BLADE
MITER GAUGE SPREADER
HEAD
5 MITER GAUGE
\
7 TABLE INSERT
SAW
4
RIP FENCE
HOLES FOR
FACING
3 TILT HANDWHEEL
2 ELEVATION
RIP FENCE
LOCK KNOB
] ON-OFF SWITCH
CAUTION: Before turning switch on, make sure the blade
guard is correctly installed and operating properly.
The On-Off Switch has a locking feature. THIS SHOULD
PREVENT UNAUTHORIZED AND POSSIBLY
HAZARDOUS USE BY CHILDREN AND OTHERS.
A. Insert key into switch.
B. TO turn saw ON ... stand to either side of the
blade never in line with it ... insert finger under
switch lever and pull END of lever out.
After turning switch ON, always allow the blade to
come up to full speed before cutting.
Do not cycle the motor switch on and off rapidly,
as this may cause the sawblade to loosen. In the
event this should ever occur, allow the sawblade to
come to a complete stop and retighten the arbor
nut normally, not excessively. Never leave the saw
while the power is "ON".
C. TO turn saw OFF ... PUSH lever in. Never leave
the saw until the cutting tool has come to a
complete stop.
D. TO lock switch in OFF position.., hold switch IN
with one hand ... REMOVE key with other hand.
WARNING: FOR YOUR OWN SAFETY, LOWER
BLADE OR OTHER CUTTING TOOL BELOW
TABLE SURFACE. (IF BLADE IS TILTED,
RETURN IT TO VERTICAL (90° ) POSITION).
ALWAYS LOCK THE SWITCH "OFF". WHEN
SAW IS NOT IN USE ... REMOVE KEY AND
KEEP IT IN A SAFE PLACE ... ALSO ... IN
THE EVENT OF A POWER FAILURE (ALL OF
YOUR LIGHTS GO OUT) TURN SWITCH OFF
I/
!
ON-OFF SWITCH
PULL
INSERT KEY
\
TURN ON
_ REMOVE KEY
KEY
(YELLOW PLASTIC)
• .. LOCK IT AND REMOVE THE KEY. THIS
WILL PREVENT THE SAW FROM STARTING UP
AGAIN WHEN THE POWER COMES BACK ON.
lS
Loading ...
Loading ...
Loading ...