Loading ...
Loading ...
Loading ...
45
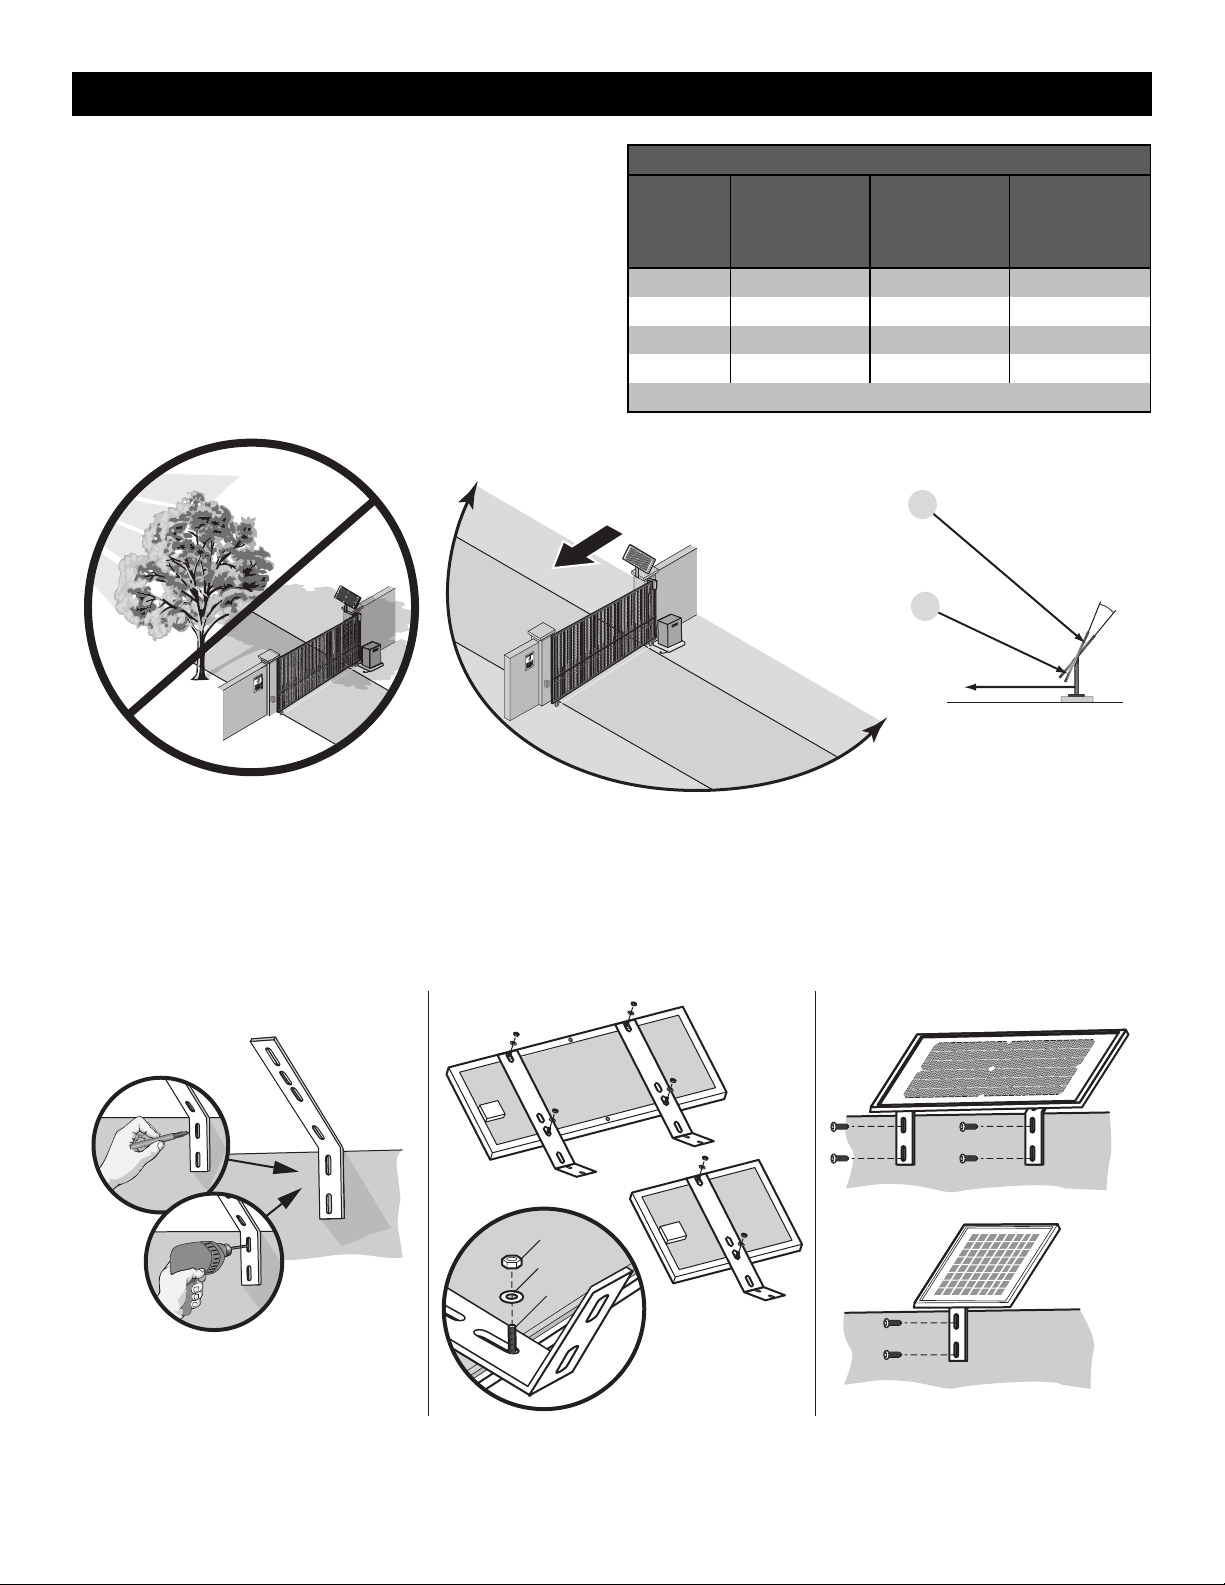
Position
The location of the panel(s) is critical to the success of the installation. In
general, the panel(s) should be mounted using the provided angle bracket
facing due south. The solar panel(s) should be mounted in an area clear of
all obstructions and shade from buildings and trees. If the panel(s) is not
casting a shadow, the battery is not being charged.
NOTE: Tall trees or buildings that do not shade the solar panel(s) in the
summer could shade the solar panel(s) during the winter months when the
sun sits lower in the sky.
MAXIMUM WIRE LENGTH
AMERICAN
WIRE
GAUGE
(AWG)
20 WATTS OF
PANELS
40 WATTS OF
PANELS
60 WATTS OF
PANELS
16 235 (71.6 m) 115 (35.1 m) 80 (24.4 m)
14 375 (114.3 m) 190 (57.9 m) 125 (38.1 m)
12 600 (182.9 m) 300 (91.4 m) 200 (61 m)
10 940 (286.5 m) 475 (144.8 m) 315 (96 m)
Chart assumes: copper wire, 65°C, 5% drop, 30V nominal
TIP: The area around the solar panel(s)
should be clear of shadows or obstructions
to the sun for a 180° arc east to west.
Sun’s position
Summer Sun Height
Winter Sun Height
Up to 15°
South
South
180°
TIP: To optimize the system for winter
operation the angle can be increased an
additional 15° (solar panel(s) sits more
vertical).
Installation
Solar panel(s) MUST be installed facing south. Use a compass to determine direction. Below are general instructions for installing the solar panel(s). Your
installation may vary slightly depending on the solar panel purchased.
1. Position the mounting bracket on the mounting surface. Mark and drill holes.
2. Secure the solar panel to the mounting bracket using the hex bolts, hex nuts and washers provided.
3. Secure the solar panel to the mounting surface using lag screws provided.
Hex Nut
Washer
Hex Bolt
Mounted panel must face SOUTH
1 2 3
Mounting
Surface
Mounting
Surface
SOLAR PANELS
Loading ...
Loading ...
Loading ...