Loading ...
Loading ...
Loading ...
Page 29
main burners only on HIGH with the lid down for about 10 minutes. When lit, the flame should have a mostly blue color to it.
It may have a tint of yellow and adjustment to the air shutters can be made to obtain a blue flame and proper gas glow (see
flame adjustment). Turn the control knobs to HI and allow the grill to preheat for 15 minutes or until desired temperature is
displayed on the thermometer. The hood is to be closed during the appliance preheat period.
Flame Adjustment
a. Become familiar with the safety instructions at the front of this manual. Do not smoke while lighting the appliance
or checking the gas supply connections.
b. Make sure that all gas connections are securely tightened and have been leak-tested with a soapy water solution
- never with a flame!
c. With the cooking grids and flame tamers removed, light the main burners and run them on the high setting.
d. Inspect burners for proper flame appearance. The ideal flame appearance is one that is mostly blue and not lifting
off of the burner surface. There is an air shutter found at the end of the burner (close to the valve) which can be
either opened or closed to make adjustments to the flame's appearance. To adjust, remove the burner from the
appliance and loosen the Phillips head screw holding the air shutter to the burner. If the flame is yellow, open the
air shutter to make the flame bluer. If the flame is lifting off
of the burner surface, slightly close the air shutter. Re-tighten the Phillips head screw and re-install the burner to
recheck the flame appearance. Repeat if necessary.
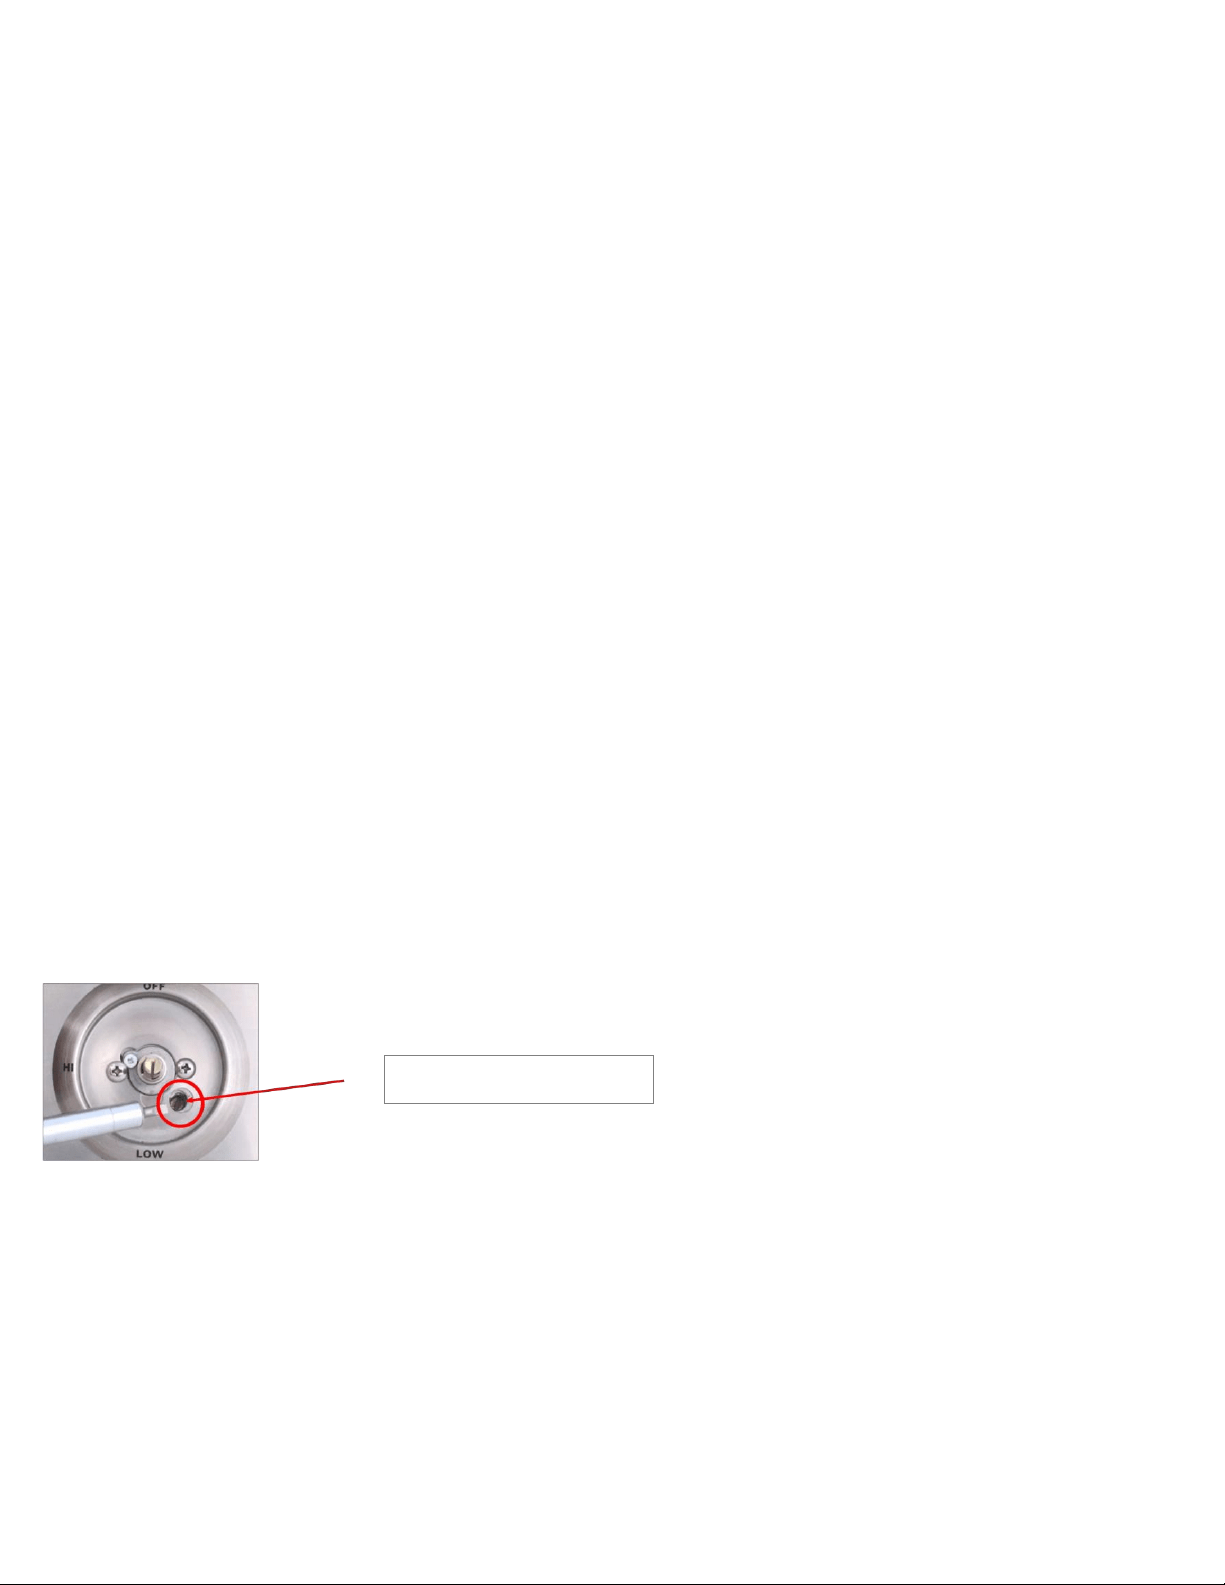
e. Turn burners to low flame setting and test for proper flame height. Flame should be stable and burning out of
each burner port without danger of going out in the lowest setting. (To adjust the LOW flame setting simply light
the appliance on the LOW setting and adjust the screw located under the knob on the front of the valve using a
flat head screwdriver as seen in the diagram below.)
Low-flame setting
screw
Loading ...
Loading ...
Loading ...