Loading ...
Loading ...
Loading ...
CAUTION:
To avoid possible injury or damage to the
appliance, ensure grates are installed exactly
per installation instructions and not backwards
or upside down.
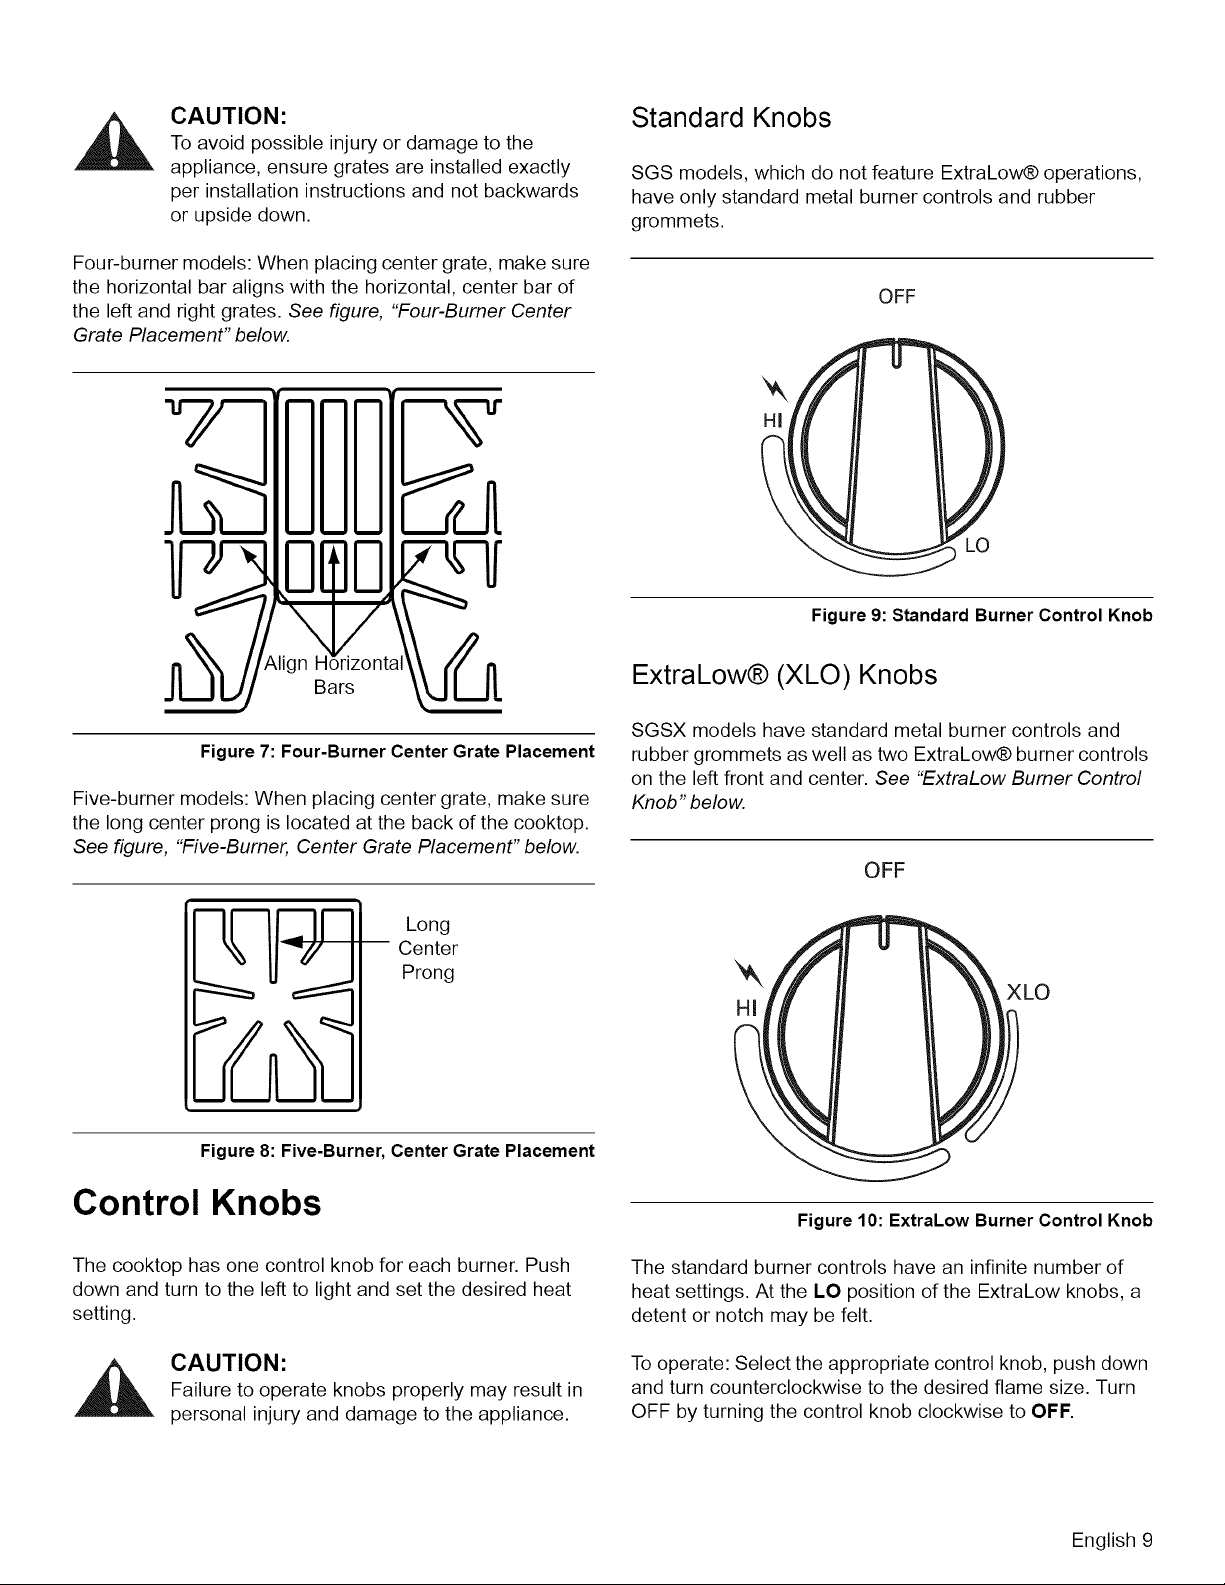
Four-burner models: When placing center grate, make sure
the horizontal bar aligns with the horizontal, center bar of
the left and right grates. See figure, "Four-Burner Center
Grate Placement" below.
Bars
Figure 7: Four-Burner Center Grate Placement
Five-burner models: When placing center grate, make sure
the long center prong is located at the back of the cooktop.
See figure, "Five-Burner, Center Grate Placement" below.
Standard Knobs
SGS models, which do not feature ExtraLow® operations,
have only standard metal burner controls and rubber
grommets.
OFF
Figure 9: Standard Burner Control Knob
ExtraLow® (XLO) Knobs
SGSX models have standard metal burner controls and
rubber grommets as well as two ExtraLow® burner controls
on the left front and center. See "ExtraLow Bumer Control
Knob" below.
OFF
Long
Center
Prong
HI
XLO
Figure 8: Five-Burner, Center Grate Placement
Control Knobs
The cooktop has one control knob for each burner. Push
down and turn to the left to light and set the desired heat
setting.
,_ CAUTION:
Failure to operate knobs properly may result in
personal injury and damage to the appliance.
Figure 10: ExtraLow Burner Control Knob
The standard burner controls have an infinite number of
heat settings. At the LO position of the ExtraLow knobs, a
detent or notch may be felt.
To operate: Select the appropriate control knob, push down
and turn counterclockwise to the desired flame size. Turn
OFF by turning the control knob clockwise to OFF.
English 9
Loading ...
Loading ...
Loading ...