Loading ...
Loading ...
Loading ...
General Care & Cleaning
FEATURE OVERVIEW
• Cleaning Recommendations for Ceramic Glass Cooktops (cont'd)
• Care & Cleaning of Stainless Steel
• Removing & Replacing Oven Door
DO not use the following on the ceramic glass cooktop:
• Do not use abrasive cleaners and scouring pads, such as metal and some
nylon pads. They may scratch the cooktop, making it more difficult to clean.
• Do not use harsh cleaners, such as chlorine bleach, ammonia or oven
cleaners, as they may etch or discolor the cooktop.
• Do not use dirty sponges, cloths or paper towels, as they can leave soil or
lint on the cooktop which can burn and cause discoloration.
Care and Cleaning of Stainless Steel (Stainless Steel models only)
Some models are equipped with stainless steel exterior parts. Special care and cleaning
are required for maintaining the appearance of stainless parts. Please refer to the table
provided at the beginning of the General Care & Cleaning section in this Use & Care
Manual.
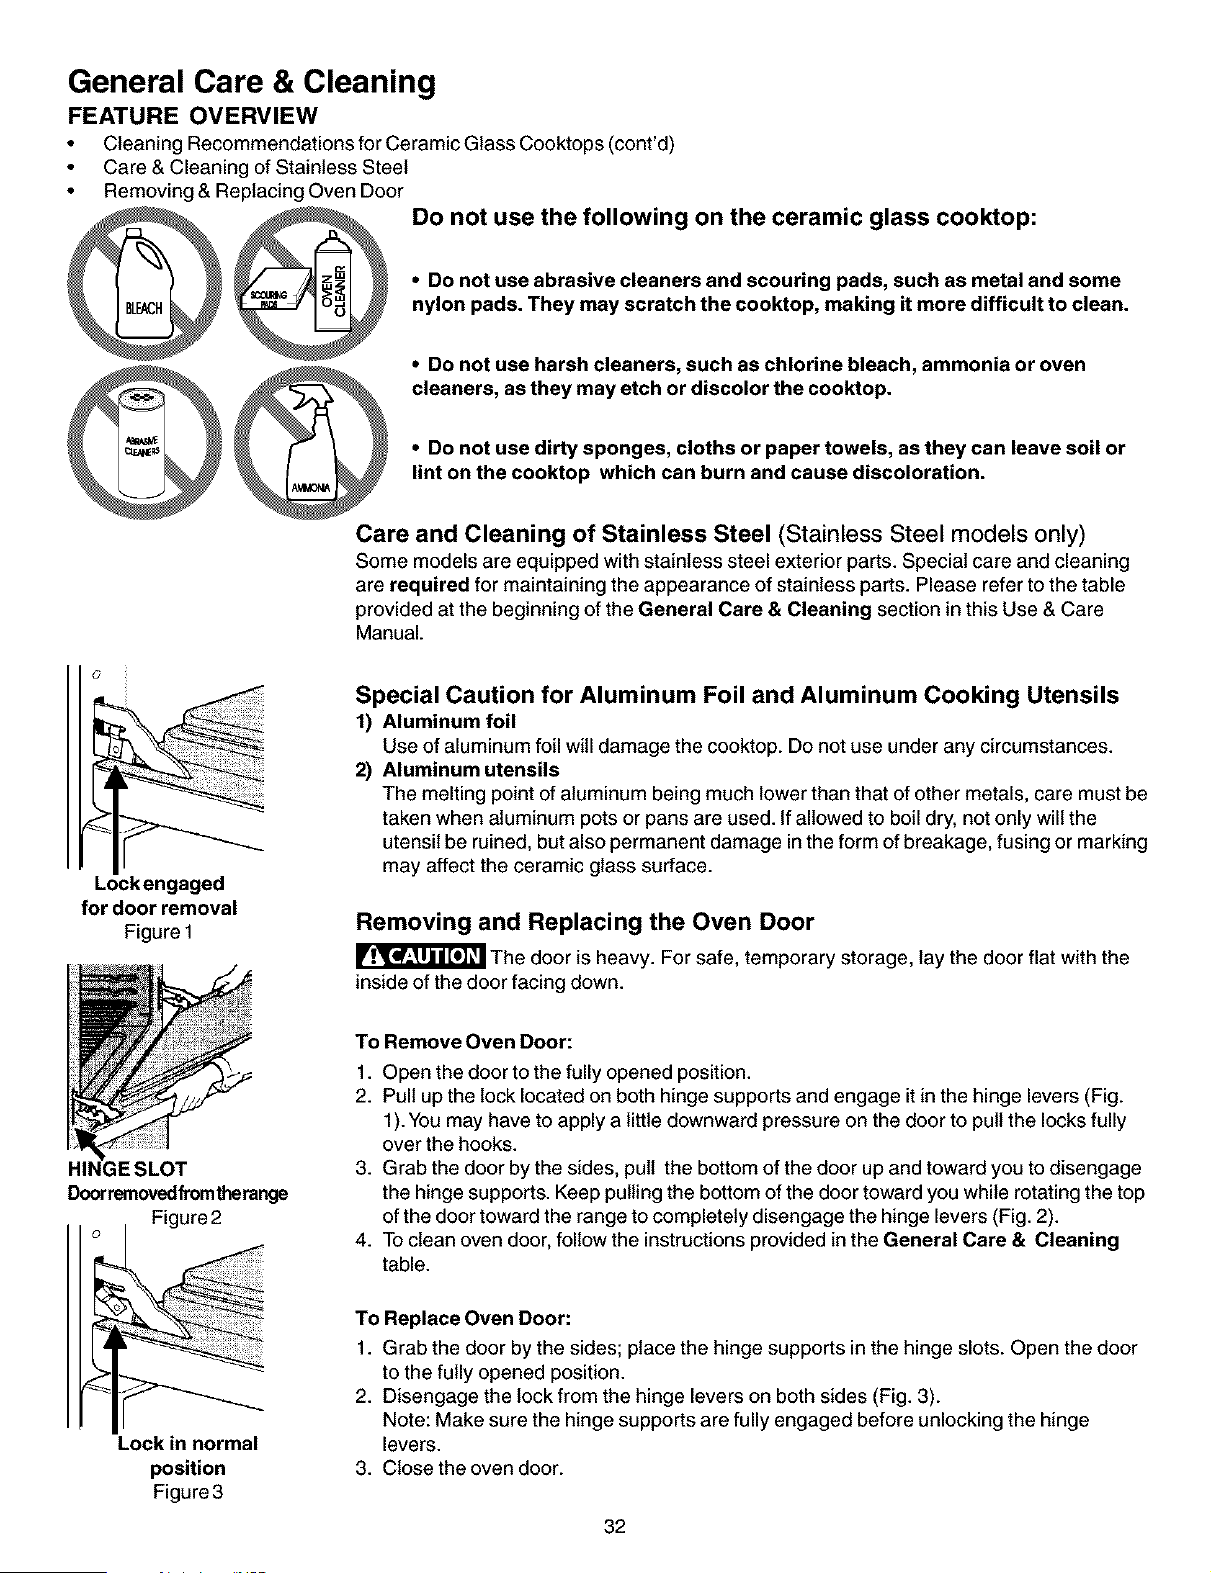
Lockengaged
for door removal
Figure 1
HII
Doorremovedfromtherange
Figure 2
Special Caution for Aluminum Foil and Aluminum Cooking Utensils
1) Aluminum foil
Use of aluminum foil will damage the cooktop. Do not use under any circumstances.
2) Aluminum utensils
The melting point of aluminum being much lower than that of other metals, care must be
taken when aluminum pots or pans are used. If allowed to boil dry, not only will the
utensil be ruined, but also permanent damage in the form of breakage, fusing or marking
may affect the ceramic glass surface.
Removing and Replacing the Oven Door
The door is heavy. For safe, temporary storage, lay the door flat with the
inside of the door facing down.
To Remove Oven Door:
1. Open the door to the fully opened position.
2. Pull up the lock located on both hinge supports and engage it in the hinge levers (Fig.
1). You may have to apply a little downward pressure on the door to pullthe locks fully
over the hooks.
3. Grab the door by the sides, pull the bottom of the door up and toward you to disengage
the hinge supports. Keep pulling the bottom of the door toward you while rotating the top
of the door toward the range to completely disengage the hinge levers (Fig. 2).
4. To clean oven door, follow the instructions provided in the General Care & Cleaning
table.
Lock in normal
position
Figure 3
To Replace Oven Door:
1. Grab the door by the sides; place the hinge supports in the hinge slots. Open the door
to the fully opened position.
2. Disengage the lock from the hinge levers on both sides (Fig. 3).
Note: Make sure the hinge supports are fully engaged before unlocking the hinge
levers.
3. Close the oven door.
32
Loading ...
Loading ...
Loading ...