Loading ...
Loading ...
Loading ...
23
SERVICE AND MAINTENANCE
• Debris can accumulate anywhere on the rider, especially on horizontal
surfaces. Additional cleaning may be necessary when mowing in dry
conditions or when mulching.
• Fuel leaks/spills, oil leaks/spills and excess lubrication can also become
collections sites for debris. Immediate repair and cleaning up oil or fuel spills
can help reduce fire hazards.
• In addition to cleaning the rider before operating and storing, do not
attempt to mow unusually tall grass (10” or higher), dry grass (e.g., pasture)
or piles of dry leaves. Dry grass or leaves may contact the engine exhaust
and/or build up on the mower deck presenting a potential fire hazard.
Engine
Refer to the Engine Operator’s Manual for engine maintenance instructions.
Check engine oil level before each use as instructed in the Engine Operator’s
Manual. Follow the instructions carefully.
Changing Engine Oil
Oil Drain Hose Models
WARNING
If the engine has been recently run, the engine, muffler and surrounding
metal surfaces will be hot and can cause burns to the skin. Exercise caution
to avoid burns.
NOTE: The oil filter (if equipped) should be changed at every oil change interval.
To complete the oil change, proceed as follows:
1. Run the engine for a few minutes to allow the oil in the crankcase to warm.
Warm oil will flow more freely and carry away more of the engine sediment
which may have settled at the bottom of the crankcase. Use care to avoid
burns from hot oil.
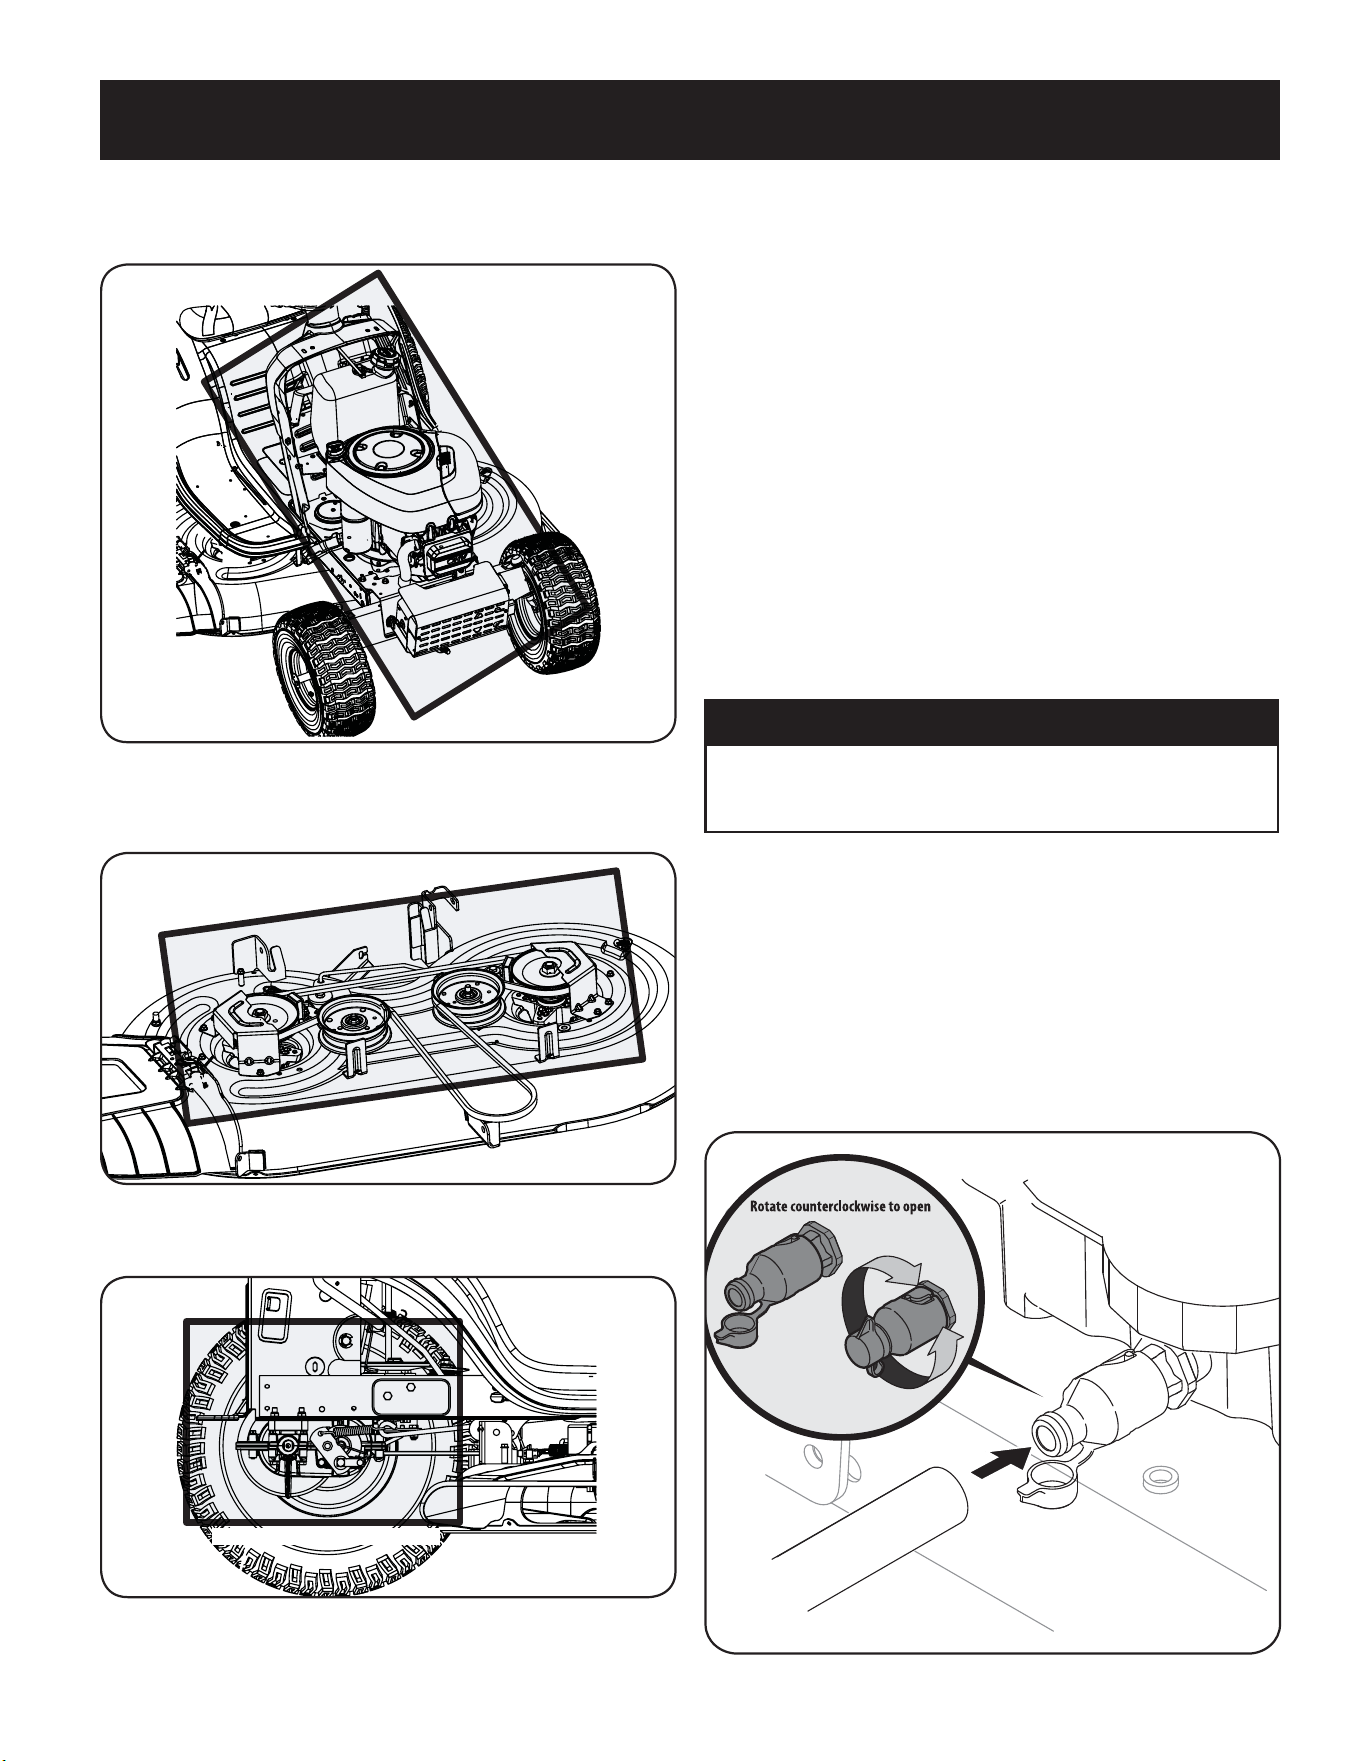
2. Open the tractor’s hood and locate the oil drain port on the left side of the engine.
3. Open the protective cap on the end of the oil drain valve to expose the drain
port. See inset of Figure 5.
OPENED
CLOSED
Figure 5
• Clean under the hood. Exhaust manifold, around fuses, all wiring and
harnesses, muffler pipe, muffler shield, engine intake screens and cooling
fins, etc. See Figure 2.
Figure 2
• Clean the top of the mower deck, under the spindle covers and belt area. See
Figure 3.
Figure 3
• Clean around and near the transmission, axle and the fan area. See Figure 4.
Wheel Not Shown For Clarity
Figure 4
Loading ...
Loading ...
Loading ...