Loading ...
Loading ...
Loading ...
32
Multifunction oven light is not working
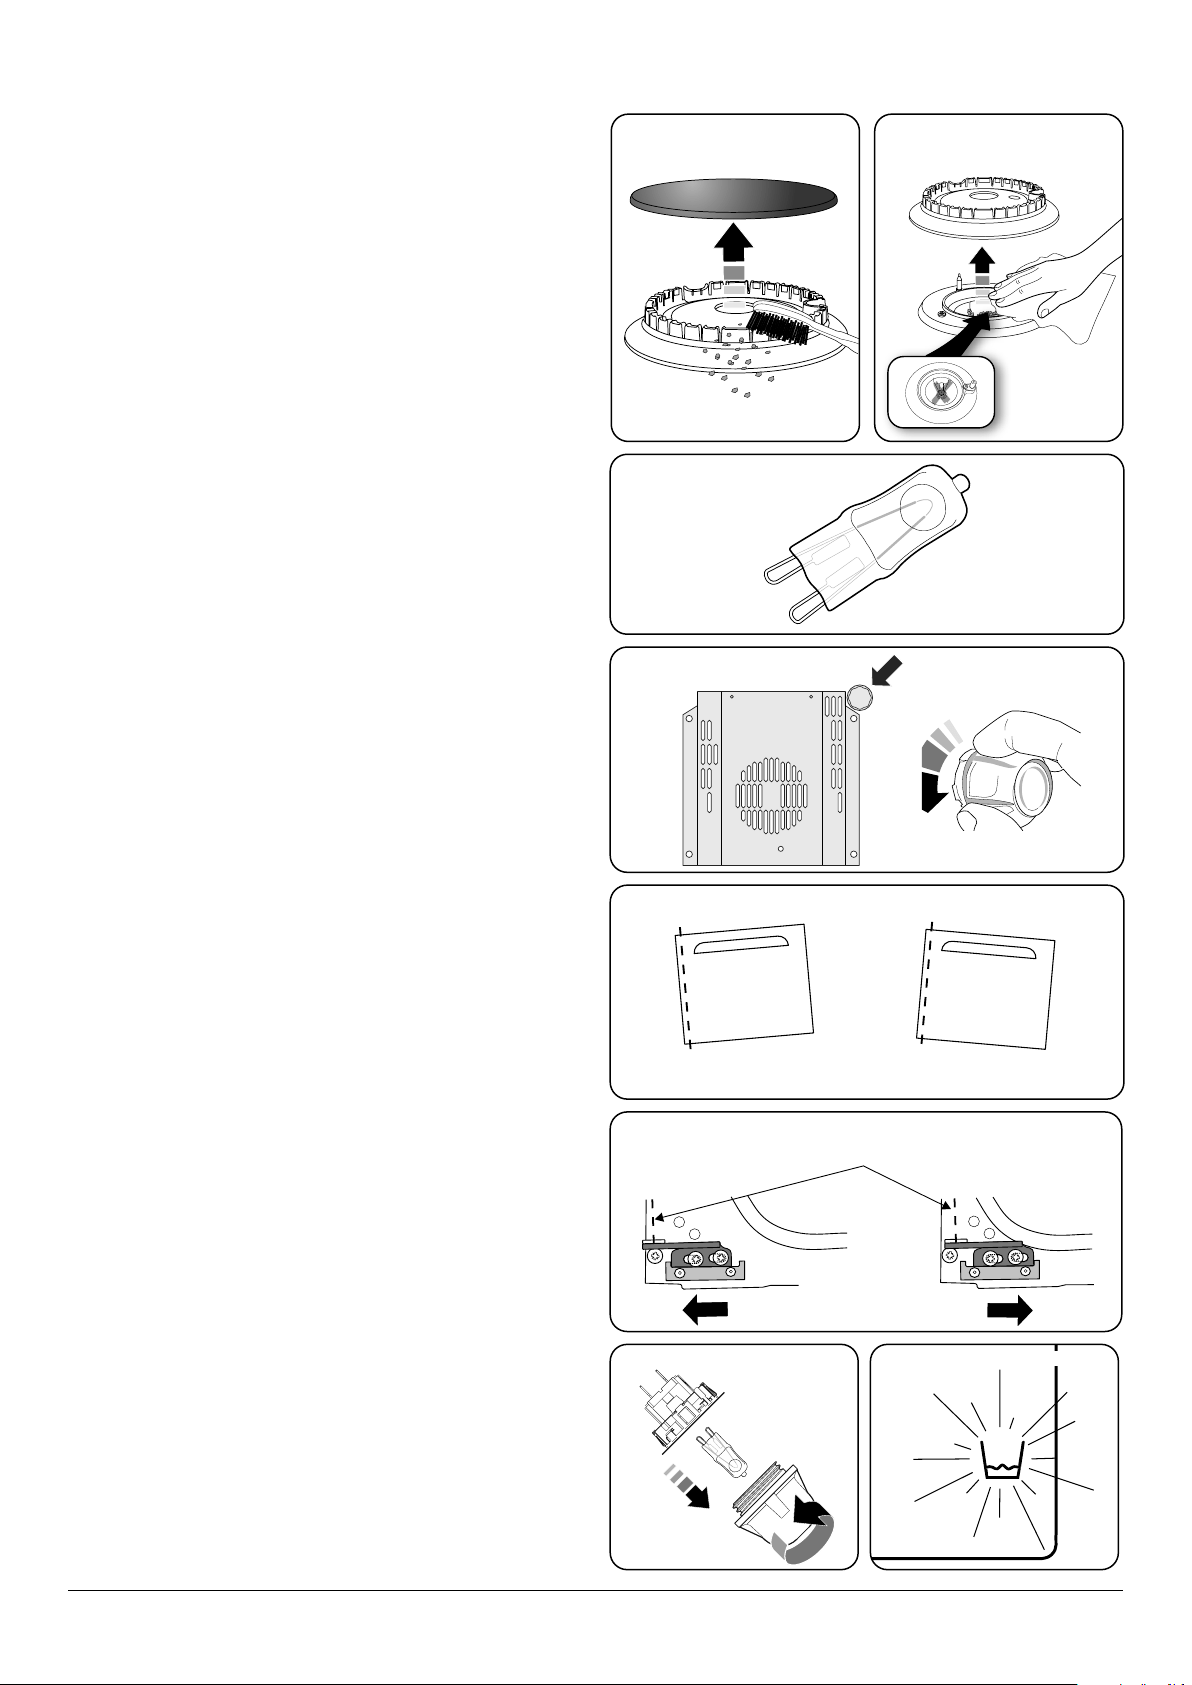
The bulb has probably burnt out. You can buy a replacement
bulb (which is not covered under the warranty) from a good
electrical shop. Ask for a 40W - 230V halogen lamp (G9)
(Fig. 7.3).
Before removing the existing bulb, turn o the power supply
and make sure that the oven and bulb have cooled. Open the
oven door and remove the oven shelves.
Remove the bulb cover by turning it a quarter turn, counter-
clockwise. It may be very sti (Fig. 7.4).
Pull the existing bulb to remove it. When handling the
replacement bulb, avoid touching the glass with your ngers,
as oils from your hands can cause premature failure. Push,
click in the replacement bulb.
Replace the bulb cover by turning it a quarter turn, clockwise.
Turn on the circuit breaker and check that the bulb now
lights.
The left-hand oven door is misaligned
The bottom hinge of the left-hand oven door can be adjusted
to alter its angle (Fig. 7.5).
Loosen the bottom hinge xing screws and use the notch and
a at bladed screwdriver to move the position of the hinge to
set the hinge position (Fig. 7.6).
Retighten the hinge screws.
Steam cavity light is not working
The bulb has probably burnt out. You can buy a replacement
bulb (which is not covered under the warranty) from a good
electrical shop. Ask for a 25W - 230V halogen lamp (G9)
(Fig. 7.3).
WARNING: Before removing the existing bulb, turn o
the power supply and make sure that the oven and bulb have
cooled. Open the oven door and remove the oven shelves.
Remove the bulb cover by turning it, counter-clockwise. It
may be very sti (Fig. 7.7).
Pull the existing bulb to remove it. When handling the
replacement bulb, avoid touching the glass with your ngers,
as oils from your hands can cause premature failure. Push,
click in the replacement bulb.
Replace the bulb cover by turning it clockwise. Turn on the
circuit breaker and check that the bulb now lights.
Moisture visible on the steam cavity door
This is normal. Wipe away excess moisture once cooking is
complete.
The Steam oven beeps and makes a noise but there is the
ashing of the start/pause button and another ashing
symbol (Fig. 7.8).
Problem: The water tank is not in place. To x this, place the
water tank in the correct position ensuring that the water
tank is fully engaged and an audible click is heard.
ArtNo.320-0007 Oven door hinge adjustment 2
Eect of hinge adjustment – exaggerated for clarity
Oven door omitted for clarity
Centre line of hinge pin
Fig. 7.1 Fig. 7.2
Fig. 7.3
Fig. 7.4
Fig. 7.5
Fig. 7.6
Fig. 7.7 Fig. 7.8
Loading ...
Loading ...
Loading ...