
Loading ...
Loading ...
Loading ...
W415-2349 / A / 10.31.19
EN
38
fi nishing
A. Insert 4 AA batteries (not supplied) into the battery housing supplied, note the polarity of the batteries and
insert as indicated on the cover (+/-). (To open the battery housing slide the back piece upwards and off
of the battery housing).
B. Attach the wires from the wiring harness of the appliance to the battery housing.
C. Place the battery housing into the valve compartment below the burner, ensure that the battery housing is
placed in a clean and easily accessible location.
D. Turn the gas and electrical power back on to begin operating the appliance.
5.4 battery housing installation
5.5 glass / door replacement
• Ensure the gas and electrical power to the appliance is turned off.
• Appliance may be hot. Do not service until the appliance has cooled.
!
WARNING
Replacement glass/frame assembly shall be replaced as a complete unit as supplied by the appliance
manufacturer.
!
WARNING
• Do not use substitute materials.
• Glass may be hot. Do not touch glass until cooled.
• Care must be taken when removing and disposing of any broken door glass or damaged components. Be
sure to vacuum up any broken glass from inside appliance before operation.
• Do not strike, slam, or scratch. Do not operate appliance with glass removed, cracked, broken, or scratched.
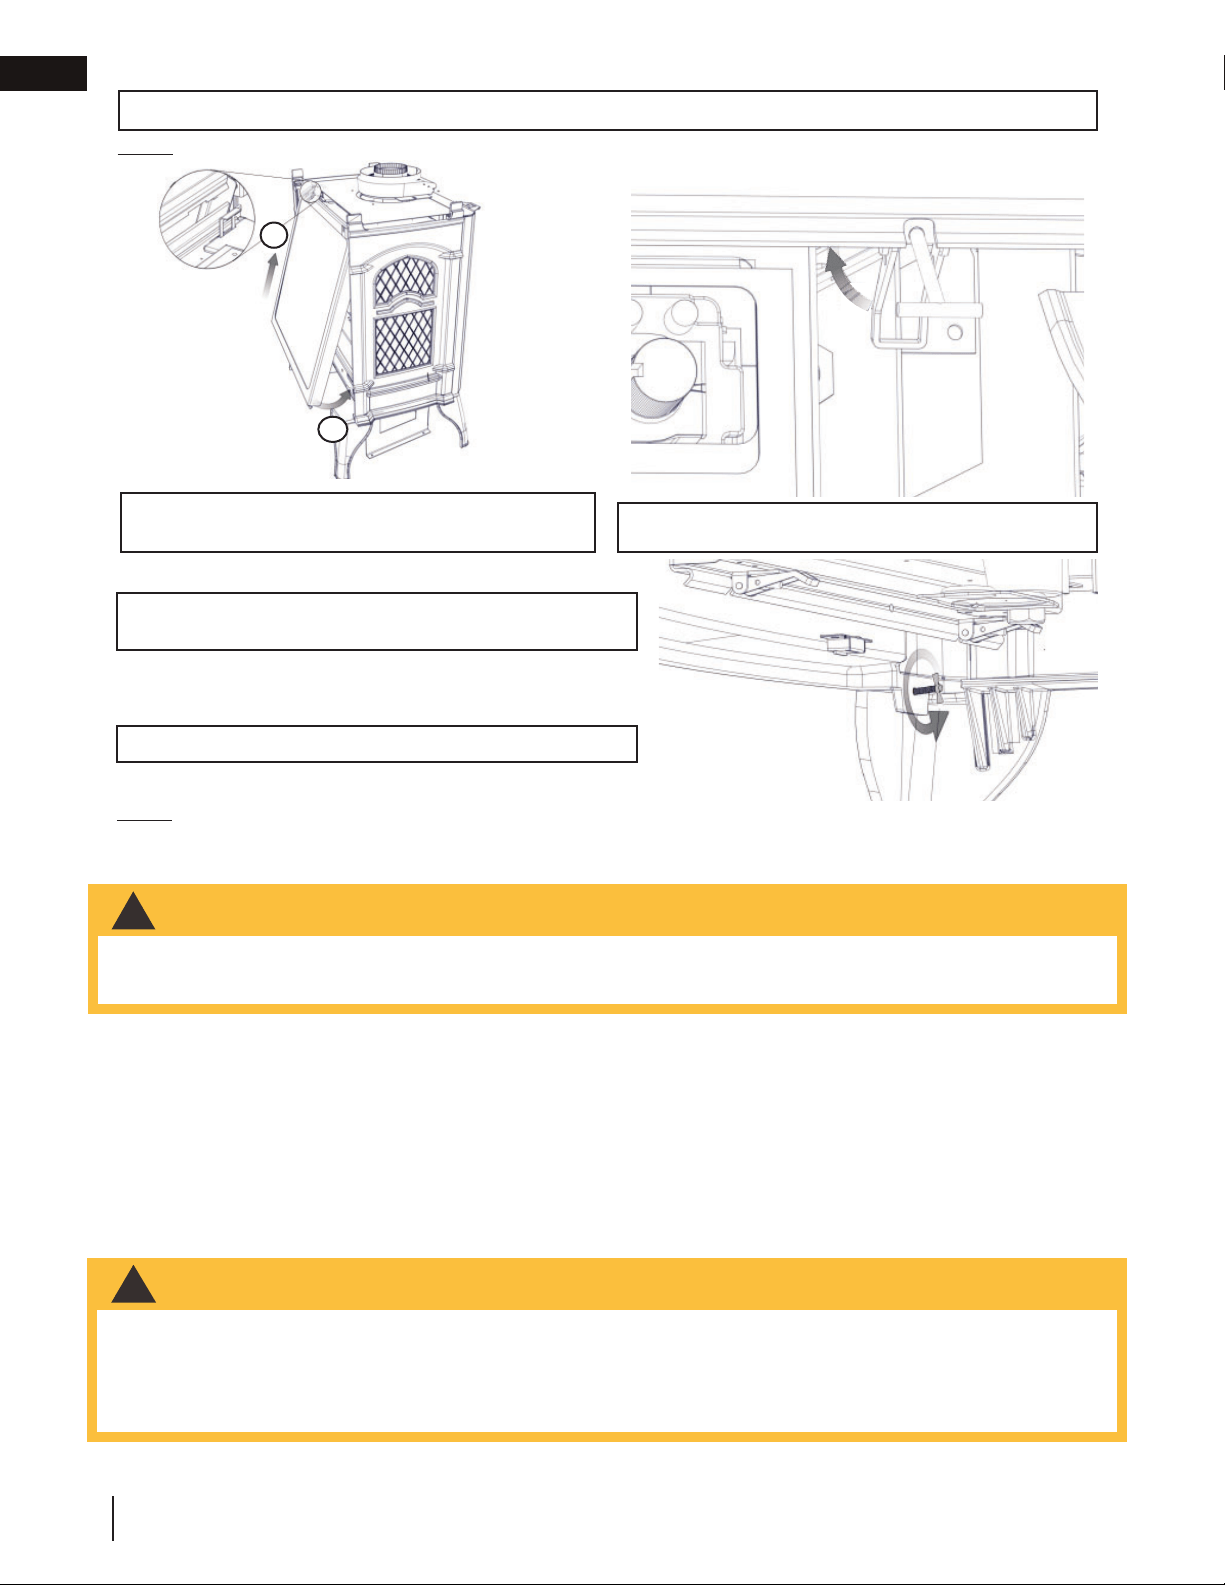
NOTE: If gap adjustment is required between cast front and side, tighten or loosen wing nut screws (located be-
hind either side on the bottom).
I. Set cast front over legs and reinstall bolts removed at step B
until secure.
J. Place cast top on top of appliance.
1
2
F. Lift glass door up and off edge of fi rebox top and slide it under top retainers to remove.
NOTE: When removing the glass door, a simple procedure must be followed in order to not damage the components.
G. Slide glass door under top retainers and rest on edge of
fi rebox. Swing bottom inwards.
H. Slide ‘T’ latches into grooves at bottom of glass and
fasten release handles.
Loading ...
Loading ...
Loading ...