Loading ...
Loading ...
Loading ...
ENG - 28
08 INSTALLING THE WALL
MOUNT
Installation Precautions
• Install on a vertical wall only.
• Do not install in a place with high temperature or humidity.
• Verify whether the wall is strong enough to support the product’s
weight. If not, reinforce the wall or choose another installation
point.
• Connect cables from the unit to external devices before you install
the Soundbar on the wall.
• Make sure the unit is turned off and unplugged before you install
it. Otherwise, it may cause an electric shock.
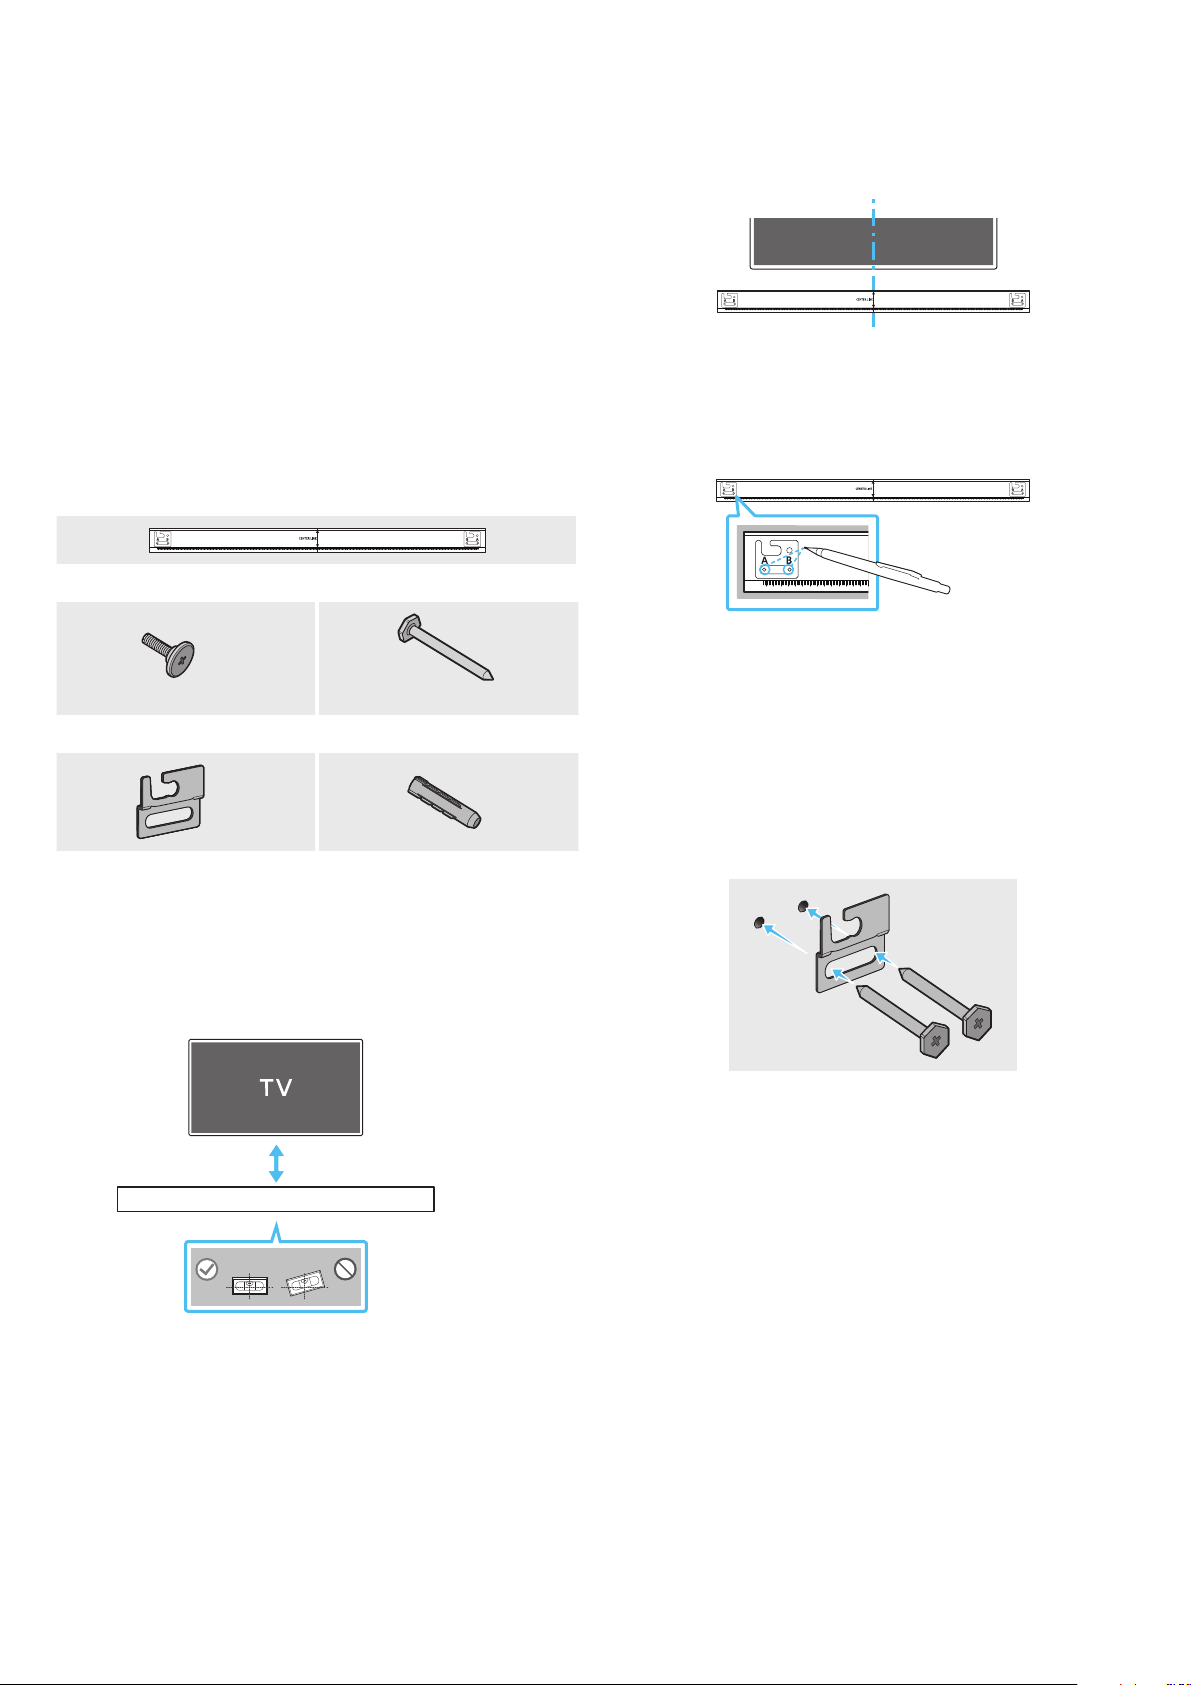
Wallmount Components
AH81-15127A-01
A TYPE
:
740mm
B TYPE
:
700mm
Wall Mount Guide (AH81-15127A)
x 2
x 4
(M5 X L55)
Holder-Screw (AH61-03164A) Screw (6011-008215)
x 2
x 4
Bracket-Wall Mount
(AH61-04277A)
Screw Anchor (BN61-17904A)
1. Place the Wall Mount Guide against the wall surface.
• The Wall Mount Guide must be level.
• If your TV is mounted on the wall, install the Soundbar at least 2
inches (5 cm) below the TV.
2 inches (5 cm) or more
2. Align the Wall Mount Guide’s Center Line with the center of your
TV (if you are mounting the Soundbar below your TV), and then x
the Wall Mount Guide to the wall using tape.
• If you are not mounting below a TV, place the Center Line in the
center of the installation area.
AH81-15127A-01
A TYPE
:
740mm
B TYPE
:
700mm
Center Line
3. Push a pen tip or sharpened pencil tip through the center of the
A-TYPE and B-TYPE images on each end of the Guide to mark the
holes for the supporting screws, and then remove the Wall Mount
Guide.
AH81-15127A-01
A TYPE
:
740mm
B TYPE
:
700mm
4. Using an appropriately sized drill bit, drill a hole in the wall at each
marking.
• If the markings do not correspond to the positions of studs,
make sure you insert appropriate anchors or mollies into the
holes before you insert the support screws. If you use anchors
or mollies, make sure the holes you drill are large enough for
the anchors or mollies you use.
5. Push a screw (not supplied) through each Screw, and then screw
each screw rmly into a support screw hole.
Loading ...
Loading ...
Loading ...