
Loading ...
Loading ...
Loading ...
28 31-2001053 Rev. 0
Installation
2
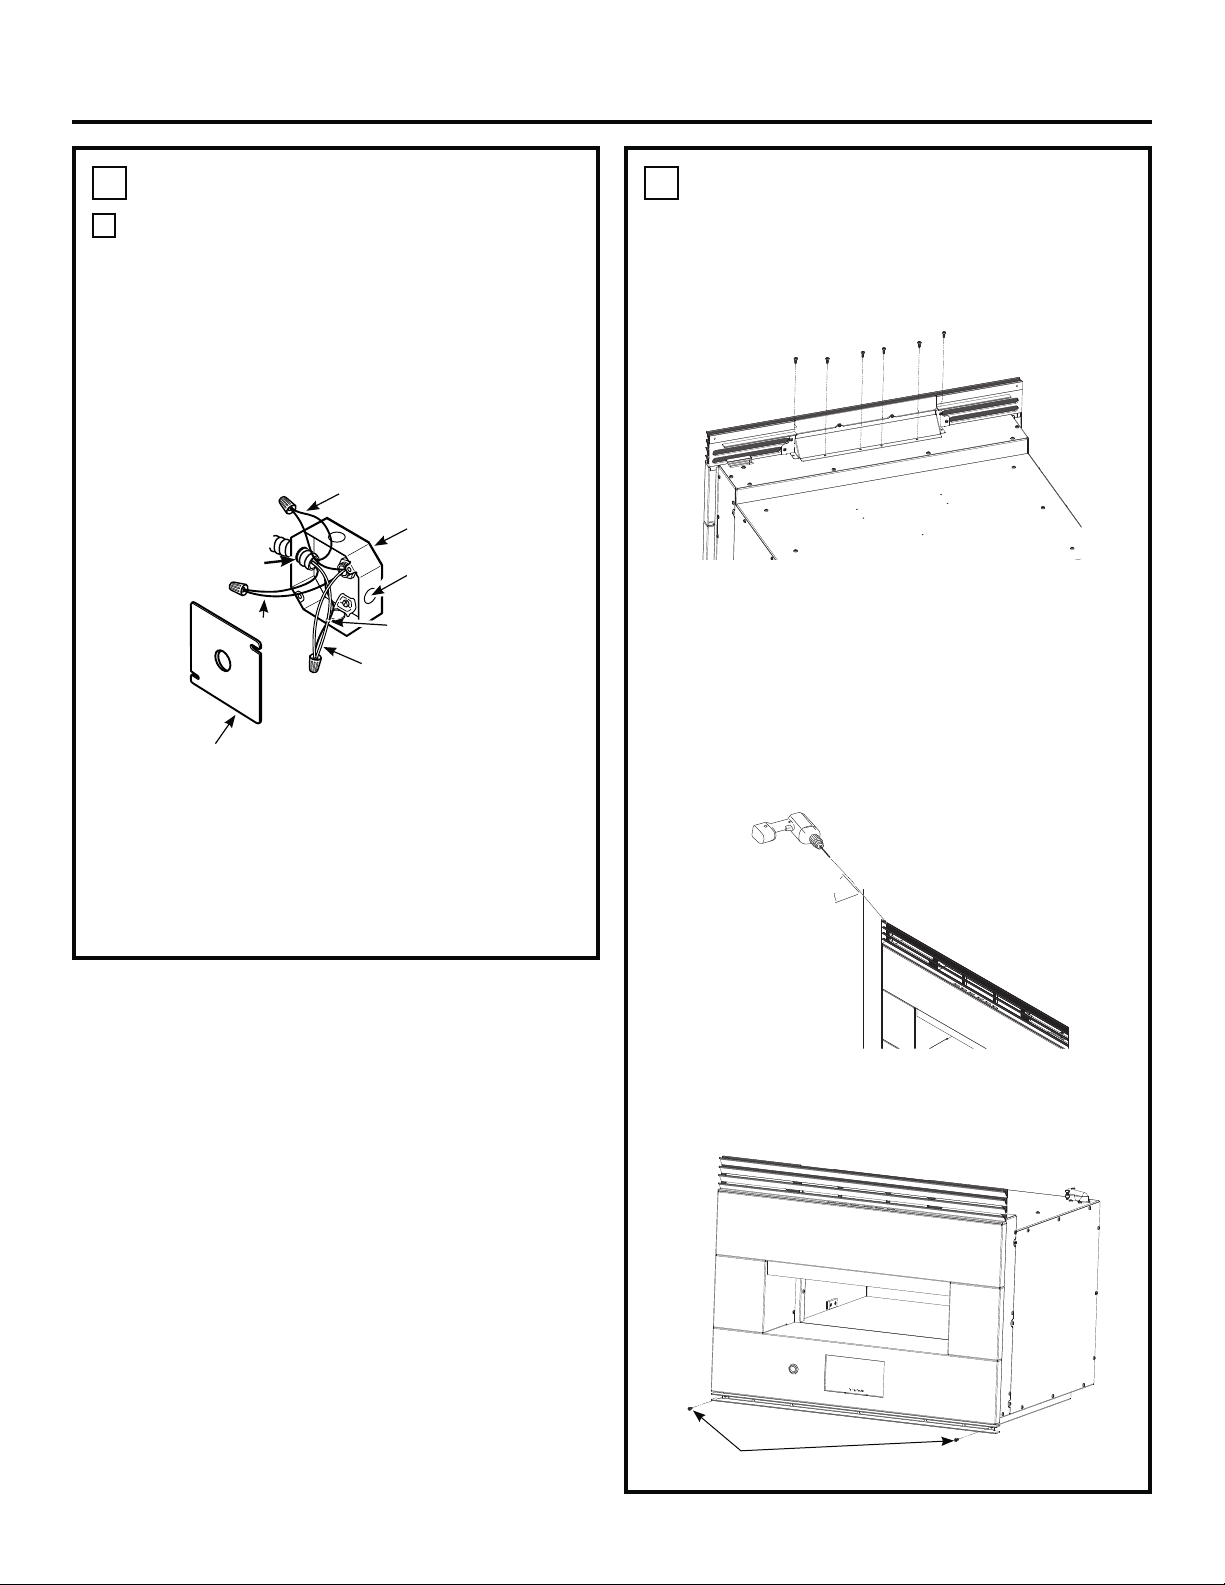
ELECTRICAL CONNECTIONS (Cont)
B
THREE-CONDUCTOR BRANCH CIRCUIT
CONNECTION
NOTE: If residence leads are aluminum conductors,
see WARNING on page 5.
When connecting to a three-conductor branch circuit,
if local codes permit:
1. Connect the oven ground conductor along with the
neutral (white) lead to the branch circuit neutral
(white or gray in color), using a wire nut.
2. Connect the oven red lead to the branch circuit red
lead and the oven black lead to the branch circuit
black lead in accordance with local codes, using
wire nuts.
3. Install proper strain relief clamp.
4. Install junction box cover.
Ground and
neutral wires (white)
Tape or Crimp
Neutral wire
connection
Black
Red
Branch
circuit
Alternate
knockout
Range
conduit
snaps
into box
Junction Box Cover
3
INSTALLING THE OVEN IN THE
CABINET
1. Before lifting oven into cabinet cutout, remove six
screws from top vent and attach top grille to top of
oven using the same screws as shown.
2. Lift oven into cabinet cutout using the bottom as a
grip. Do not lift by the oven opening.
3. Carefully slide the oven back into the cutout until
the top grille just touches the front face of the
cabinet. NOTE: Do not push too far or damage to
the top grille may occur.
4. Pre-drill top grille mounting holes into cabinet using
3/32” drill bit and the hole in the trim as a guide.
Install two 3/4” Philips screws.
5. After oven is installed in cabinet, align Lower Vent
Trim with holes on mounting brackets and install
using two 1/2” Torx screws.
45°
Screws
Loading ...
Loading ...
Loading ...