Loading ...
Loading ...
Loading ...
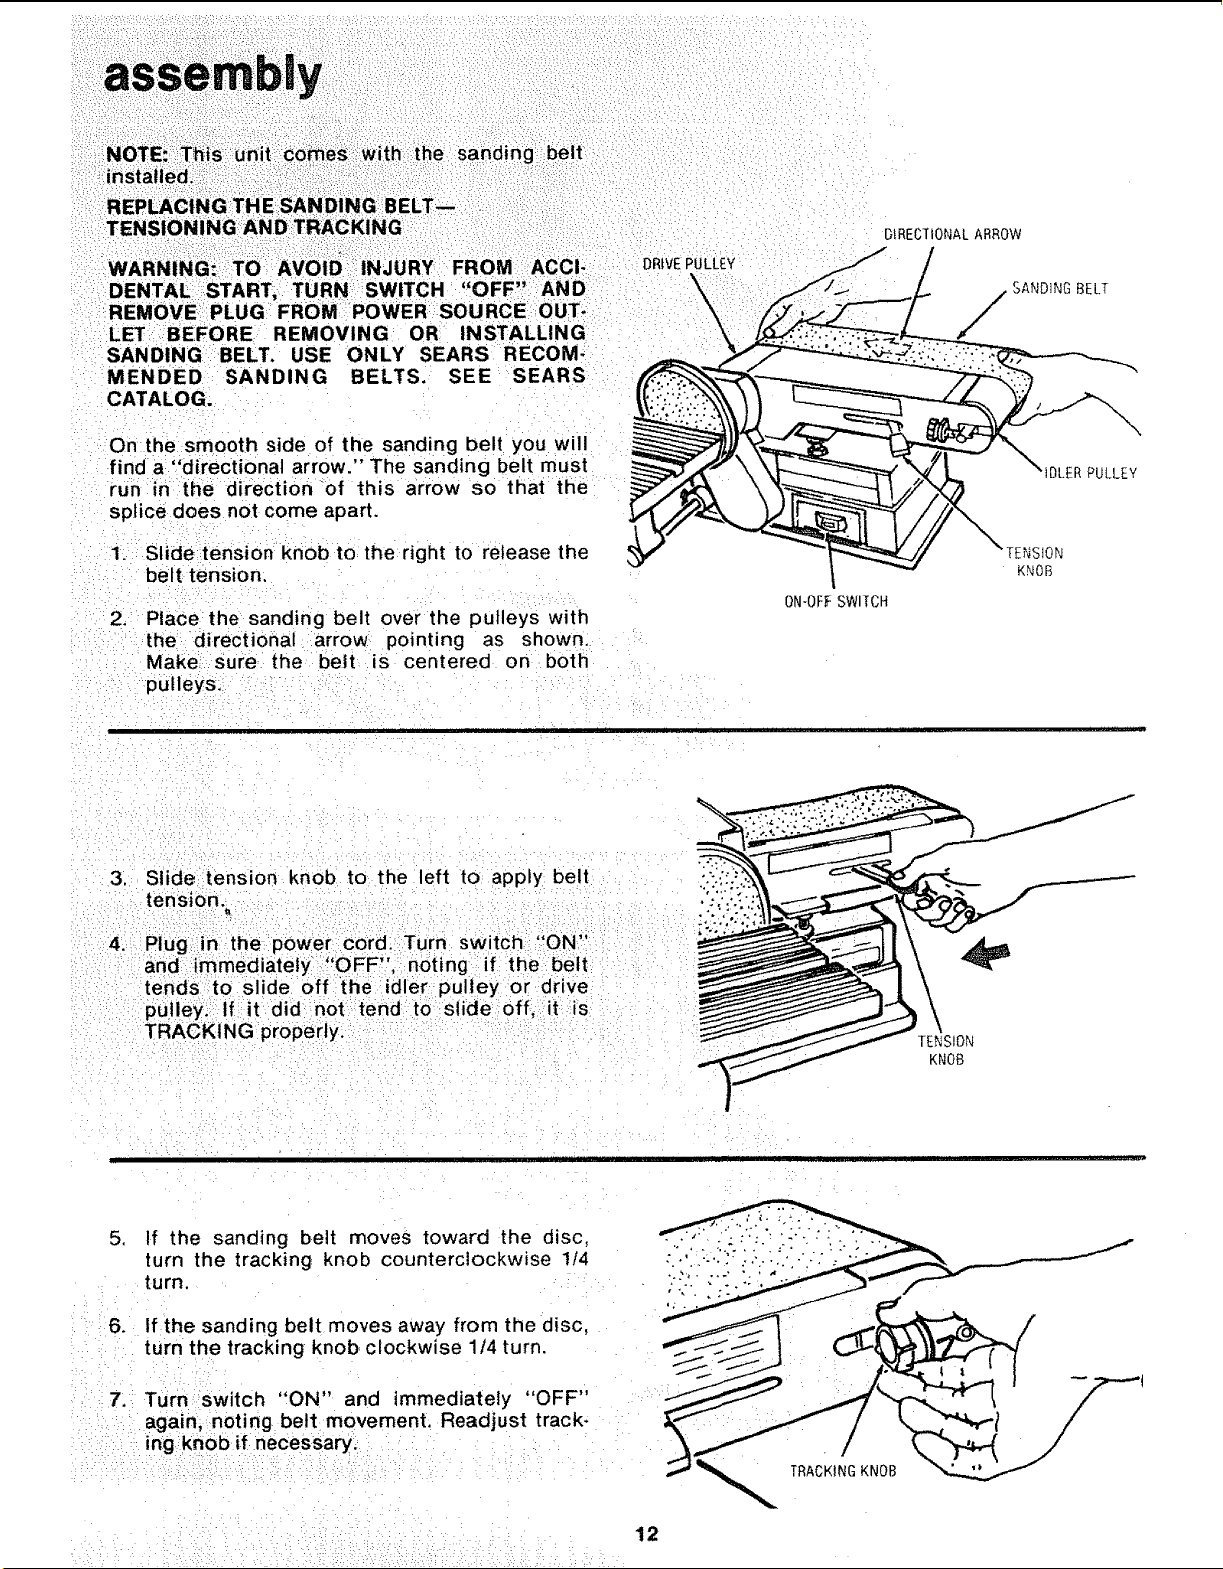
NOTE::,iT_islunit €0me_ :with:::the sanding belt
ins:taiied_:_: ::i:ii: _ .....
TENSIONING ANDTRACKING
DENTAL: START, I TURNSWITCH ,'OFF"_ AND \
REMOVE PLUG FROM POWER: SOURCE :OUT-:
:\
LET BEFORE REMOVING OR INSTALLING
SANDING BELT. USE ONLY SEARS RECOM-
MENDED SANDING BELTS. SEE SEARS
CATALOG.
Onthe smooth side of the sanding belt you will
find a "directional arrow." The sanding belt must
run in the direction-of this arrow so that the
splice does not come apart.
1. Stidetension knob to the right to release the
belt tension.
2. Place the sanding belt over the pulleys with
the directional arrow pointing as shown:
Make;sure the belt is centered on both
pulleys: ........
ON-OFF SWITCH
DiRECTiONAL ARROW
/
SANDING BELT
TEkIStON
KNOB
iDLERPUCLEY
,
.•
Stide tension knob to the left to apply belt
tension.,
Plug in the lpOwer cord:i_Turn switch "ON,
and immediately" I;'OFF', noting if the belt
tends to sl de off the :idler pulley or drive
pulley. :if it did not_i_end :to siide off, it!is "
TRACKING properly.
TENSION
KNOB
5. If the sanding belt moves toward the disc,
turn the tracking knob counterclockwise 1t4
turn.
6. If the sanding belt moves away from the disc,
turn the tracking knob clockwise 114 turn.
7.11Turn switch "ON" and immediately "OFF"
again, noting belt movement. Readjust track-
: : ing:knob if necessary_ : : .:
i
12
Loading ...
Loading ...
Loading ...