Loading ...
Loading ...
Loading ...
26
ADJUSTING THE TOP BURNER AND OVEN FLAME
Keep appliance area clear and free from combustible materials, gasoline, and
other flammable vapors and liquids. Do not obstruct the flow of air that is
necessary for combustion and ventilation.
Top Burner Valves
The top burners have orifices that are dedicated to the type of fuel to be used. These
orifices are not adjustable. They must be changed completely to convert from one
gas to the other. DO NOT DISCARD THE UNUSED ORIFICES. They should be saved in
order to convert the range back to its original fuel.
When converting the gas valves, the minimum flame adjustment screw must be
adjusted.
Please see the supplied screwdriver in the conversion kit along with the orifices. The
proper flame size is approximately ¼” obtained. – see adjustment procedure below.
The properly adjusted maximum flame is approximately ¾” high and has three distinct
cones; the kindling point, the dark blue center cone, and the outer mantel.
ADJUSTING THE TOP BURNER FLAME
1. Ensure the range has gas supply and power
2. Light the burner
3. Set the top burner valve to the minimum position
4. Remove the knob by pulling straight out
5. Turn the valve fully counter clockwise.
Then proceed to adjust the adjustment screw
counter clockwise for a smaller flame and clockwise
for a larger flame.
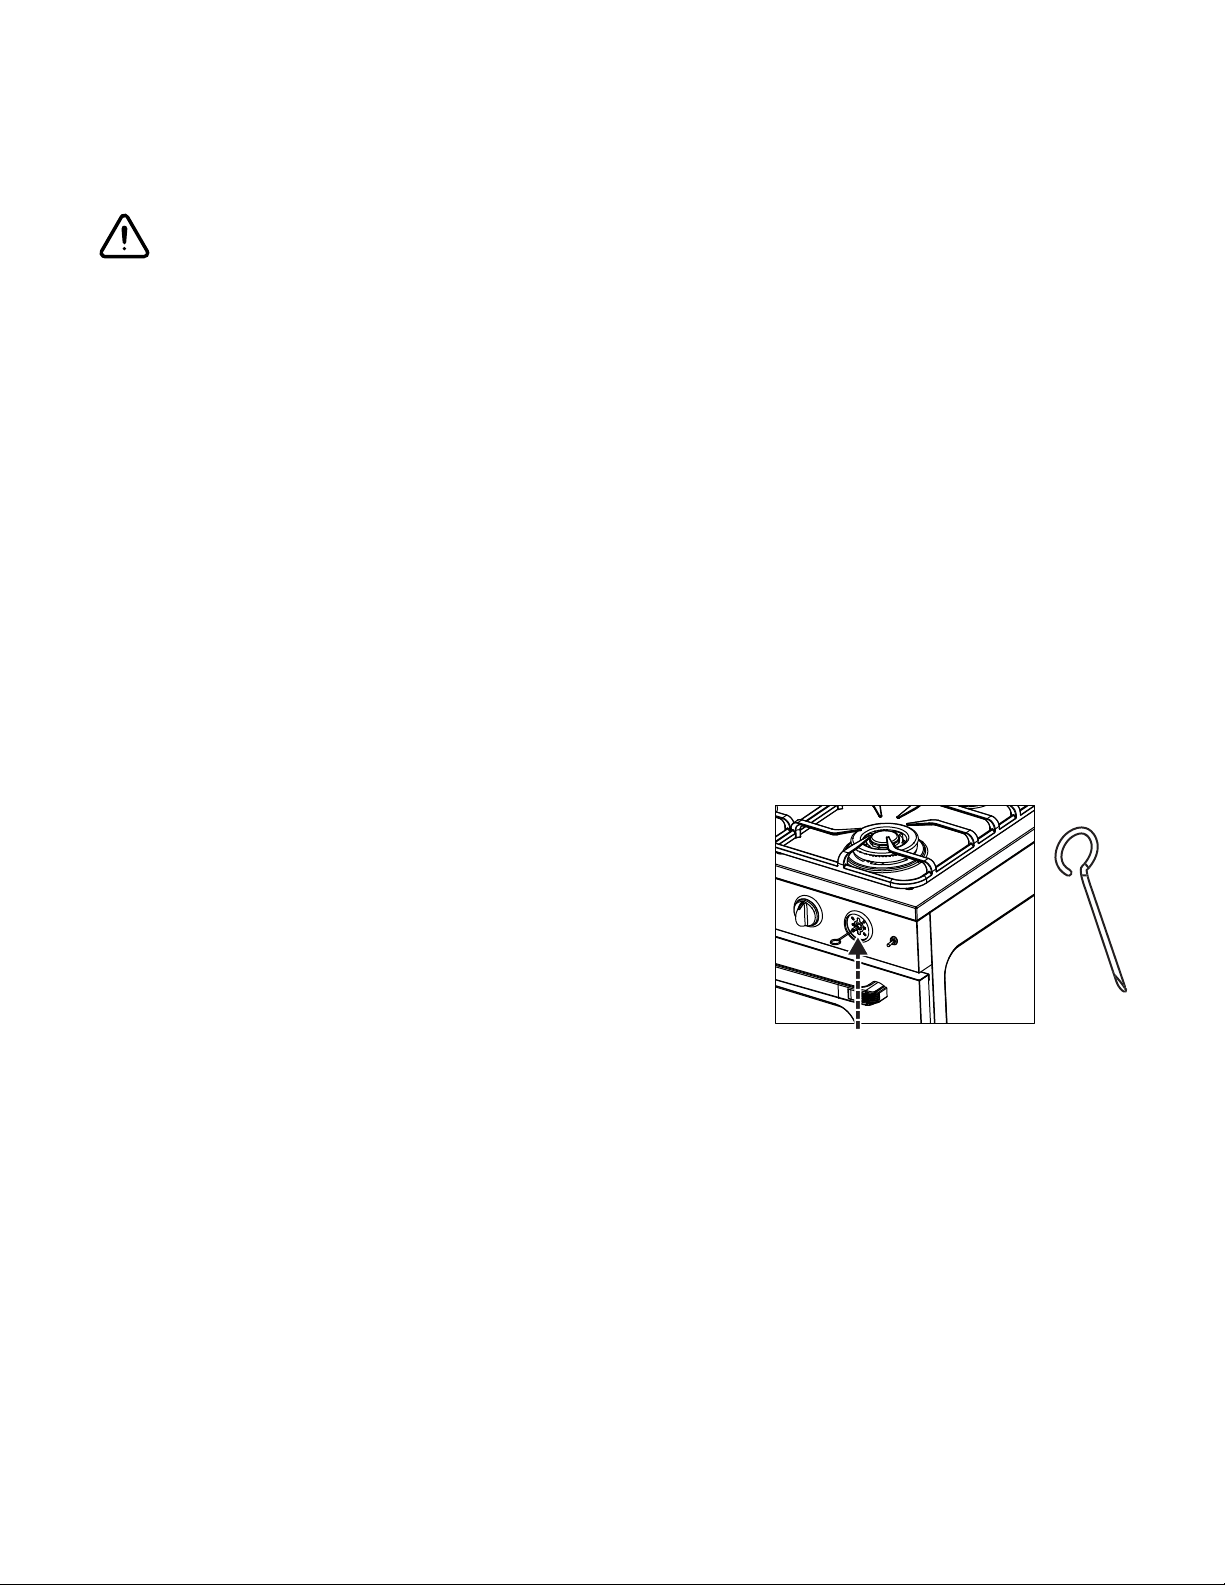
Adjustment: Minimum flame should be approx. ¼”
tall Orifice Location Adjustment location is inside the valve stem
6. Temporarily replace the lid, burners, burner caps and grates and recheck the flame.
Once complete, reassemble the control panel and the lid.
7. Replace the knob
8. Repeat for each of the other burners
FLAME HEIGHT ADJUSTMENT
Adjustment location is inside the valve stem
Loading ...
Loading ...
Loading ...