Loading ...
Loading ...
Loading ...
CUSTOMER RESPONSIBILITIES
CHECK FOR DAMAGED/WORN PARTS
The following damaged/worn parts should be referred to
your Sears Serv{ce Center,
NOTE: It is normal for a small amount of oil to appear
under the saw after engine stops Do not confuse this with
a leaking oil tank,.
= On/Stop Switch - ensure on/stop switch functions prop-
erly by moving the switch to the "stop" position and
assure that engine stops, then restart your engine and
continue.,
= Fuei Tank - discontinue use of chain saw if fuel tank
show signs of damage or leaks,
. Oil Tank - discontinue use o! chain saw ifoil tank shows
signs of damage or leaks.
= Chain Catcher - replace chain catcher if bent, cut, or
damaged in any way.
CLEAN UNIT AND LABELS
. Clean the unit using a damp cloth with a mild detergent
• Wipe off the unit with a clean dry cloth,
CLEAN AIR FILTER (Fig. 40)
A dirty air filter decreases the life and performance of the
engine and increases fuel consumption and harmful
emissions
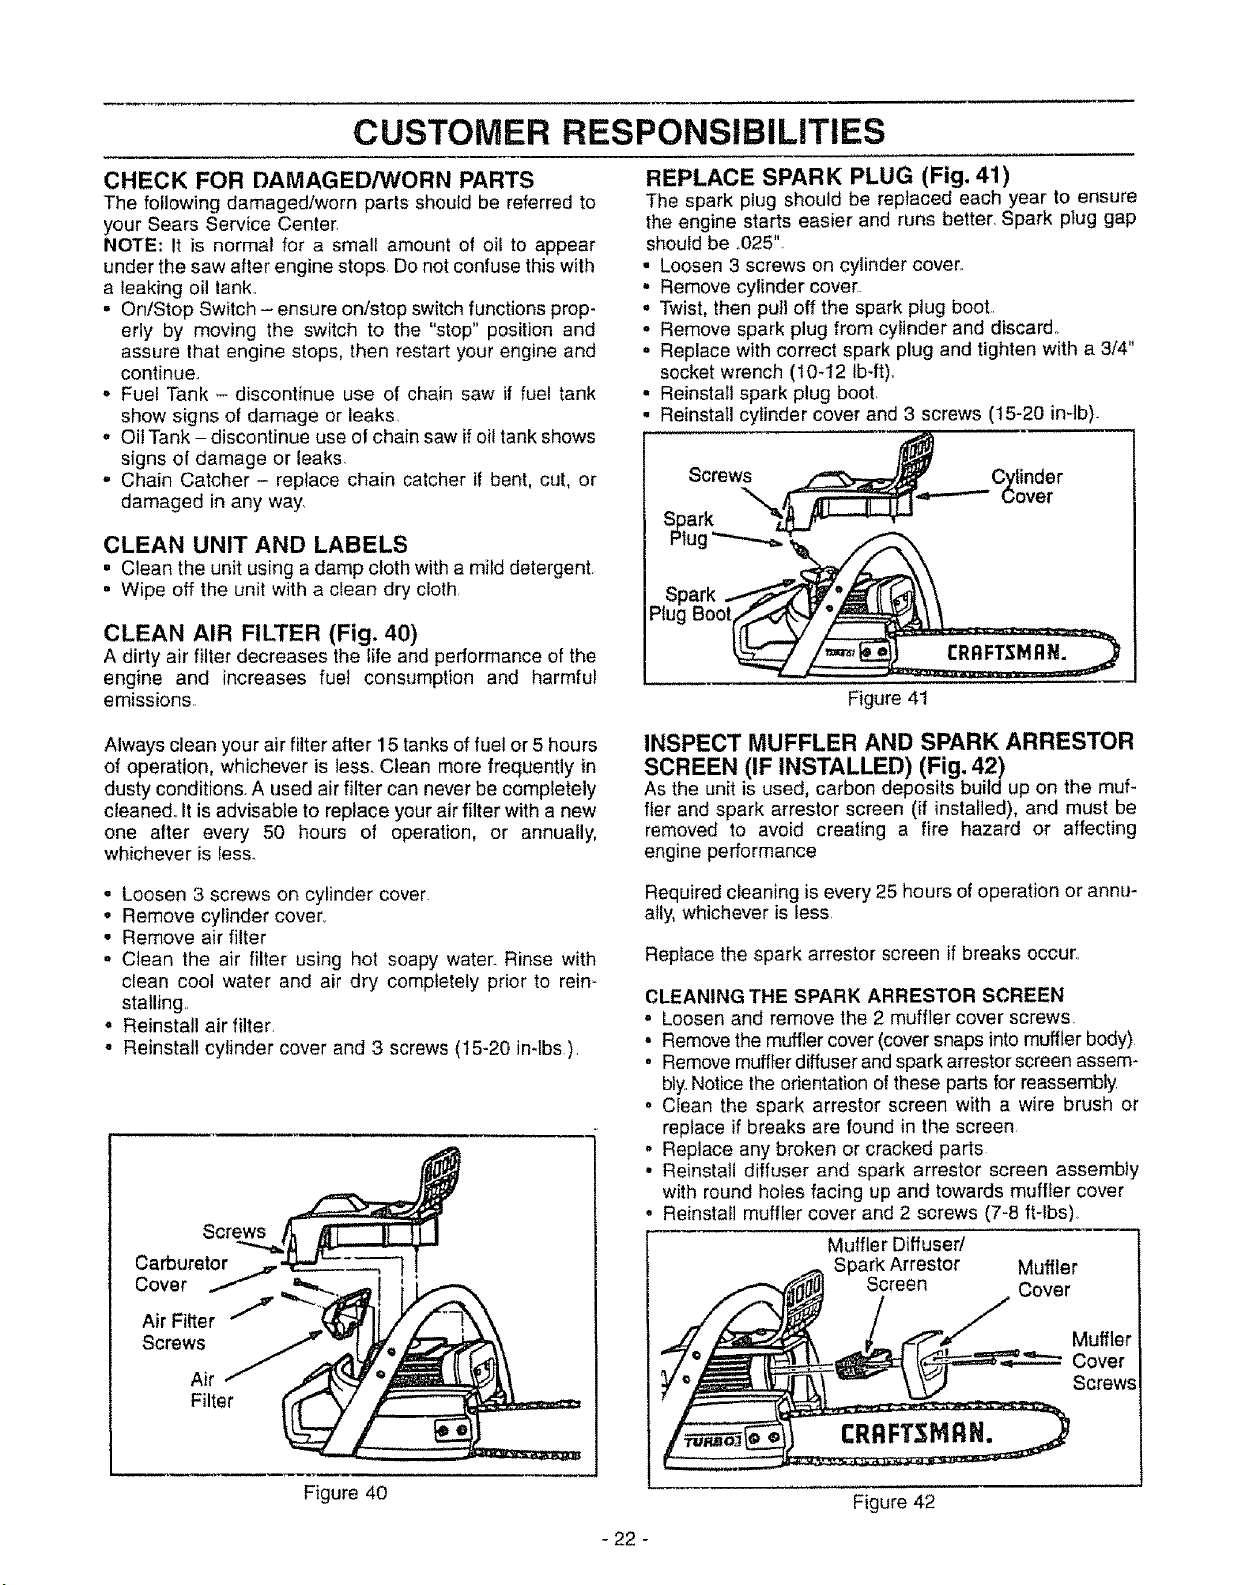
REPLACE SPARK PLUG (Fig. 41)
The spark plug should be replaced each year to ensure
the engine starts easier and runs better, Spark plug gap
should be .025".
• Loosen 3 screws on cylinder cover.
• Remove cylinder cover
o Twist, then pull off the spark plug boot..
• Remove spark plug from cytinder and discard.
• Replace with correct spark plug and tighten with a 3/4"
socket wrench (10-12 Ib-ft),,
• Reinstall spark plug boot,
• Reinstall cylinder cover and 3 screws (15-20 in-lb).
Screws Cylinder
_over
CRnFT_;MRN.
Figure 41
Always clean your air filter after 15 tanks of fuel or 5 hours
of operation, whichever is less. Clean more frequently in
dusty conditions. A used air filter can never be completely
cleaned,, it is advisable to replace your air filter with a new
one alter every 50 hours of operation, or annually,
whichever is less.
INSPECT MUFFLER AND SPARK ARRESTOR
SCREEN (IF INSTALLED) (Fig. 42)
As the unit is used, carbon deposits build up on the muf-
fler and spark arrestor screen (if installed), and must be
removed to avoid creating a fire hazard or affecting
engine performance
. Loosen 3 screws on cylinder cover.
° Remove cylinder cover,
• Remove air filter
. Clean the air filter using hot soapy water. Rinse with
clean cool water and air dry completely prior to rein-
stalling.,
• Reinstall air filter,
. Reinstall cylinder cover and 3 screws (15-20 in-tbs).
Screws
Carburetor .._,
Cover /
Air Filter
Screws
Air
Filter
Required cleaning is every 25 hours ofoperation or annu-
ally, whichever is less
Replace the spark arrestor screen if breaks occur.,
CLEANING THE SPARK ARRESTOR SCREEN
. Loosen and remove the 2 muffler cover screws
• Remove the muffler cover (cover snaps intomuffler body)
= Remove muffler diffuser and spark arrestor screen assem-
bly,Notice the orientation of these parts for reassembly
• Clean the spark arrestor screen with a wire brush or
replace if breaks are found in the screen
• Replace any broken or cracked parts
• Reinstall diffuser and spark arrestor screen assembly
with round holes facing up and towards muffler cover
• Reinstall muffler cover and 2 screws (7-8 ft-lbs),
Muffler Diffuser/
Spark Arrestor Muffler
Screen Cover
Muffler
Cover
Screws
Figure 40
- 22 -
Figure 42
Loading ...
Loading ...
Loading ...