Loading ...
Loading ...
Loading ...
CUSTOMER RESPONSiBILITiES
SHARPENING CHAIN
(Fig. 31, 32, 33, 34, 35, 36 & 37)
_ ARNING
IMPROPER CHAIN SHARPENING TECH-
NIQUES AND!OR DEPTH GAUGE MAIN-
TENANCE WILL INCREASE THE CHANCE
OF KICKBACK WHICH CAN RESULT IN
SERIOUS INJURY,
ALWAYS WEAR GLOVES WHEN HAN-
DLING THE CHAIN,, THE CHAIN CAN BE
SHARP ENOUGH TO CUT YOU EVEN
THOUGH IT IS TOO DLILLTO CUT WOOD°
CHAIN TERMINOLOGY & PART NAMES
Preset TheStrap
Left Hand Cutter
__='_'_Drive Link
Right Hanc_Cut_er'-_ _"
Guard Tie Strap
CHAIN CUTTER PART NAMES
Top Plate -T....._=_Guitet
Side Plate _j-_,_,_Depu_n e
Heet.-_. _},_
Toe _,,, ,# _io_et
CHAIN "PITCH" CHAIN "GAUGE"
This distance Thickness o! boIIorn _
divided by two section of drive tink
Pitch refers to chain mea-
surement A chain's pitch
is the distance between
any three of its riveis
divided by two.
Gauge refers to thickness
of that portion of drive link
which fits into saw bar
groove
Tools required:
• Flat file
• .025 depth gauge
o 4.Smm round file & file holder
Conditions which indicate the need for chain sharpening:
, Reduction in size of wood chips The size of the wood
chip will decrease as the chain gets duller until it
becomes more like a powder than a chip, Note that
dead or rotted wood will no! produce a good chip.,
• Saw cuts to one side or at an angle.
° Saw requires excessive force to cut.
• Noticeable loss of cutting speed.
Sharpening instructions:
• Move on/stop switch to the "stop" position.
• Check chain for proper tension. Adjust chain tension if
necessary. (See Chain Tension/Adjustment).
• Check and Iower depth gauges before sharpening cut-
ters.
• Depth gauges should be checked every third sharpen-
ing.When cutting frozen wood the depth gauges should
be checked each time you sharpen the chain.
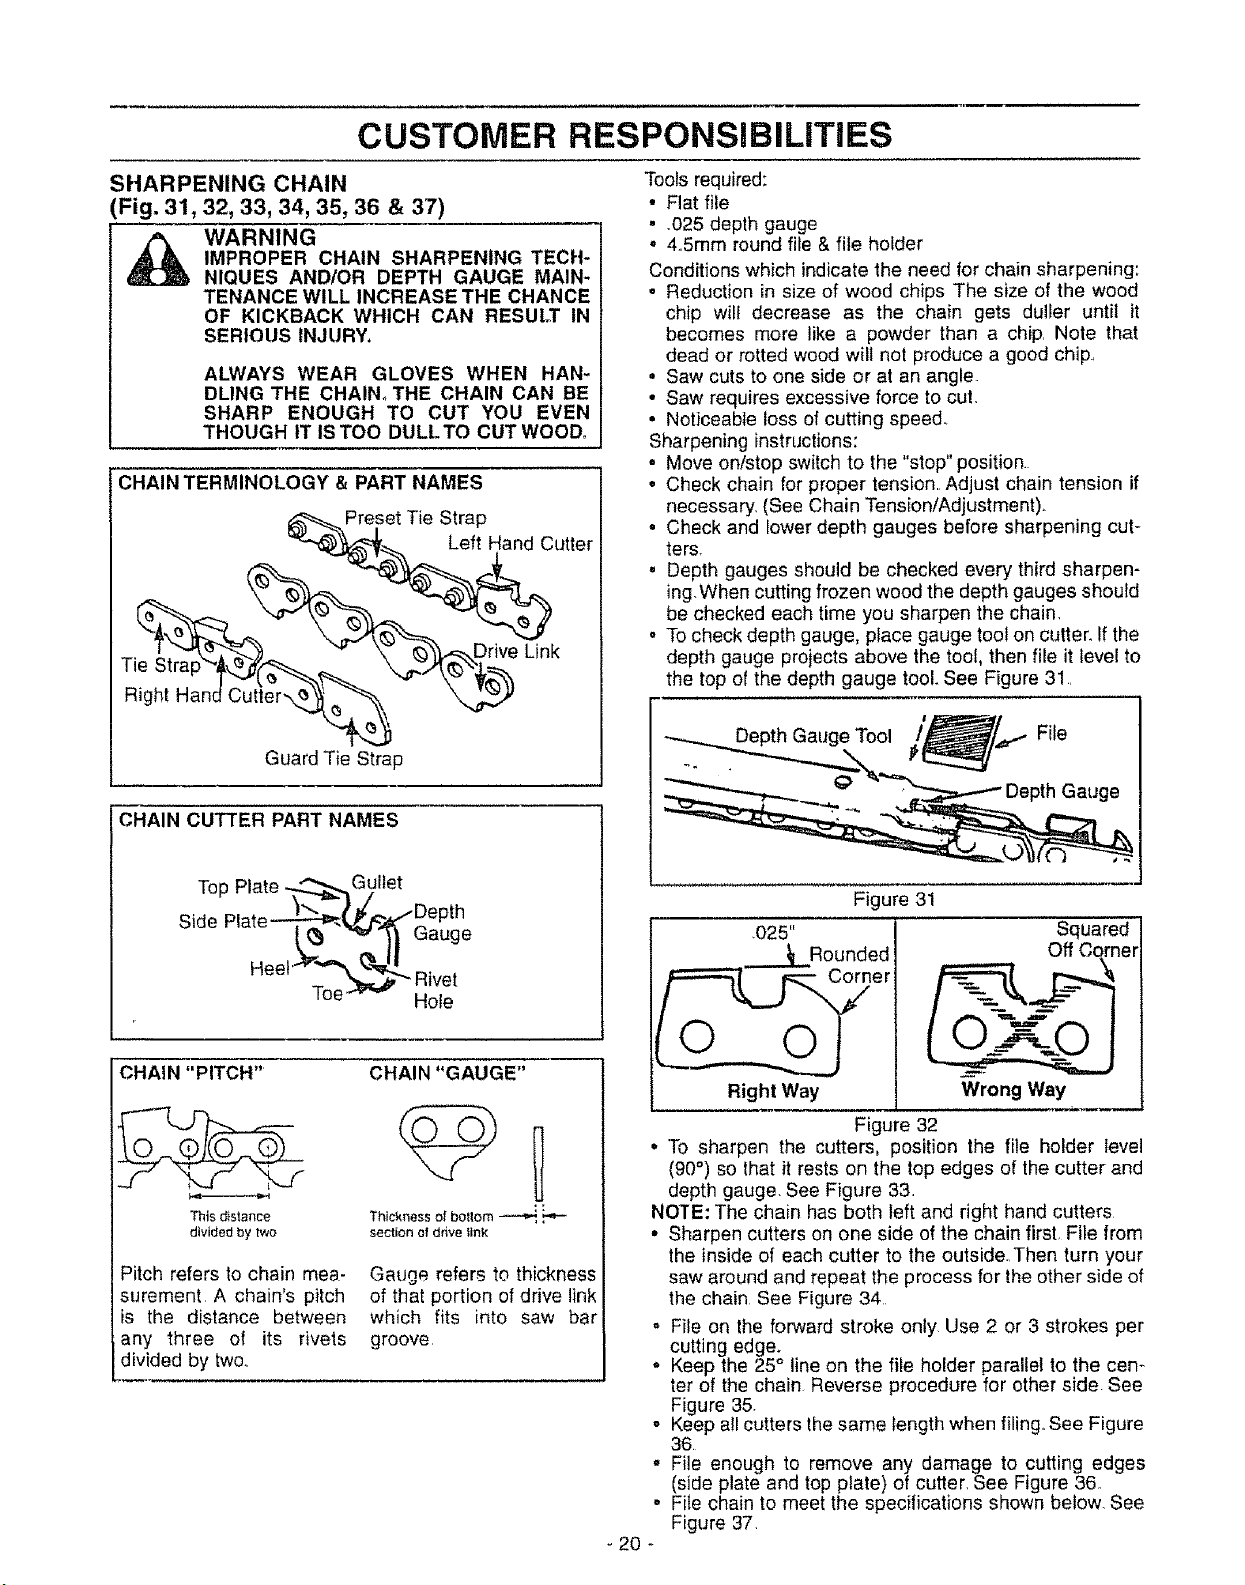
• To check depth gauge, place gauge tool on cutter. If the
depth gauge projects above the tool, then file it level to
the top of the depth gauge tool. See Figure 31.
o
o
o
- 20 -
,025"
Right Way
Figure 31
Squared
Off Corner
Wrong Way
Figure 32
• To sharpen the cutters, position the file holder level
(90°) so that it rests on the top edges of the cutter and
depth gauge. See Figure 33.
NOTE: The chain has both left and right hand cutters
• Sharpen cutters on one side of the chain first. File from
the inside of each cutter to the outside. Then turn your
saw around and repeat the process for the other side of
the chain See Figure 34
= File on the forward stroke only Use 2 or 3 strokes per
cutting edge.
o Keep the 25° lineon the file holder parallel to the cen-
ter of the chain Reverse procedure for other side See
Figure 35.
Keep all cutters thesame length when filing. See Figure
36
File enough to remove any damage to cutting edges
(side plate and top plate) of cutter. See Figure 36
File chain to meet the specifications shown below. See
Figure 37.
Loading ...
Loading ...
Loading ...