Loading ...
Loading ...
Loading ...
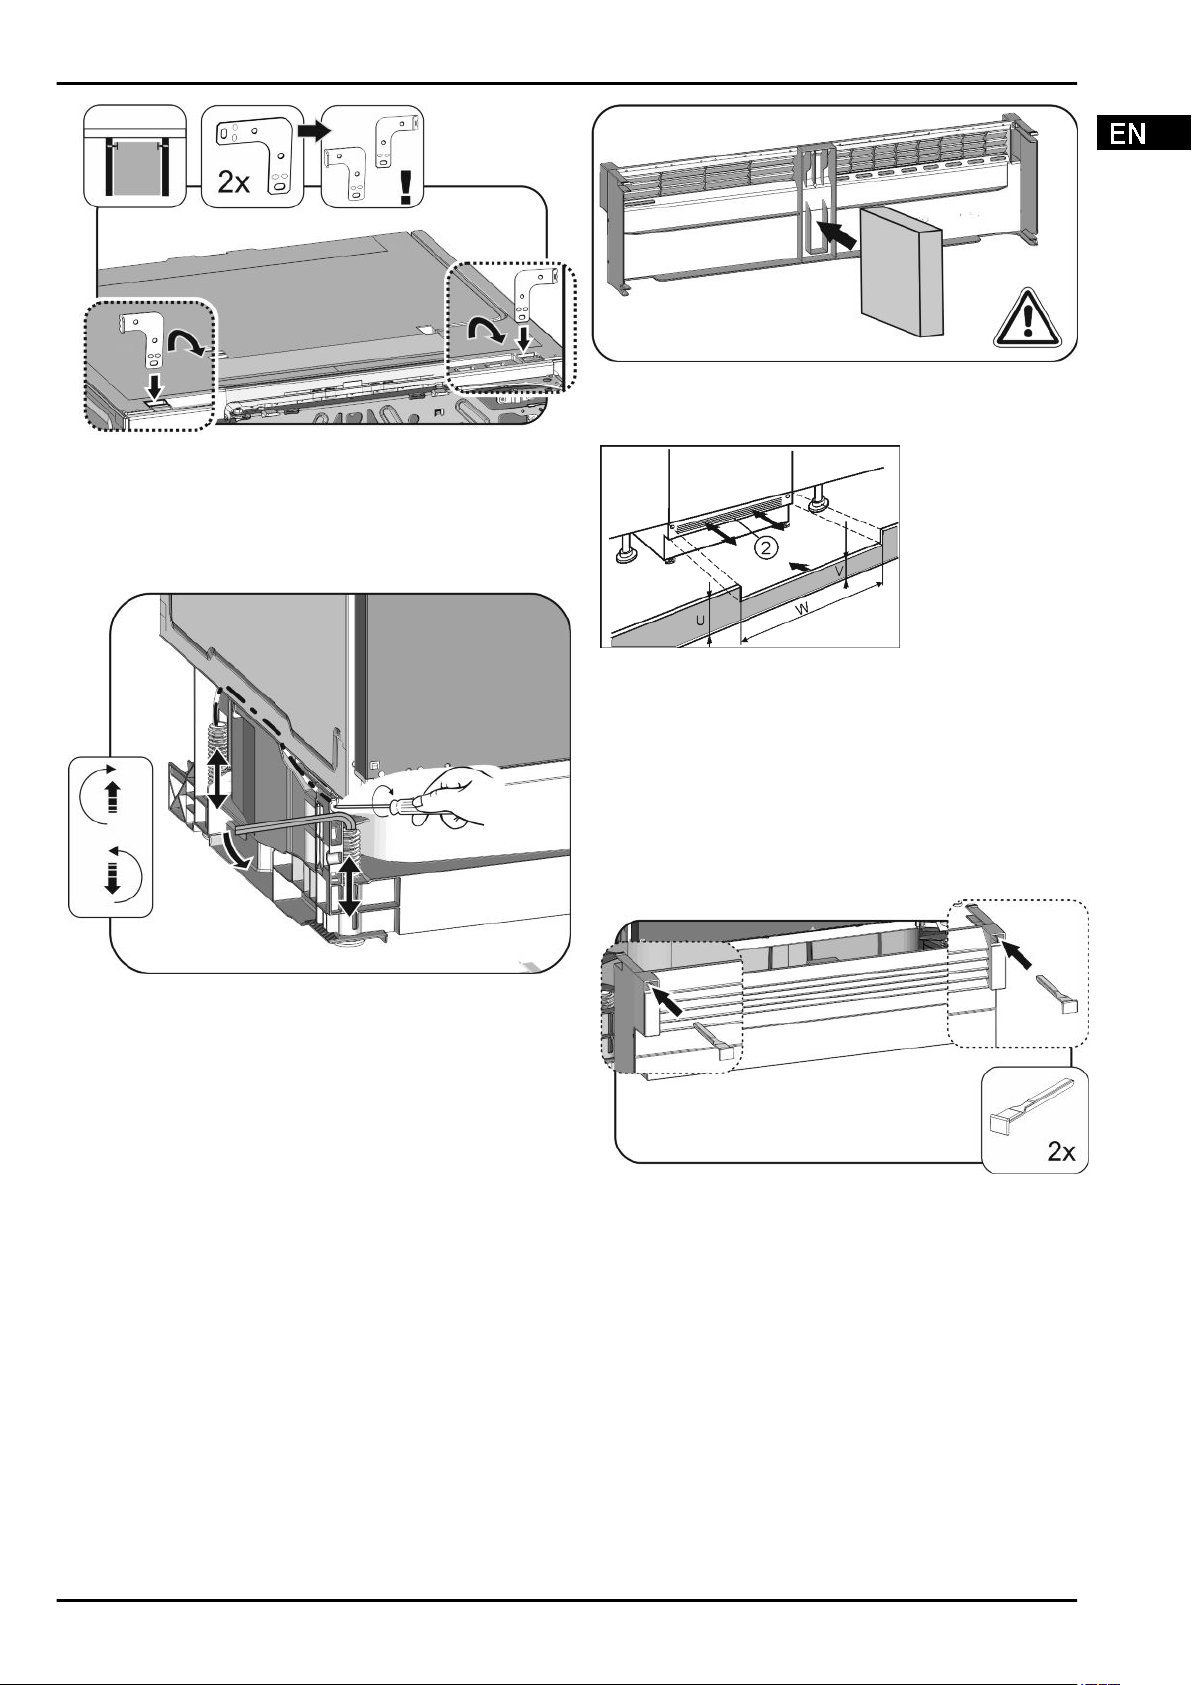
Fig. 10
u
Bend both brackets at one end before installation. Insert the
straight edge into the holder on the top of the unit and bend
towards the front.
u
Slide the unit into the recess and level, see Levelling the
appliance.
Levelling the appliance
Fig. 11
u
Unscrew the rear adjusting feet using a screwdriver and
undo the front adjusting feet using a no. 8 Allen key alter-
nately until the unit sits just under the worktop.
u
Use a spirit level to level the unit.
w
The gap from the front edge of the cabinet wall to the appli-
ance should be 41.5 mm on both sides.
w
Should there be no unit side wall, align it with the work top.
For units with door stop components (knobs, sealing
lips etc.):
u
Deduct the extra dimension (depth of the door stop compo-
nents) from the 41.5 mm depth of insertion.
u
Unscrew the rear adjusting feet using a screwdriver and
undo the front adjusting feet using a no. 8 Allen key (if the
adjusting feet are retracted) or a screwdriver (if the adjusting
feet are extended) alternately as far as they will go. The
maximum adjustment range is 60 mm.
w
The appliance is aligned upright.
w
The appliance is slightly braced between the floor and the
work top.
Fig. 12
u
Place the foam pad in the plinth panel – this is essential for
separating air flows!
Fig. 13
u
Fit the plinth panel (2) without securing.
u
Position the unit door and the unit plinth panel for testing.
u
If plinth panel (2) is visible, pull it forward until the front edge
of the ventilation grid and the unit plinth panel are in line.
-or-
u
If the plinth panel (2) is hidden, push it right back.
u
Ensure that the ventilation slots are completely free: If
necessary, cut some off the height of the unit plinth panel
(U).
w
Adjust the bar height (V) under the plinth panel (2) along the
recess width (W).
Fig. 14
u
Fit and secure the plinth panel: Hold the plinth panel and
insert the catch.
u
Fix the unit plinth panel.
To secure appliance in the recess:
Putting into operation
* Depending on model and options 7
Loading ...
Loading ...
Loading ...