Loading ...
Loading ...
Loading ...
6
Settings
107
4 Press E.
5 Press F.
The screen of Step 2 reappears.
Repeat Steps 2 to 5.
6 Press F twice.
t Memo
• You can check the functions assigned to the buttons while the
Guide Display (p.45) is shown.
• You can assign the same function to both X and Y.
• When [AE Lock], [One Push File Format], [Wi-Fi], [Night
Vision LCD Display], or [Electronic Level] is assigned to a
button, pressing the button makes a beep sound. To disable
the beep sound, change the sound setting for each function
in [Sound Effects] of the D1 menu. (p.31)
You can temporarily change the file format by pressing X or
Y during shooting. By default, [One Push File Format] is
assigned to X.
Select the file format to change to when X or Y is pressed
for each [File Format] setting.
1 Set [Fx1 Button] or [Fx2 Button] to [One Push
File Format] in Step 3 of “Setting the Button
Operation” (p.106).
2 Select Z or Y for [Cancel after 1 shot].
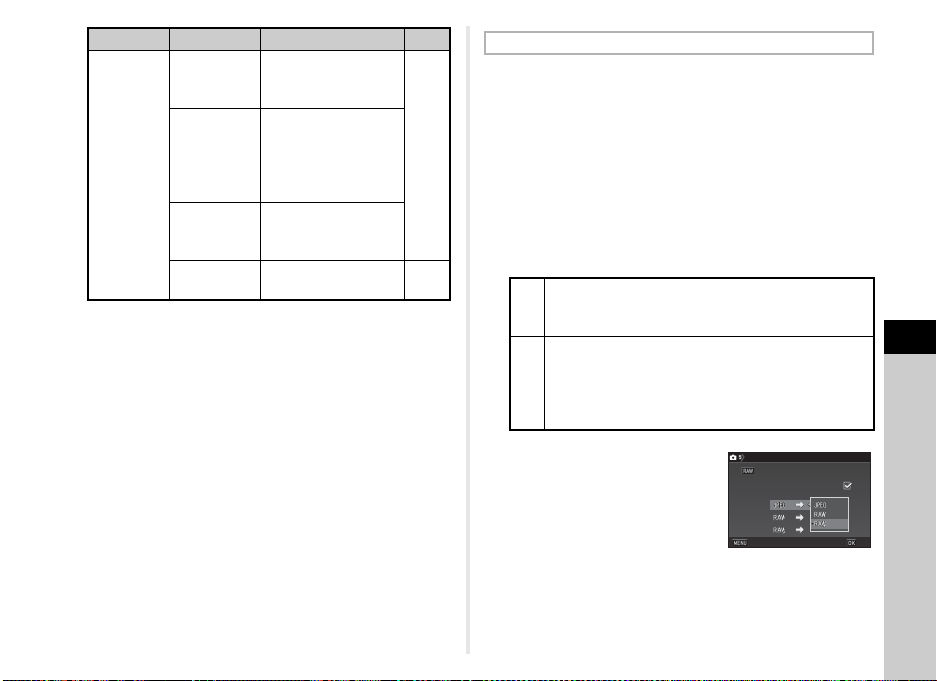
3 Select the file format when
X or Y is pressed.
The left side is the [File Format]
setting and the right side is the
changed file format when X or
Y is pressed.
4 Press F three times.
The camera returns to standby mode.
AF/AE-L
Button
Enable AF1
Autofocus is
performed when
f is pressed.
p.61Enable AF2
Autofocus is
performed when
f is pressed. Half
press of 0 is
disabled.
Cancel AF
While f is
pressed, half press of
0 is disabled.
AE Lock
Locks the exposure
setting.
p.53
Setting Function Page
Setting the One Push File Format
Z
The recording format returns to the [File Format]
setting of [Image Capture Settings] in the A2 menu
after a picture is taken.
Y
The setting is retained until any of the following
operations is performed:
• When X or Y is pressed again
• When 3, F, or G is pressed, or when the
mode dial or main switch is turned
Fx1 Button
Fx1 Button
Cancel after 1 shot
Cancel after 1 shot
One Push File Format
One Push File Format
Cancel
Cancel
OK
OK
Loading ...
Loading ...
Loading ...