Loading ...
Loading ...
Loading ...
Sears recommends the following accessories
ITEM CAT. NO
Work Bench ...................... See Catalog
Drill Chuck 1/2" Capacity with
No, 1 M,T, Shank ................ See Catalog
Screw Center with No. 1 M.T. Shank ., See Catalog
Batl Bearing Center with
No. 1 M,T, Shank ................ See Catalog
60oCenter with No. 1 M,T, Shank ..... See Catalog
Face Plate, 4" Diaowith 3/4"-16 Thread
9 Holes ............................ 9-2489
Copy Crafter ......................... 9-24917
Sears may recommend other accessories not listed in
the manual.
See your nearest Sears store for other accessories.
ITEM CAT. NO.
Turning Tools ..................... See Catalog
Draw Bolt with I/4"-20 Threads ....... See Catalog
Power Tool Know-How Handbook ........ 9-29114
Bowl Turning Tool Rest ................ 9-24903
Face Plate 6" with 3/4"-16 Thread
6 holes ........................... 9-24904
Face Plate 4" dia. with 3/4"-16 Thread
Cast Iron, 6 holes ................ See Catalog
Do not use any other accessory unless you have re-
ceived and read complete instructions for its use,
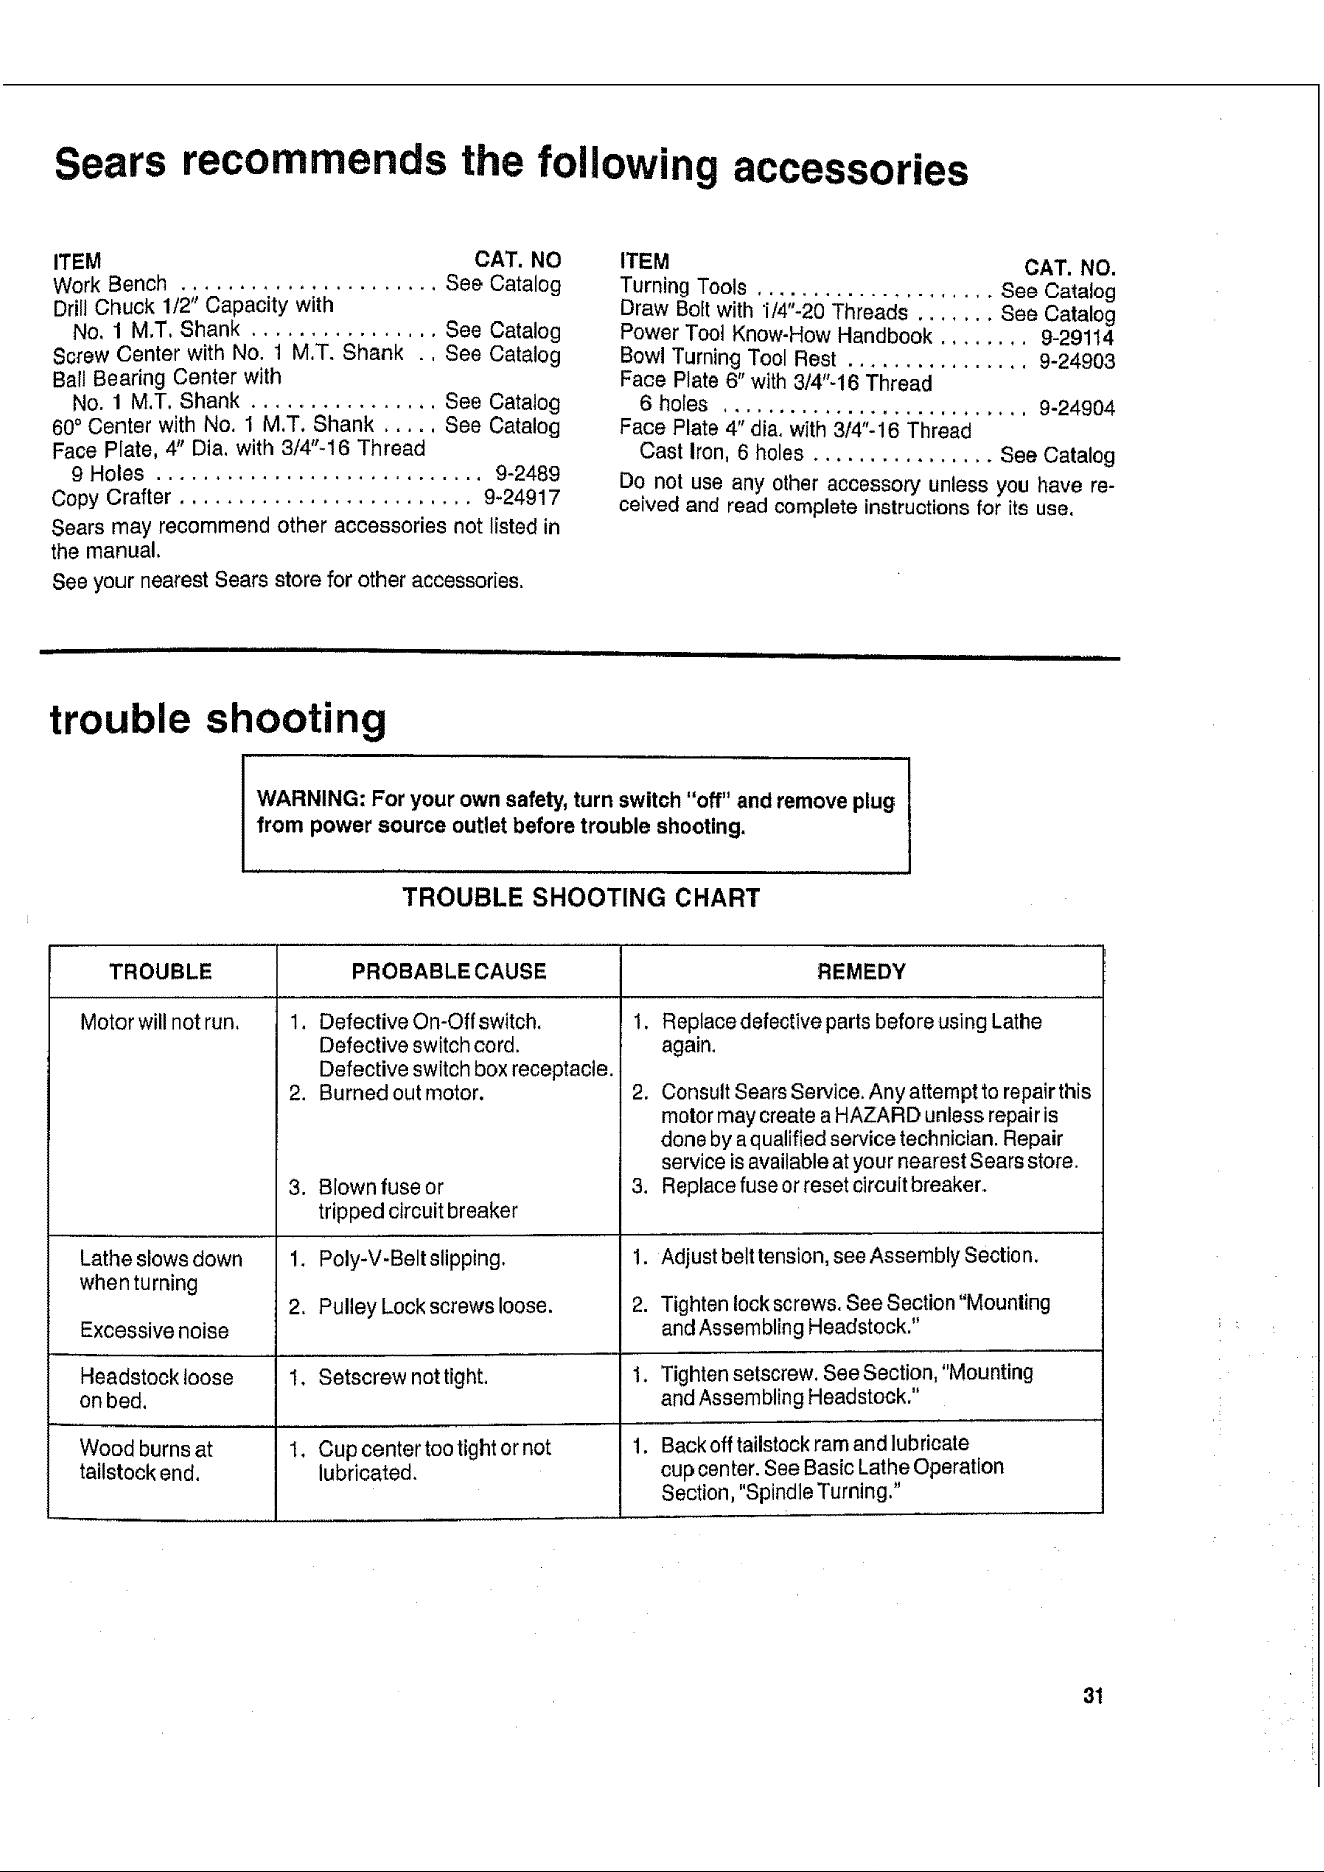
trouble shooting
WARNING: For your own safety, turn switch "off" and remove plug
from power source outlet before trouble shooting.
TROUBLE SHOOTING CHART
TROUBLE PROBABLE CAUSE REMEDY
Motor willnot run. 1. 1.
Lathe slows down
when turning
Excessive noise
Headstock loose
on bed,
Wood burns at
tailstock end.
,
,
.
2.
Defective On-Off switch.
Defective switch cord.
Defective switch box receptacle.
Burned out motor.
Blown fuse or
tripped circuitbreaker
Poly-V-Belt slipping,
Pulley Lock screws loose.
Setscrew not tight.
Cup center too tight or not
lubricated.
Replace defective parts before usingLathe
again.
2. Consult Sears Service. Any attemptto repairthis
motor may create a HAZARD unless repair is
done by aqualified service technician. Repair
service is available at your nearest Sears store.
3. Replace fuse or reset circuit breaker.
1. Adjust belt tension, see Assembly Section.
2. Tighten lock screws. See Section "Mounling
and Assembling Headstock."
1, Tighten setscrew, See Section, "Mounting
and Assembling Headstock."
1. Back off tailstock ram and lubricate
cup center. See Basic Lathe Operation
Section, "Spindle Turning."
31
Loading ...
Loading ...
Loading ...