Loading ...
Loading ...
Loading ...
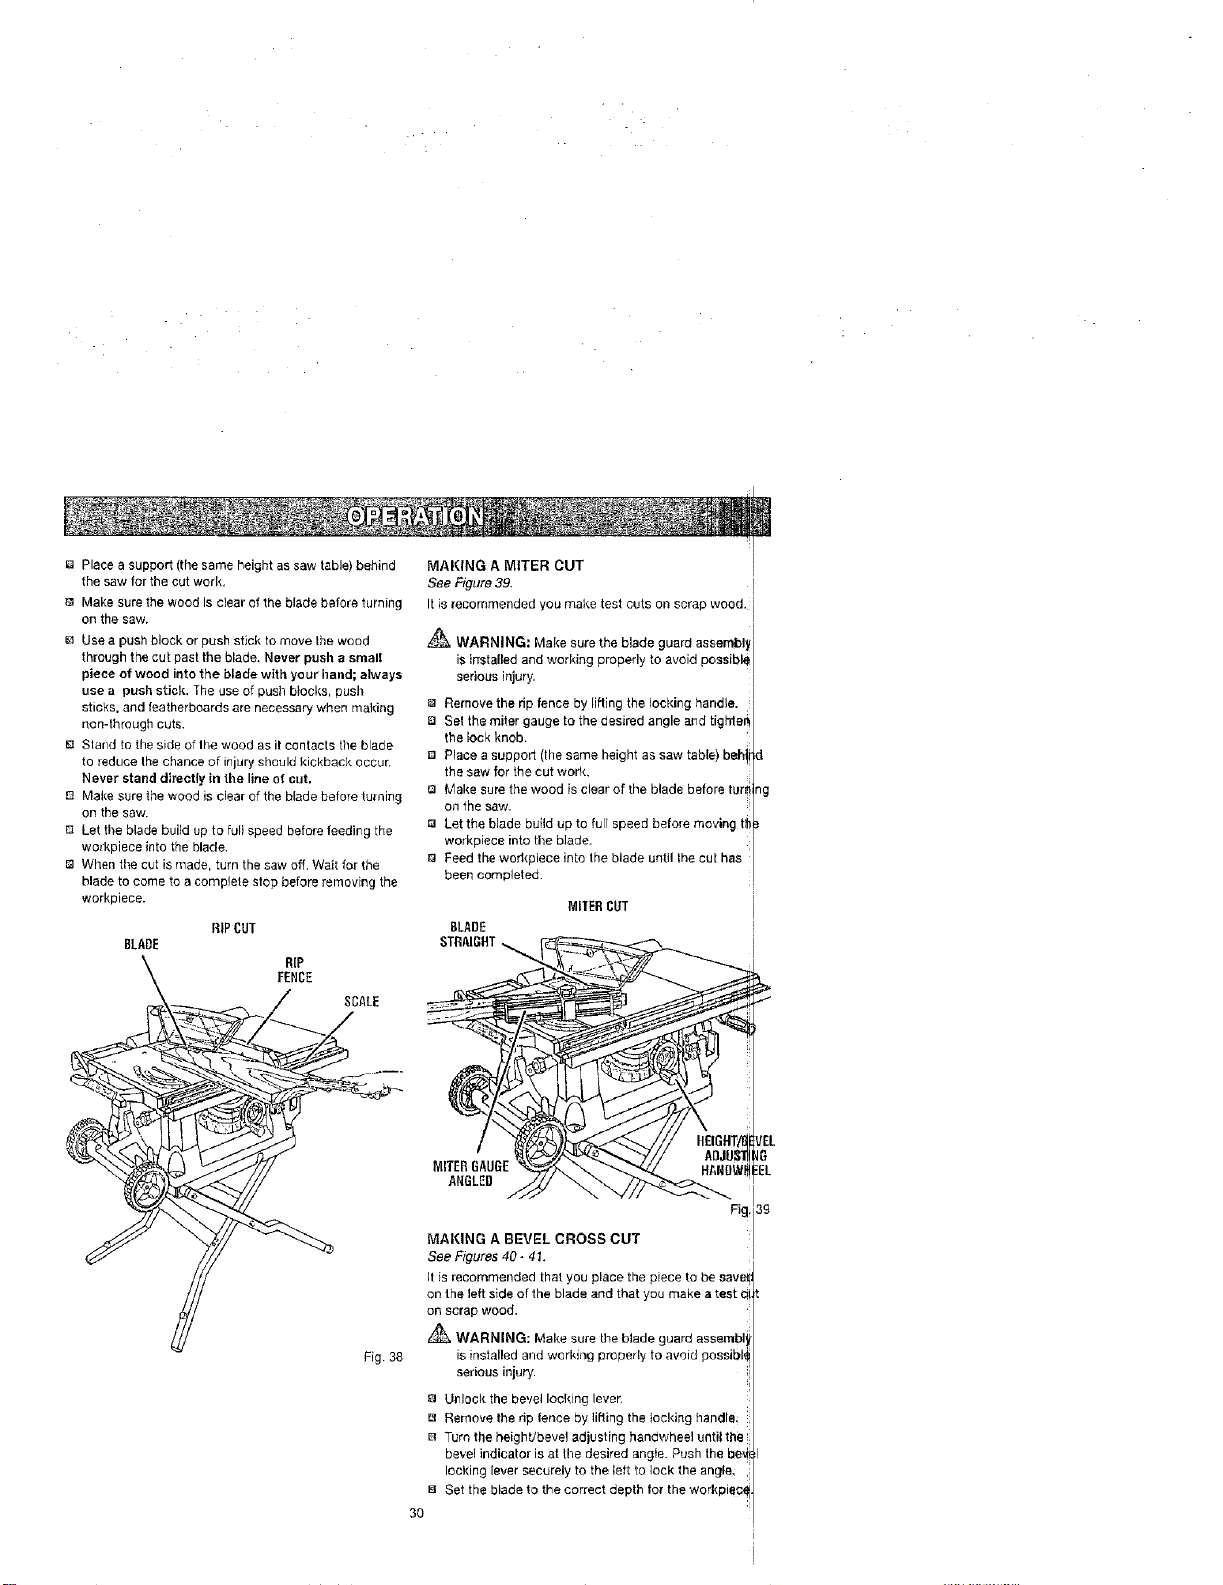
Placeasupport(thesameheightassawtable)behind
thesawforthecutwork,
MakesurethewoodIscIearofthebladebeforeturning
onthesaw.
Useapushblockorpushsticktomovethewood
throughthecutpasttheblade.Neverpushasmall
pieceofweedintothebladewithyourhand;always
useapushstick.Theuseofpushblocks,push
sticks,andfeatherboardsarenecessarywhenmaking
non-throughcuts.
BStarldtothesideofIhewoodasitcontactstheblade
toreducethechanceofinjuryshouldkickbackoccur.
Neverstanddirectlyinthelineofcut.
Makesurethewoodisclearofthebladebeforefuming
onthesaw.
[3Letthebladebuildup to fult speed before feeding the
workplace into the blade.
When the cut is made, turn the saw off. Wait for the
blade to come to a complete stop before removing the
workplace.
RiPCUT
BLADE
RIP
FENCE
MAKING A MITER CUT
See Figure 39. I
It is recommended you make test cuts on scrap wood. =
WARNING; Make sure the blade guard assembly _
is installed and woddng properly to avoid poasible
serious injury.
Remove the rip fence by lifting the locking handle.
ia Set the miter gauge to the desired angle arid tigt'rle_
the lock knob.
B Place a support (the same height as saw table}, behi
the saw for the cut work.
Q Make sure the wood is clear of the blade before tLurl
on the saw.
la Let the Made build up to full speed before moving fl
workpieee into tile blade.
13 Feed the workplace into the blade until the cut has
been completed.
MILERCUT
8LADE
STRAIGHT_
d
_g
Fig. 38
Ig
MITERGAUGE IEL
ANGLED
_g,3g
MAKING A BEVEL CROSS CUT
See Figures 40- 41.
It is recommended that you place the piece to be save,
on the left side of the blade and that you make a test c
on scrap wood.
_ WARNING: Make sure theblade guard asserqbl,
is installed and werldng properly to avoid peesibl_
serious injury.
F3 Unlock the bevel locking lever.
El Remove the rip fence by lifting the locking handle
B Turn the height/bevel adjusting handwheel unti_ the
be_,'el indicalor is at the desired angie. Push the be_
looking Fever securely to the left to lock the an#le_
Set the blade to the correct depth for the workpie_
30
Loading ...
Loading ...
Loading ...