
Loading ...
Loading ...
Loading ...
– 17 –
9. OPERATION & USE
Warning! Never attempt to adjust, maintain or
service this machine while it is connected to the
power supply.
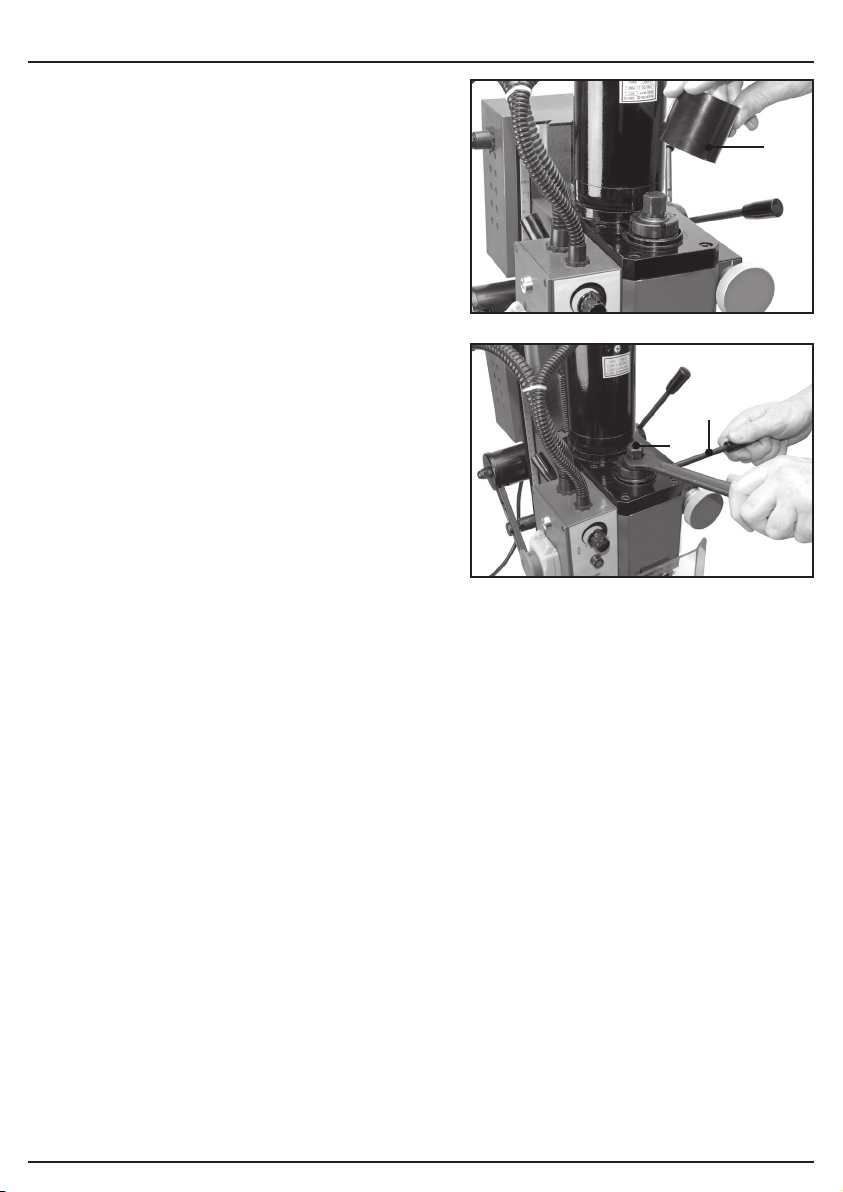
9.5 ARBOR REMOVAL – FIGS.9-10
The arbor is held in place with a draw bar (a bolt
which screws into the end of the arbor).
– Remove the protective cover (Q) by pulling it
upwards.
– Insert the fixing pin (R) through the hole in the
top of the spindle.
Note: The chuck may require manually turning
until the pin correctly locates, locking the spindle.
– With the 14mm spanner loosen the draw bar
(S) one half turn anti-clockwise.
– With a soft blow mallet carefully strike the top of
the draw bar.
– Continue loosening and striking the draw bar
alternately until the arbor becomes free.
Note: Do not loosen the draw bar too much before
striking it as damage will occur to the threads.
To refit the arbor - make sure the tapers are clean
before taping it up into the spindle, then secure it in
place with the draw bar.
Attention: Always replace the protective cover
before connecting this machine to the power
supply.
FIG.9
FIG.10
(R)
(Q)
(S)
Loading ...
Loading ...
Loading ...