Loading ...
Loading ...
Loading ...
10
ASSEMBLY
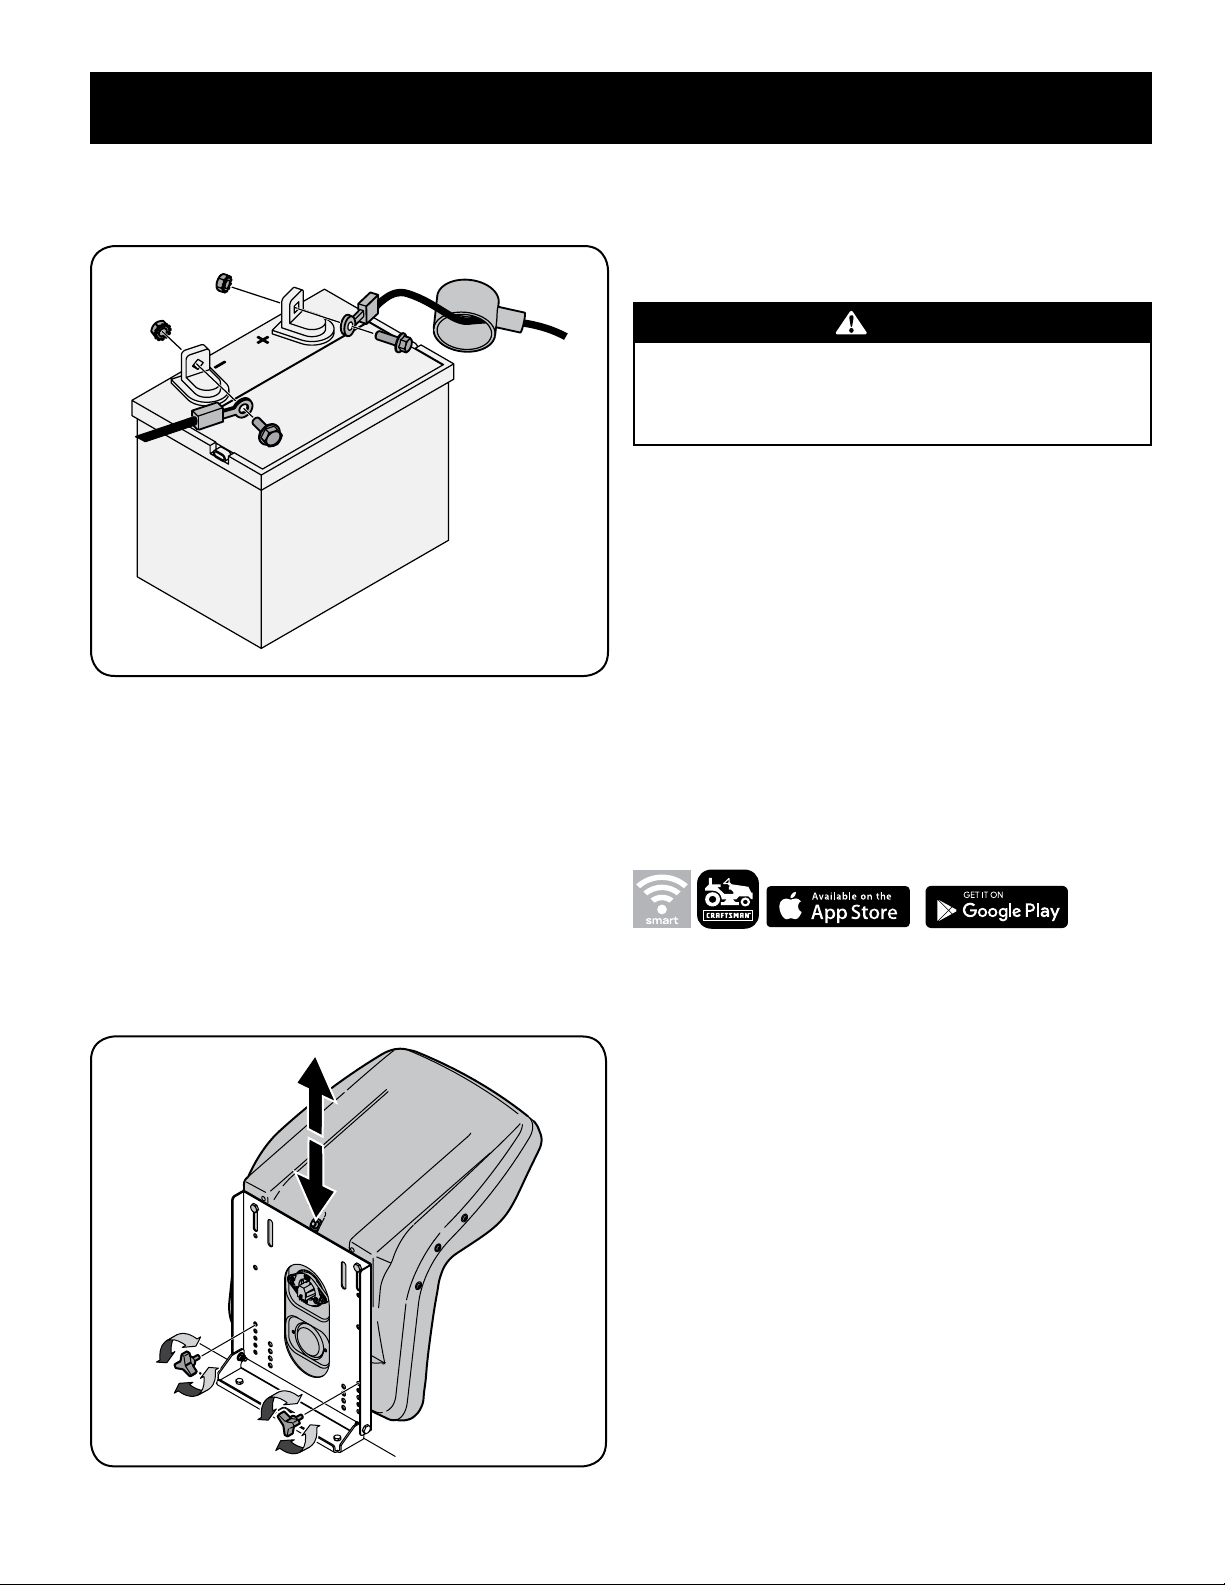
1. Remove the plastic cover, if present, from the positive battery terminal and
attach the red cable to the positive battery terminal (+) with the bolt and
hex nut. See Figure 9.
Figure 9
2. Remove the plastic cover, if present, from the negative battery terminal and
attach the black cable to the negative battery terminal (–) with the bolt and
hex nut. See Figure 9.
3. Position the red rubber boot over the positive battery terminal to help
protect it from corrosion.
NOTE: If the battery is put into service after the date shown on top/side of
battery, charge the battery as instructed in the Service and Maintenance
section your Operator’s Manual prior to operating the riding mower.
Adjusting the Seat
To adjust the position of the seat, rotate the seat forward and locate the two
adjustment knobs on the front of the seat pan. Refer to Figure 10.
Figure 10
Rotate the clamp knobs to the left and remove them, slide the seat forward or
backward and re-insert the clamp knobs into one of the four available positions on
the seat pan and into the seat, then tighten securely. Make sure the seat is locked into
position before operating the tractor. See Figure 10.
Adding Fuel
WARNING
Use extreme care when handling gasoline. Gasoline is extremely
flammable and the vapors are explosive. Never fuel the riding mower
indoors or while the engine is hot or running. Extinguish cigarettes, cigars,
pipes and other sources of ignition.
1. Be sure engine is outdoors and in a well-ventilated area.
2. Clean area around the fuel tank cap and remove the fuel tank cap.
3. Using an approved red GASOLINE container, add fuel slowly, being careful to
avoid spilling.
4. Fill the tank until the fuel reaches the bottom of the fuel tank neck.
5. Replace the fuel cap and tighten securely. Wipe up spilled fuel before
starting engine. If fuel is spilled DO NOT start engine. Move riding mower
away from area of spillage. Avoid creating any source of ignition until fuel
vapors are gone.
Checking and Adding Oil
Your riding mower is shipped with oil in the engine. However, you MUST check
the oil level before operating. Check and add the oil as instructed in your Engine
Operator’s Manual.
Smart Lawn App Bluetooth® Activation
Take command of your lawn care with the Bluetooth® enabled Smart Lawn App
from Craftsman. Maintenance tips, weather tracking and more — everything you
need to keep the best yard on the block is now in one place.
Smart Lawn also provides step-by-step instructions and video tutorials to show
you how to keep your riding mower running right. Plus, you can order the parts you
need directly from the app. The app also tracks the charge of your riding mower
battery, as well as the state of other key replacement components like oil, blade and
air filter.
Connect your Bluetooth® enabled riding mower by downloading the FREE
Craftsman Smart Lawn App to begin using all of the new connectivity features
of your Craftsman rider! Download it for FREE from the App Store or Google Play
(works with devices running iOS 9, Android 4.4 and later versions).
Once you’ve created your account, the app will prompt you to enter your riding
mower’s model number and serial number barcodes. Next it will attempt to connect
with the riding mower via Bluetooth®.
Set your smartphone Bluetooth® setting to the ‘ON’ position. In order to sync your
phone to the riding mower, turn on the engine, or turn the key to the ‘ON’ position.
Remember to turn the key to the ’OFF’ position after you connect so as not to drain
the battery charge (if not running the riding mower).
If you have further questions, call our Craftsman help line at 1-888-331-4569.
Loading ...
Loading ...
Loading ...