Loading ...
Loading ...
Loading ...
Pilotless Ignition ([selectmodels)
Your range is equipped with pilotless ignition. With this type
of ignition system, the gas automatically shuts off and the
oven will not operate during a power failure.
A lighted match will not light the oven burner. No attempt
should be made to operate the oven during a power failure.
Pilot Ignition (selectmodels)
Light the right rear burner first before lighting the oven pilot
light. This will remove air from the gas system and aid in the
ignition of the pilot light. If this step is not performed, ignition
time may be longer than expected.
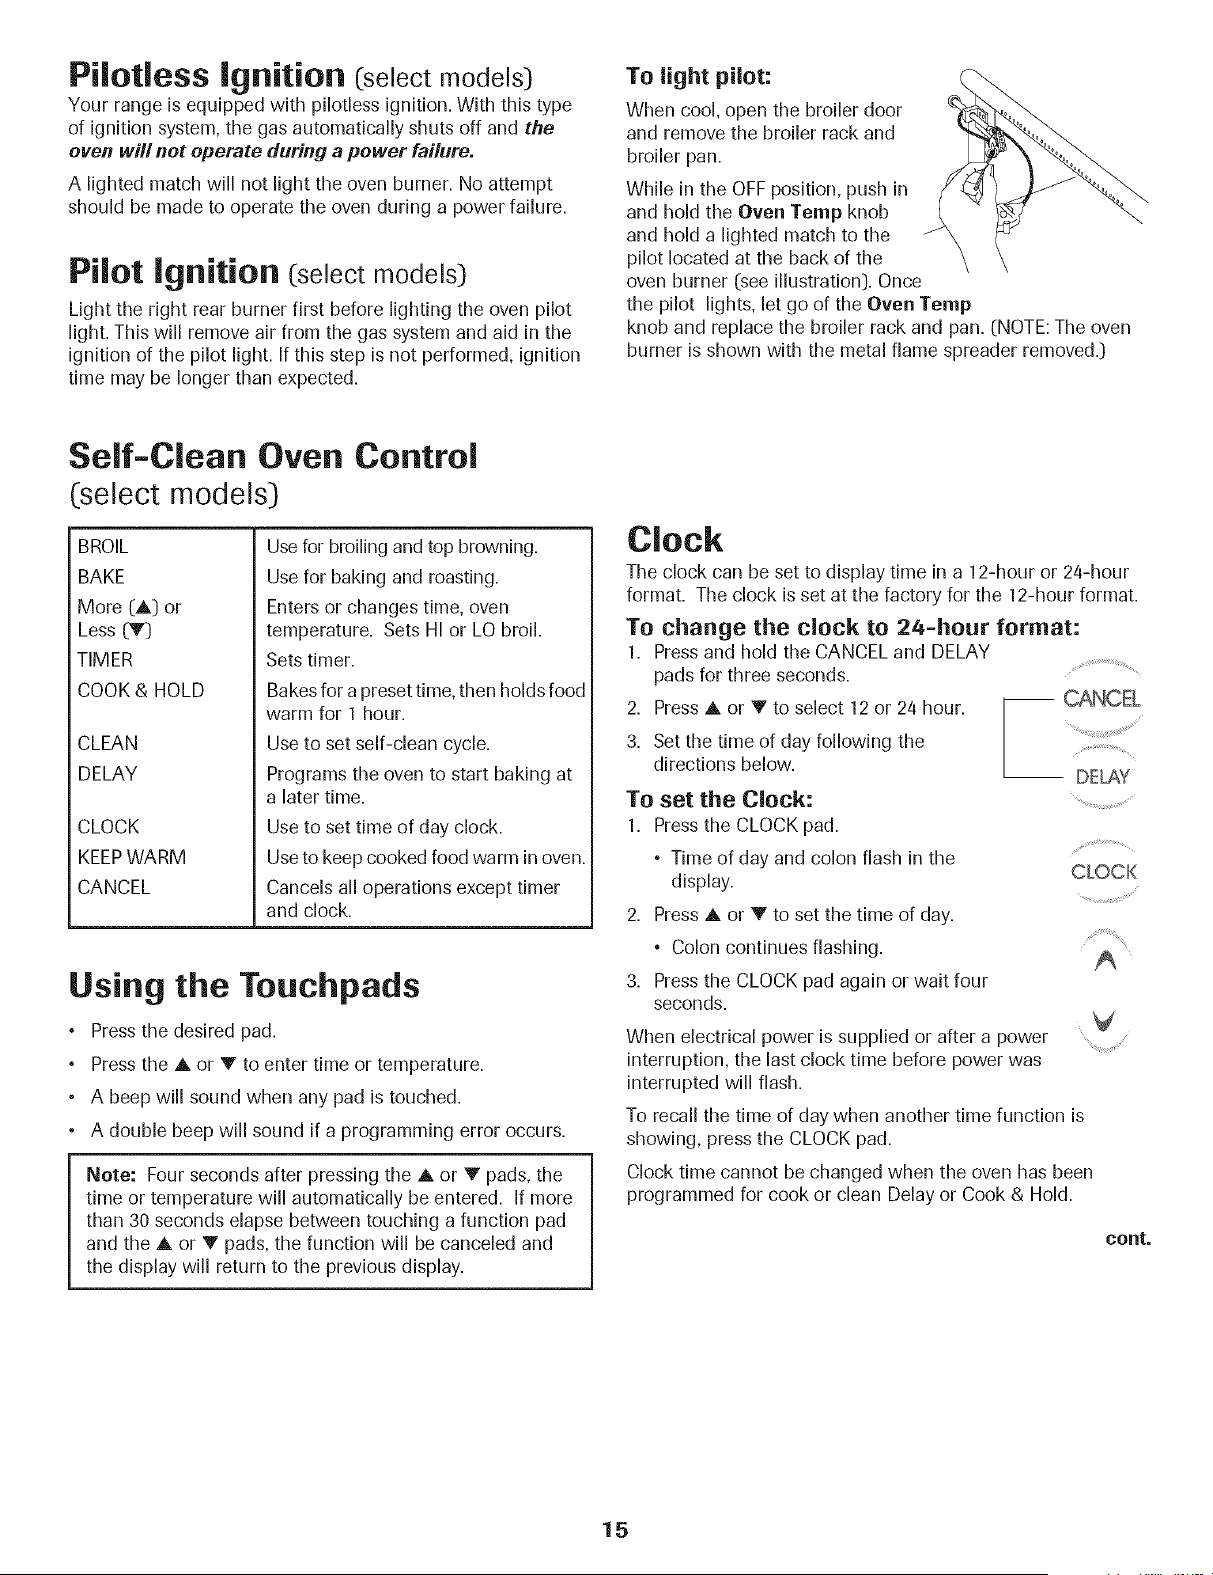
To light pilot:
When cool, open the broiler door
and remove the broiler rack and
broiler pan.
While in the OFFposition, push in
and hold the Oven Temp knob
and hold a lighted match to the
pilot located at the back of the
oven burner (see illustration).Once
the pilot lights, let go of the Oven Temp
knob and replace the broiler rack and pan. (NOTE: The oven
burner is shown with the metal flame spreader removed.)
Self-Clean Oven Control
(select models)
BROIL
BAKE
More (A,) or
Less (V)
TIMER
COOK & HOLD
CLEAN
DELAY
CLOCK
KEEPWARM
CANCEL
Use for broiling and top browning.
Use for baking and roasting.
Enters or changes time, oven
temperature. Sets HI or LO broil.
Sets timer.
Bakes for a preset time, then holds food
warm for 1 hour.
Use to set self-clean cycle.
Programs the oven to start baking at
a later time.
Use to set time of day clock.
Use to keep cooked food warm in oven.
Cancels all operations except timer
and clock.
Using the Touchpads
Pressthe desired pad.
Pressthe A or V to enter time or temperature.
• A beep will sound when any pad is touched.
• A double beep will sound if a programming error occurs.
Note: Four seconds after pressing the A or V pads, the
time or temperature will automatically be entered. If more
than 30 seconds elapse between touching a function pad
and the A or V pads, the function will be canceled and
the display will return to the previous display.
Clock
The clock can be set to display time in a 12-hour or 24-hour
format. The clock is set at the factory for the 12-hour format.
To change the clock to 24=hour format:
1. Pressand hold the CANCEL and DELAY
pads for three seconds. ..........................................
2. Press A or Y to select 12 or 24 hour.
3. Set the time of day following the
directions below.
To set the Clock:
1. Pressthe CLOCK pad.
° Time of day and colon flash in the
display.
"%¸¸%¸¸¸¸¸¸¸¸¸¸¸¢¸¸¸¸;;¸¸;¸¸¸¸¸¸¸¸¸;¸¸¸::/
-- DELAY
CLOCK
2. Press A or T to set the time of day.
• Colon continues flashing.
3. Press the CLOCK pad again or waitfour
seconds.
When electrical power is supplied or after a power
interruption, the last clock time before power was
interrupted will flash.
V
To recall the time of day when another time function is
showing, press the CLOCK pad.
Clock time cannot be changed when the oven has been
programmed for cook or clean Delay or Cook & Hold.
cont.
15
Loading ...
Loading ...
Loading ...