Loading ...
Loading ...
Loading ...
14. AVOID AWKWARD OPERATIONS and hand
positions where a sudden slip could cause your hand
to move into the cutting tool.
15. NEVER USE SOLVENTS to clean plastic parts.
Solvents could possibly dissolve or otherwise damage
the material. Only a soft damp clothshould be used to
clean plastic parts.
16. MOUNT your table saw before performing any cutting
operations. Refer to installation instructions,
17. NEVER CUT METALS or materials which may make
hazardous dust.
18. ALWAYS USE IN A WELL VENTILATED AREA.
Remove saw dust frequently. Clean out sawdust from
the interior of the saw to prevent a potential fire hazard.
19. NEVER LEAVE THE TOOL running unattended.
Don't leave the tool until it comes to a complete stop.
20. For proper operation, this saw must be mounted to
the leg set provided, or follow the instructions on page
10 of this owners manual titled "SAW MOUNTED TO
OTHER SURFACES." Failure to provide sawdust tall-
through and removal hole will allow sawdust to build
up in the motor area, which may result in a fire hazard
or cause motor damage.
GROUNDING INSTRUCTIONS
IN THE EVENT OF A MALFUNCTION OR
BREAKDOWN, grounding provides a column's path
of least resistance for electric current to reduce the
risk of electric shock. This tool is equipped with an
electriccord having an equipment-grounding
conductor and a grounding plug.The plug MUST be
plugged into a matching outlet that is properly
installed and grounded inaccordance with ALL local
codes and ordinances.
DO NOT MODIFYTHE 3-PRONG PLUG...if it will not fit
the outlet, have the proper outlet installed by a qualified
electrician. Improper connection of the equipment-
grounding conductor can result in a risk of shock. The
conductor with insulation having an outer surface that is
green (sometimes, but not always, with yellow stripes)
is the equipment grounding conductor.
REPAIR OR REPLACE DAMAGED OR WORN CORD
IMMEDIATELY...it repair or replacement of the electric
cord or plug is ever necessary, DO NOT connect the
equipment-grounding conductor to a live terminal.
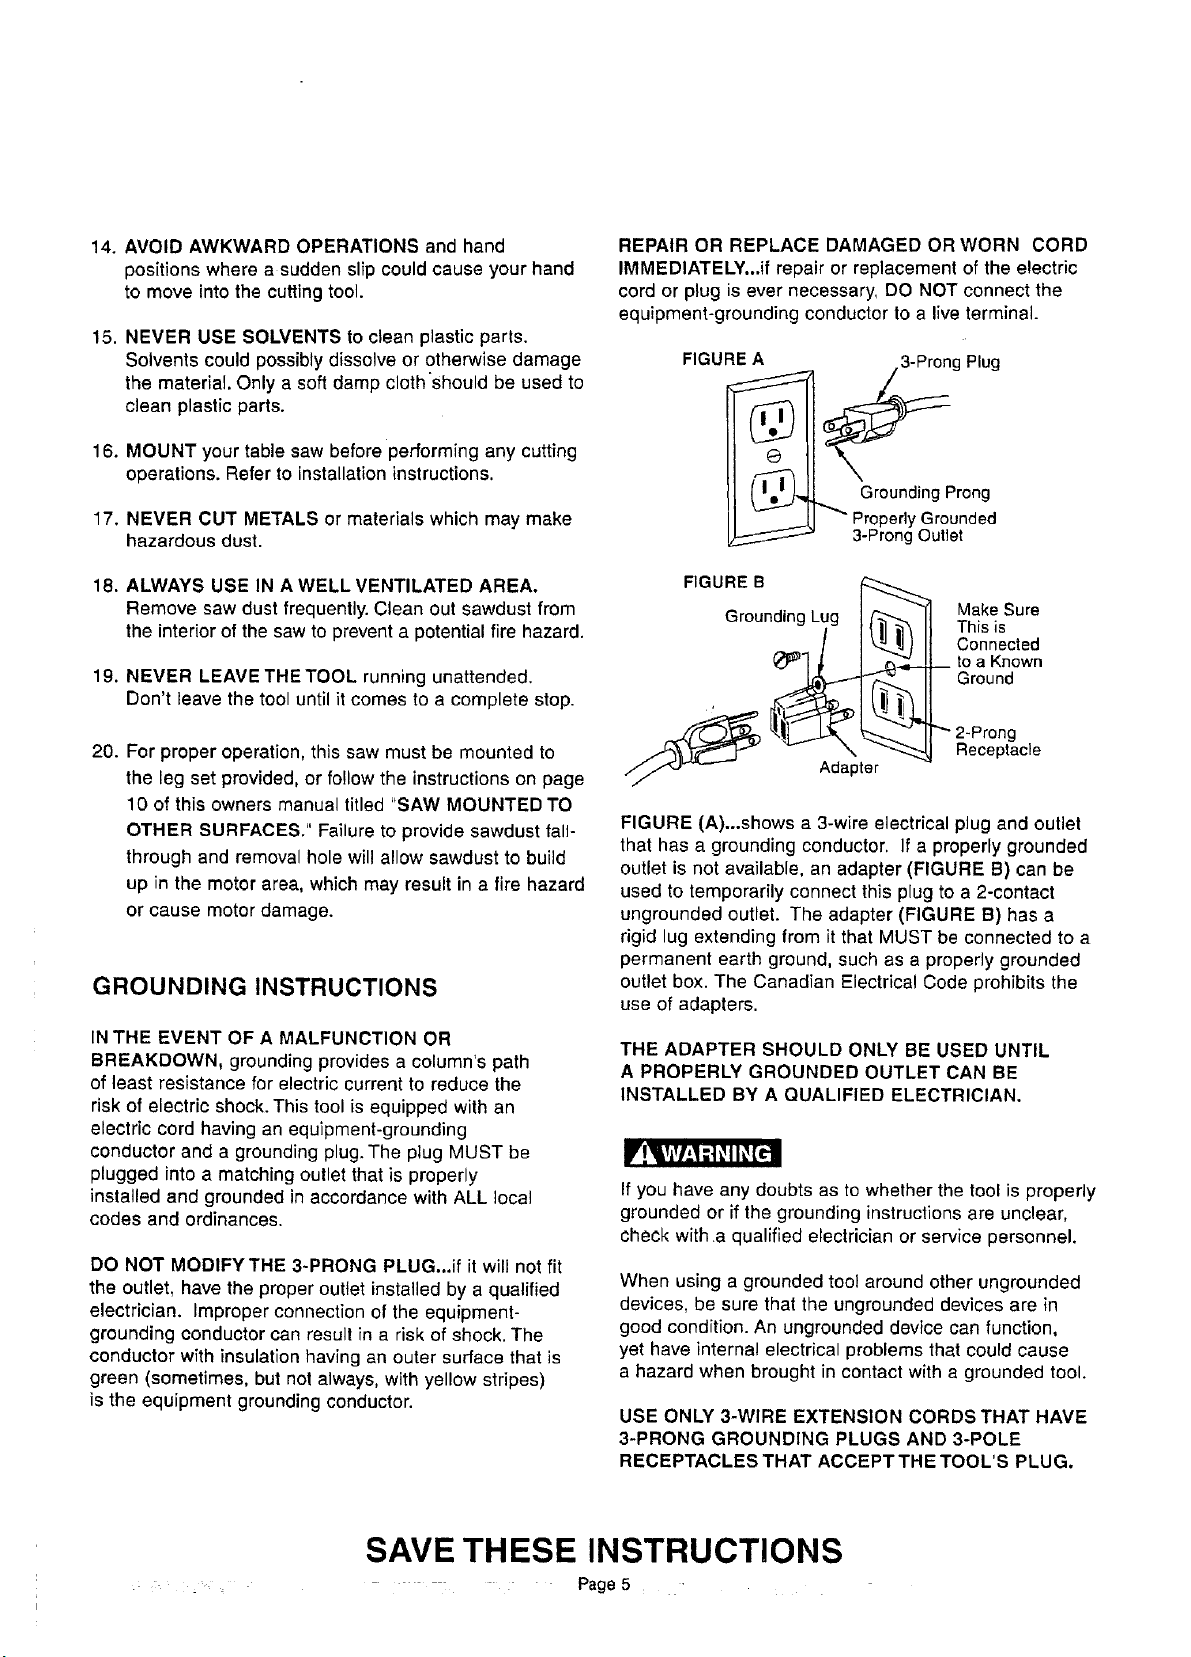
FIGURE A
g Plug
Grounding Prong
Propedy Grounded
3-Prong Oullet
FIGURE B
Grounding Lug I _ II
Make Sure
This is
Connected
to a Known
Ground
2-Prong
Receptacle
FIGURE (A)...shows a 3-wire electrical plug end outlet
that has a grounding conductor, If a properly grounded
outlet is not available, an adapter (FIGURE B) can be
used to temporarily connect this plug to a 2-contact
ungrounded outlet. The adapter (FIGURE B) has a
rigid lug extending from it that MUST be connected to a
permanent earth ground, such as a properly grounded
outlet box. The Canadian Electrical Code prohibits the
use of adapters.
THE ADAPTER SHOULD ONLY BE USED UNTIL
A PROPERLY GROUNDED OUTLET CAN BE
INSTALLED BY A QUALIFIED ELECTRICIAN,
If you have any doubts as to whether the tool is properly
grounded or if the grounding instructions are unclear,
check with.a qualified electrician or service personnel.
When using a grounded tool around other ungrounded
devices, be sure that the ungrounded devices are in
good condition. An ungrounded device can function,
yet have internal electrical problems that could cause
a hazard when brought in contact with a grounded tool.
USE ONLY 3-WIRE EXTENSION CORDS THAT HAVE
3-PRONG GROUNDING PLUGS AND 3-POLE
RECEPTACLES THAT ACCEPT THE TOOL'S PLUG.
SAVE THESE INSTRUCTIONS
: _ : _ Page 5
Loading ...
Loading ...
Loading ...