Loading ...
Loading ...
Loading ...
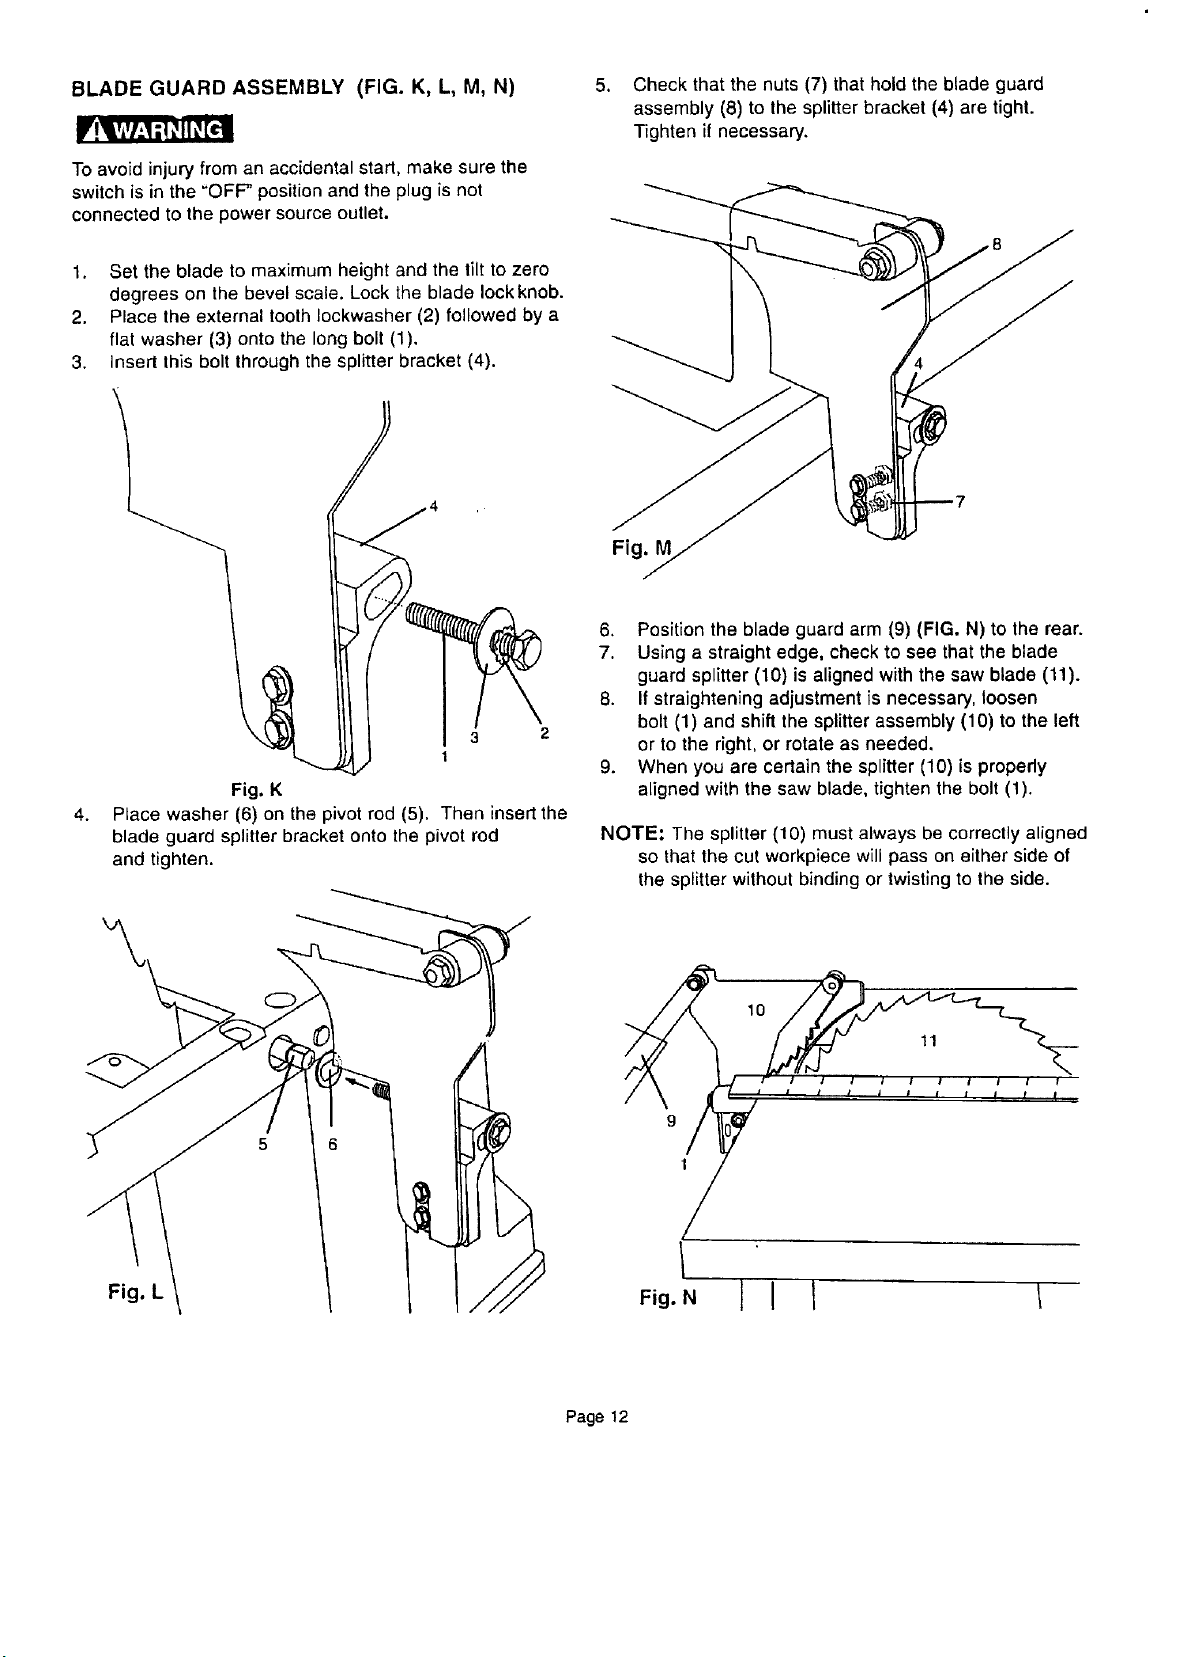
BLADE GUARD ASSEMBLY (FIG. K, L, M, N)
To avoid injury from an accidental start, make sure the
switch is in the "OFF" position and the plug is not
connected to the power source outlet.
5o
Check that the nuts (7) that hold the blade guard
assembly (8) to the splitter bracket (4) are tight.
Tighten if necessary.
1. Set the blade to maximum height and the tilt to zero
degrees on the bevel scale. Lock the blade Iockknob.
2. Place the external tooth Iockwasher (2) followed by a
flat washer (3) onto the long bolt (1).
3. Insert this bolt through the splitter bracket (4).
4.
Fig. K
3
1
Place washer (6) on the pivot rod (5). Then insert the
blade guard splitter bracket onto the pivot red
and tighten.
Fig. L
Fig.
6. Position the blade guard arm (9) (FIG. N) to the rear.
7. Using a straight edge, cheekto see that the blade
guard splitter (10) is aligned with the saw blade (11).
8. If straightening adjustment is necessary, loosen
bolt (1) and shift the splitter assembly (10) to the left
or to the right, or rotate as needed.
9. When you are certain the splitter (10) is propedy
aligned with the saw blade, tighten the bolt (1).
NOTE: Tile splitter (10) must always be correctly aligned
so that the cut workpiece will pass on either side of
the splitter without binding or twisting to the side.
9
t
10
Fig. N
Page 12
Loading ...
Loading ...
Loading ...