Loading ...
Loading ...
Loading ...
Rinnai Australia 34 Installation Manual
TRANSCEIVER INSTALLATION
MOUNTING & CONNECTING THE TRANSCEIVER
INSTALLING WIRELESS WATER CONTROLLERS
• The distance between the water heater and the transceiver must not exceed 20m.
• Metallic structures, appliances or magnetic fields in the vicinity of transceiver or
wireless water controllers may reduce signal strength.
• Do not install transceiver near a heat source, such as a cook top, stove or oven. Heat,
steam, smoke and hot oil may cause damage.
• The transceiver MUST NOT be installed where chemicals such as benzene, alcohol,
turpentine, hydrogen sulphide, ammonia, chlorine or similar chemicals are in use.
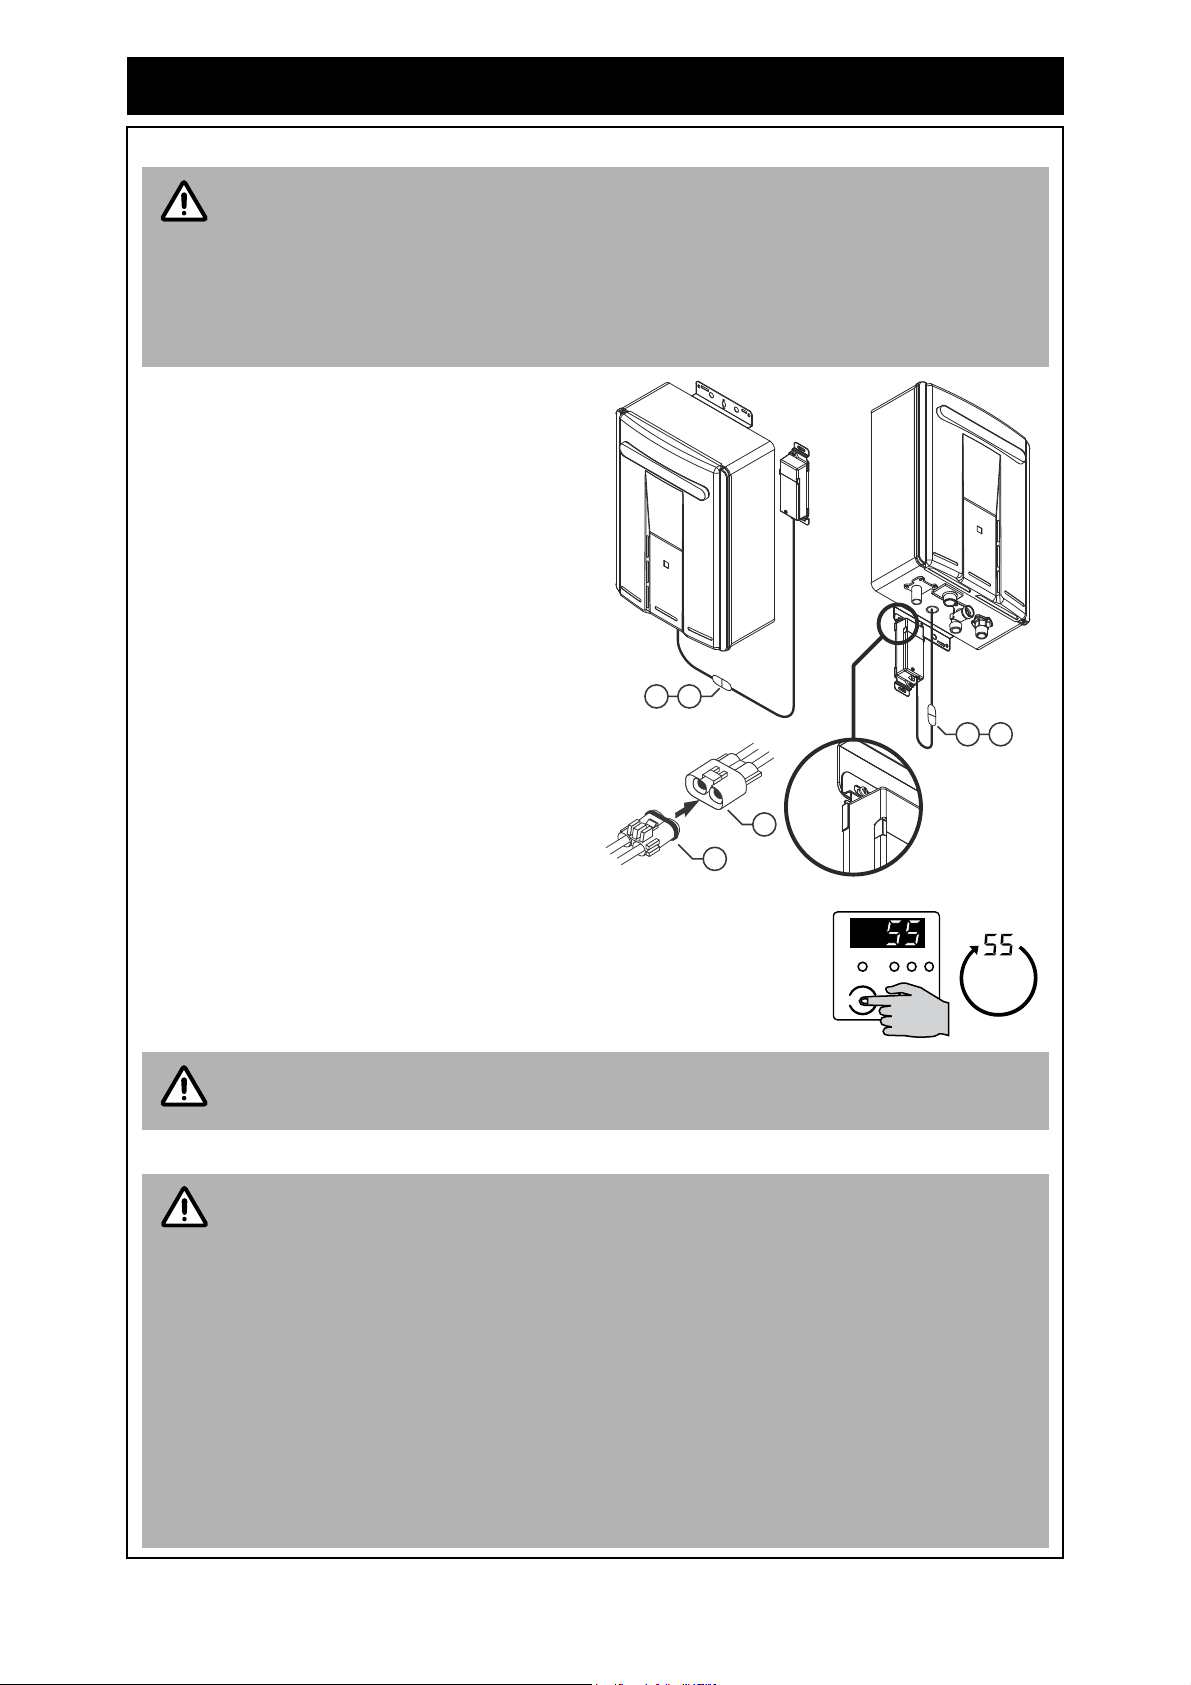
1. Determine the most suitable position for
the transceiver (see “POSITIONING OF
TRANSCEIVER AND WIRELESS
WATER CONTROLLERS” on page 31).
2. The transceiver can be either be mounted
under the hot water unit via the lower
bracket or to the wall using the screws
and/or anchors provided as shown.
3. Connect the communication cable plug A.
of the transceiver to the communication
cable socket B. of the hot water unit.
SETTING THE MAXIMUM TEMPERATURE AT THE TRANSCEIVER
1. Ensure the power to the water heater is switched ‘on’.
2. Set the transceiver’s maximum water temperature to 55°C by pressing
the ‘Max Temp’ button until 55 is displayed.
Refer to “Master and Sub controllers and temperatures” on page 30 for information
regarding using of the maximum temperatures with wireless water controllers.
This installation procedure applies to wireless water controller installations only. For
combined wired and wireless water controller installations refer to “INSTALLING
WIRED AND WIRELESS WATER CONTROLLERS” on page 36.
Up to 4 wireless water controllers can be installed. Only one of these can be
designated as a 'Master Controller' (MC), others will be designated as ‘Sub
Controllers’.
Only one wireless water controller can be installed at a time. DO NOT insert batteries
until step 3.
The supplied wireless water controller is pre-designated as a 'Master Controller' (MC)
by default and as such is ready for a kitchen installation out of the box.
If the preferred installation location for the controller is to be a bathroom, ensuite, etc
then the controller will need to be re-assigned as a 'Sub' controller, see “UN-
ASSIGNING AND RESETTING WIRELESS WATER CONTROLLERS” on page 36 for
details how to re-assigned as a controller.
NOTE
A
B
AB
AB
Max Temp. Maimtenance
Te mp . Vo lu me
NOTE
IMPORTANT
Loading ...
Loading ...
Loading ...