Loading ...
Loading ...
Loading ...
General Cleaning
(continued)
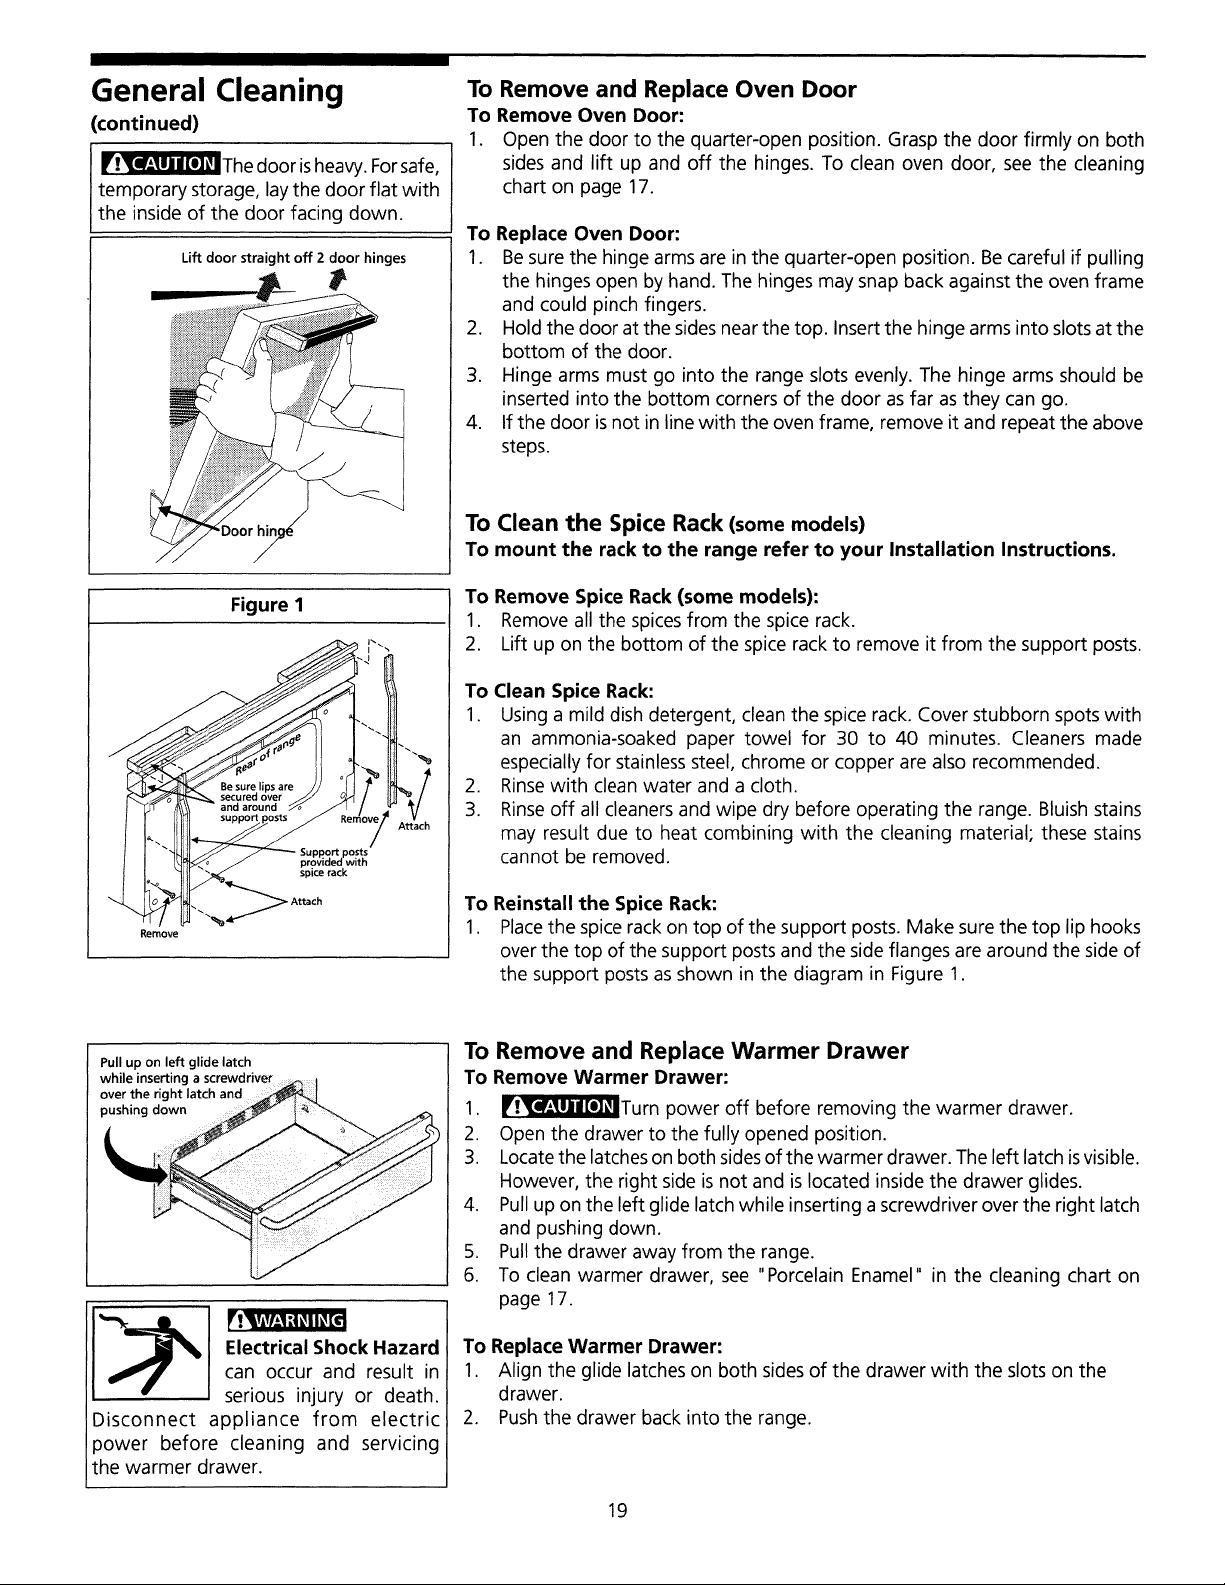
_IW_T_=_T_ Thedoor isheavy.Forsafe,
temporary storage, laythe door flat with
the inside of the door facing down.
Lift door straight off 2 door hinges
L t
!!i__i_;_...........
:d!!iiiiiiiiiiiiii!iF: !
Remove
Figure 1
_ Be sure ilps are /
fJ _ Support posts
J provided with
___ spi..... k
_ _ Attach
To Remove and Replace Oven Door
To Remove Oven Door:
1. Open the door to the quarter-open position. Grasp the door firmly on both
sides and lift up and off the hinges. To clean oven door, see the cleaning
chart on page 17.
To Replace Oven Door:
1. Be surethe hinge arms are in the quarter-open position. Be careful if pulling
the hingesopen by hand. The hingesmay snap back against the oven frame
and could pinch fingers.
2. Hold the door at the sidesnear the top. Insertthe hinge arms into slotsat the
bottom of the door.
3. Hinge arms must go into the range slotsevenly. The hinge arms should be
inserted intothe bottom cornersof the door asfar asthey can go.
4. Ifthe door isnot in linewith the oven frame, remove it and repeat the above
steps.
To Clean the Spice Rack (some models)
To mount the rack to the range refer to your Installation Instructions.
To Remove Spice Rack (some models):
1. Remove all the spices from the spice rack.
2. Lift up on the bottom of the spicerackto remove it from the support posts.
To Clean Spice Rack:
1. Using a mild dishdetergent, clean the spice rack. Cover stubborn spotswith
an ammonia-soaked paper towel for 30 to 40 minutes. Cleaners made
especially for stainlesssteel, chrome or copper are also recommended.
2. Rinsewith clean water and a cloth.
3. Rinse off all cleanersand wipe dry before operating the range. Bluishstains
may result due to heat combining with the cleaning material; these stains
cannot be removed.
To
1.
Reinstall the Spice Rack:
Placethe spicerack on top of the supportposts. Make surethe top lip hooks
overthe top of the supportposts and the side flanges are around the side of
the support posts as shown in the diagram in Figure 1.
Pullup on left glide latch
while inserting a screwdriver
over the right latch and
pushing down
Electrical Shock Hazard
can occur and result in
serious injury or death.
Disconnect appliance from electric
power before cleaning and servicing
the warmer drawer.
To Remove and Replace Warmer Drawer
To Remove Warmer Drawer:
1. [Ir[_l_lTF_J'_Turn power off before removingthe warmer drawer.
2. Open the drawer to the fully opened position.
3. Locate the latcheson both sidesofthe warmer drawer. The left latch isvisible.
However, the right sideisnot and islocated insidethe drawer glides.
4. Pullup on the left glide latchwhile insertinga screwdriveroverthe right latch
and pushing down.
5. Pullthe drawer away from the range.
6. To clean warmer drawer, see "Porcelain Enamel" in the cleaning chart on
page 17.
To Replace Warmer Drawer:
1. Align the glide latches on both sidesof the drawer with the slotson the
drawer.
2. Pushthe drawer back intothe range.
19
Loading ...
Loading ...
Loading ...