Loading ...
Loading ...
Loading ...
General Cleaning
(continued)
Unlike the standard gas range, THIS
COOKTOP IS NOT REMOVABLE.Do not
attempt to remove or lift the cooktop.
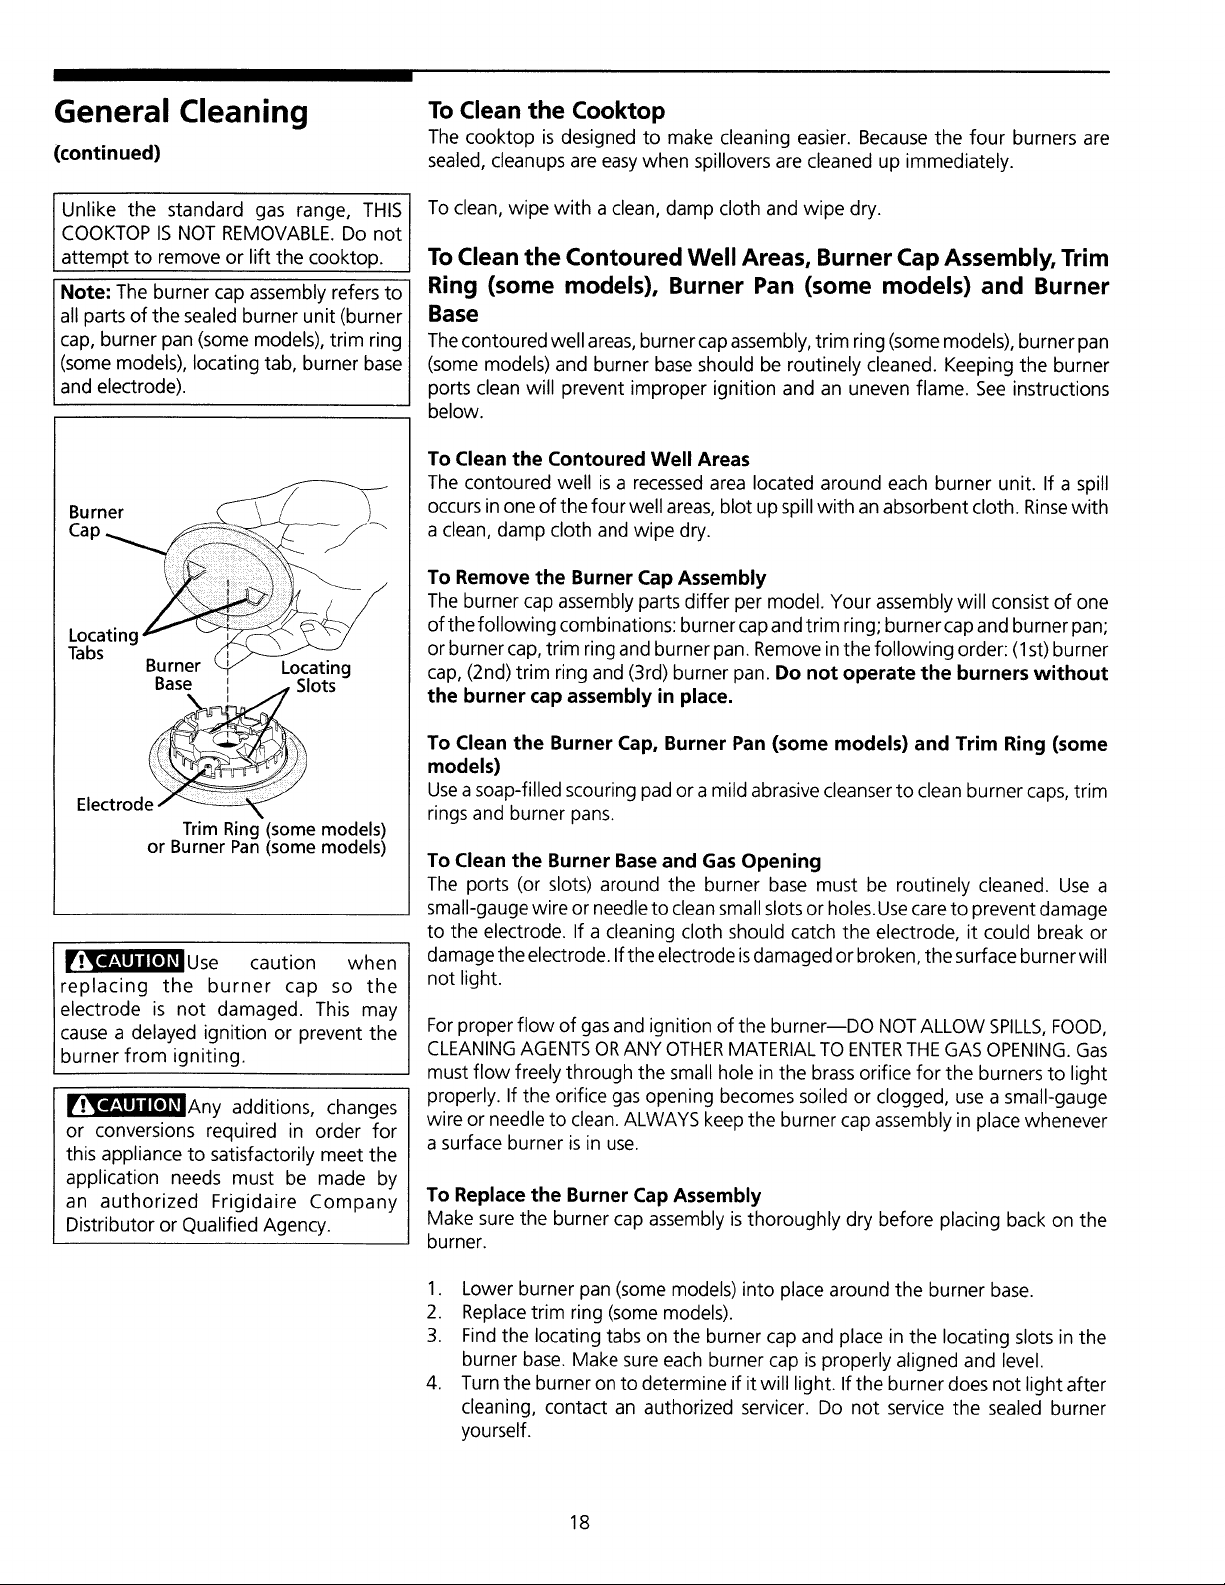
Note: The burner cap assembly refers to
all parts of the sealed burner unit (burner
cap, burner pan (some models), trim ring
(some models), locating tab, burner base
and electrode).
Burner
Cap
Locating
Tabs
Burner Locating
Electrod_ I°ts
Trim Ring (some models)
or Burner Pan (some models)
_Use caution when
replacing the burner cap so the
electrode is not damaged. This may
cause a delayed ignition or prevent the
burner from igniting.
_l_l_Any additions, changes
or conversions required in order for
this appliance to satisfactorily meet the
application needs must be made by
an authorized Frigidaire Company
Distributor or Qualified Agency.
To Clean the Cooktop
The cooktop is designed to make cleaning easier. Because the four burners are
sealed, cleanups are easywhen spillovers are cleaned up immediately.
To clean, wipe with a clean, damp cloth and wipe dry.
To Clean the Contoured Well Areas, Burner Cap Assembly, Trim
Ring (some models), Burner Pan (some models) and Burner
Base
Thecontoured well areas,burner cap assembly,trim ring (some models), burner pan
(some models) and burner baseshould be routinely cleaned. Keeping the burner
ports clean will prevent improper ignition and an uneven flame. See instructions
below.
To Clean the Contoured Well Areas
The contoured well isa recessedarea located around each burner unit. If a spill
occurs in one of the four well areas, blot up spill with an absorbent cloth. Rinsewith
a clean, damp cloth and wipe dry.
To Remove the Burner Cap Assembly
The burner cap assembly parts differ per model. Your assembly will consist of one
of the following combinations: burner capand trim ring; burner cap and burner pan;
or burner cap, trim ring and burner pan. Removein the following order: (1st) burner
cap, (2nd) trim ring and (3rd) burner pan. Do not operate the burners without
the burner cap assembly in place.
To Clean the Burner Cap, Burner Pan (some models) and Trim Ring (some
models)
Use a soap-filled scouring pad or a mild abrasive cleanser to clean burner caps, trim
rings and burner pans.
To Clean the Burner Baseand Gas Opening
The ports (or slots) around the burner base must be routinely cleaned. Use a
small-gauge wire or needle to cleansmall slotsor holes.Usecareto prevent damage
to the electrode. If a cleaning cloth should catch the electrode, it could break or
damage the electrode. Ifthe electrode isdamaged or broken, the surface burner will
not light.
For proper flow of gas and ignition of the burner--DO NOT ALLOW SPILLS, FOOD,
CLEANING AGENTS OR ANY OTHER MATERIAL TO ENTERTHE GAS OPENING. Gas
must flow freely through the small hole in the brass orifice for the burners to light
properly. If the orifice gas opening becomes soiled or clogged, use a small-gauge
wire or needle to clean. ALWAYS keep the burner cap assembly in place whenever
a surface burner is in use.
To Replace the Burner Cap Assembly
Make sure the burner cap assembly isthoroughly dry before placing back on the
burner.
1. Lower burner pan (some models) into place around the burner base.
2. Replacetrim ring (some models).
3. Findthe locating tabs on the burner cap and place in the locating slots in the
burner base. Make sure each burner cap isproperly aligned and level.
4. Turn the burner on to determine if itwil! light. If the burner does not light after
cleaning, contact an authorized servicer. Do not service the sealed burner
yourself.
18
Loading ...
Loading ...
Loading ...