
Loading ...
Loading ...
Loading ...
Accessories en
9
Appliance door
If you open the appliance door during operation, opera-
tion stops. When you close the appliance door, opera-
tion continues automatically.
5 Accessories
Use original accessories. These have been made espe-
cially for your appliance.
Note:Accessories may become deformed if they get
hot. Deformation has no effect on function. As the ac-
cessory cools down, it will regain its original shape.
The accessories supplied may differ depending on the
appliance model.
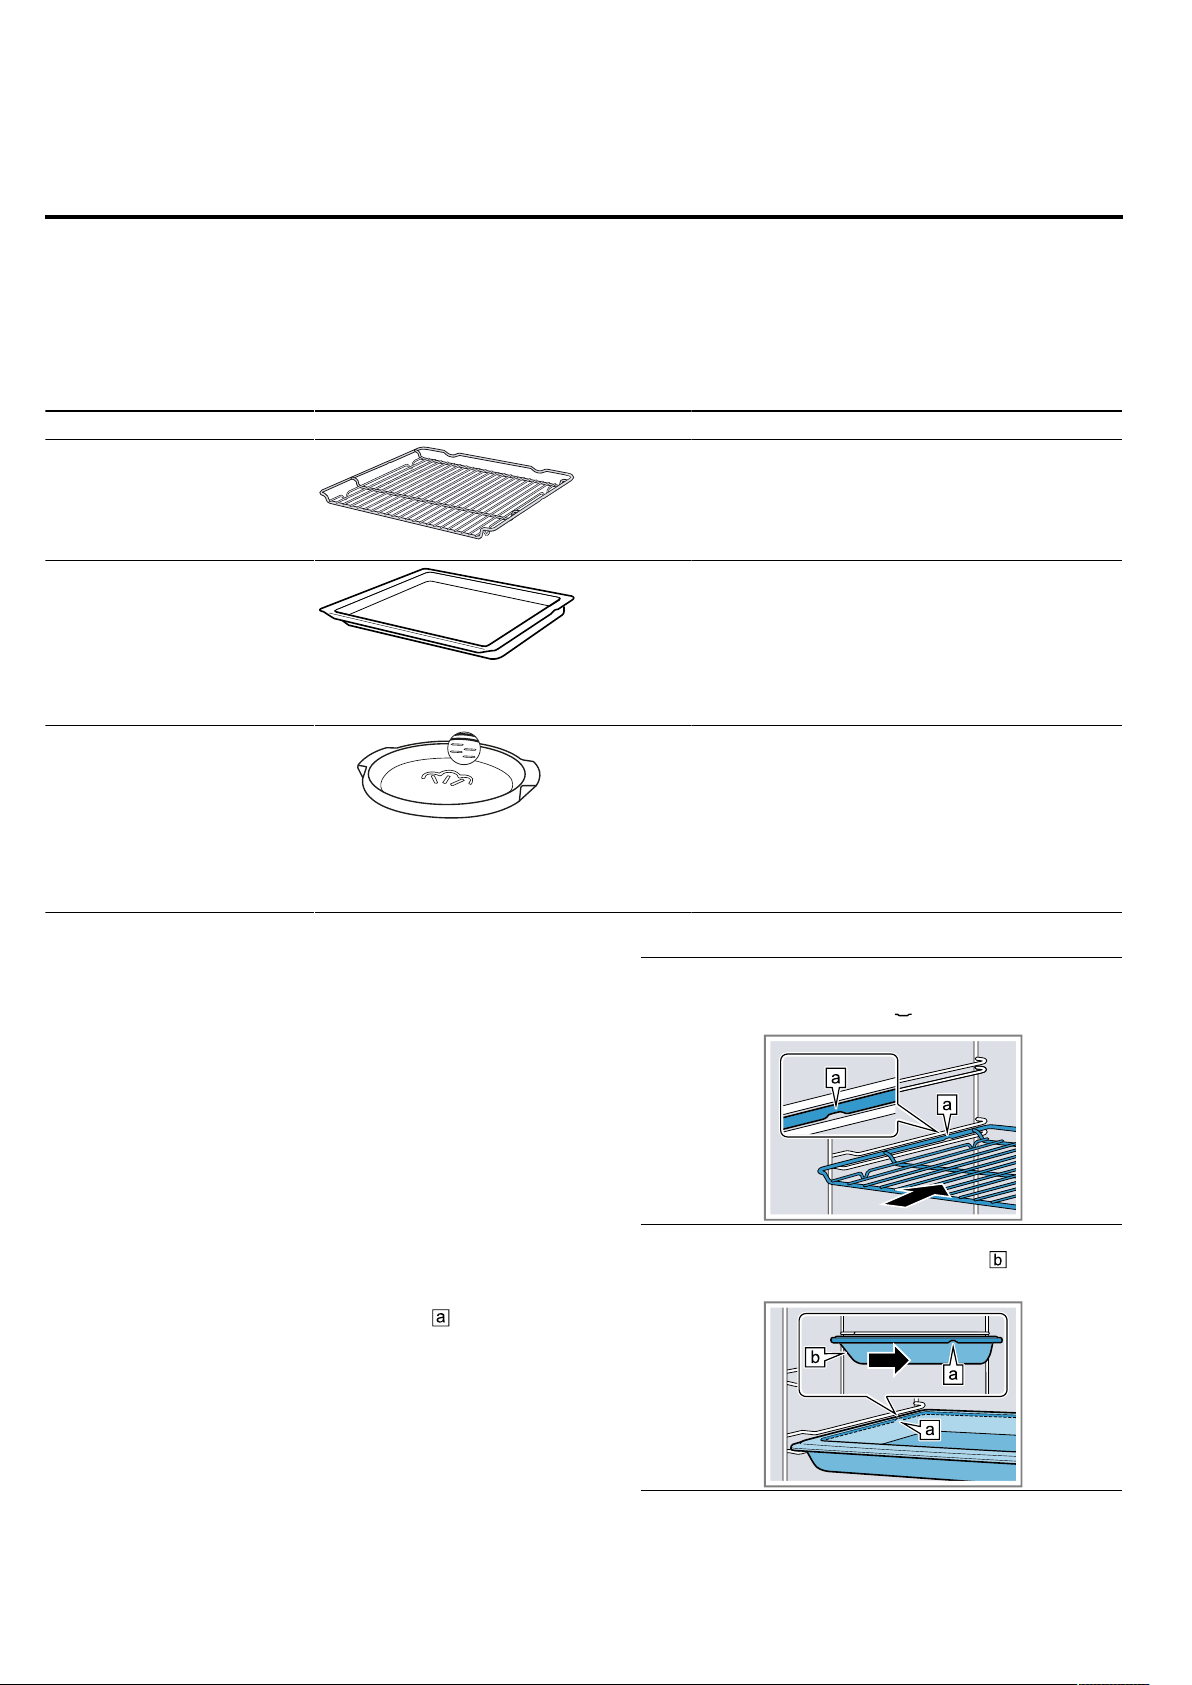
Accessories Use
Wire rack ¡ Cake tins
¡ Ovenproof dishes
¡ Cookware
¡ Meat, e.g. roasting joints or steak
¡ Frozen meals
Universal pan ¡ Moist cakes
¡ Baked items
¡ Bread
¡ Large roasts
¡ Frozen meals
¡ Catching dripping liquids, e.g. fat when
grilling food on the wire rack.
Water bowl Cooking with the steam function
The horizontal markings on the water bowl in-
dicate the volume of water:
¡ 100 ml
¡ 150ml
¡ 200ml
¡ 250ml
→"Steam assistance", Page11
5.1 Locking function
The locking function prevents the accessories from tilt-
ing when they are pulled out.
You can pull out the accessories approximately halfway
without them tipping. The accessories must be inserted
into the cooking compartment correctly for the tilt pro-
tection to work properly.
5.2 Sliding accessories into the cooking
compartment
Always slide accessories into the cooking compartment
correctly. This is the only way to ensure that accessor-
ies can be pulled out approximately halfway without tip-
ping.
1.
Turn the accessories so that the notch is at the
rear and is facing downwards.
2.
Insert accessories between the two guide rods for
the shelf position.
Wire rack Insert the wire rack with the open
side facing the appliance door and
the curved lip facing downwards.
Baking tray
E.g. univer-
sal pan or
baking tray
Slide the tray, e.g. the universal pan,
in with the sloping edge facing the
appliance door.
3.
Push the accessory all the way in, making sure that
it does not touch the appliance door.
Loading ...
Loading ...
Loading ...