Loading ...
Loading ...
Loading ...
10 (877) 427-3290
Installation Instructions
Step 4 — Move Refrigerator into Position
Remove the wood base with a 1/2” socket or open
end wrench and discard the shipping bolts and
brackets. Use an appliance cart to move the
refrigerator near the front of the enclosure. To allow
the refrigerator to be rolled into position, ensure the
front feet are retracted with a 1/2” open end wrench.
Front and rear leveling can be done from the front
once the refrigerator is in position.
Important: If the refrigerator has been on its back or side,
it must stand upright for a minimum of 24 hours before
connecting power.
Plug the power cord into the grounded outlet.
Temporarily lift the anchor bracket away from the top
of the refrigerator. It may be helpful to temporarily
tape the front of the anchor bracket to the top of the
enclosure so it does not obstruct moving the
refrigerator into position. Roll the refrigerator into
position, ensuring the water line does not interfere
underneath and the power cord does not interfere at
the back. Slack in the power cord may be taken up in
the space around the water filter.
Important: If the floor is not level, it may be necessary to
level the refrigerator prior to rolling it into the enclosure.
See Step 6 on leveling to temporarily tilt the refrigerator.
Final leveling can be done from the front.
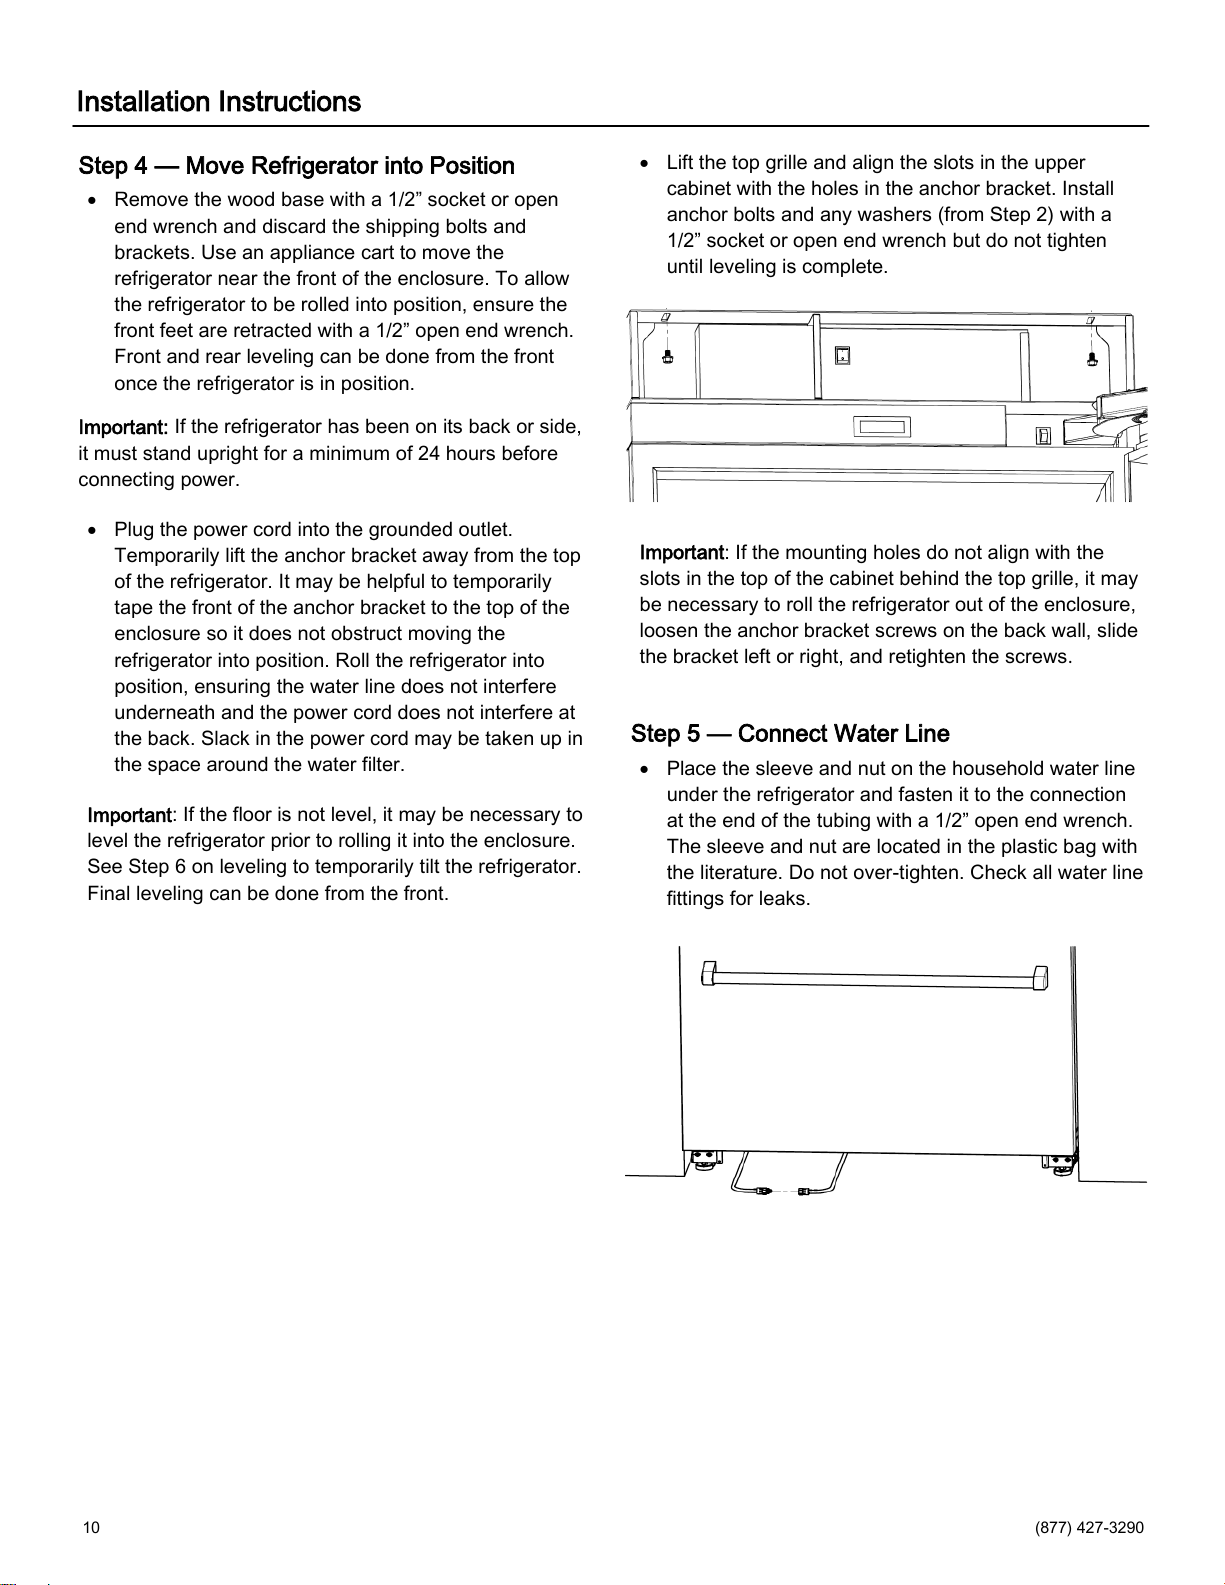
Lift the top grille and align the slots in the upper
cabinet with the holes in the anchor bracket. Install
anchor bolts and any washers (from Step 2) with a
1/2” socket or open end wrench
but do not tighten
until leveling is complete.
Important: If the mounting holes do not align with the
slots in the top of the cabinet behind the top grille, it may
be necessary to roll the refrigerator out of the enclosure,
loosen the anchor bracket screws on the back wall, slide
the bracket left or right, and retighten the screws.
Step 5 — Connect Water Line
Place the sleeve and nut on the household water line
under the refrigerator and fasten it to the connection
at the end of the tubing with a 1/2” open end wrench.
The sleeve and nut are located in the plastic bag with
the literature. Do not over-tighten. Check all water line
fittings for leaks.
Loading ...
Loading ...
Loading ...