Loading ...
Loading ...
Loading ...
STEP SiX
Installing Blade Guard and Adjusting Anti-Kickback
Pawls and Spreader
1._Instatl blade guard on motor.
2. Unlock the swivel lock handle and rotate the
blade into the IN-RIP position Lock the swivel
lock handle
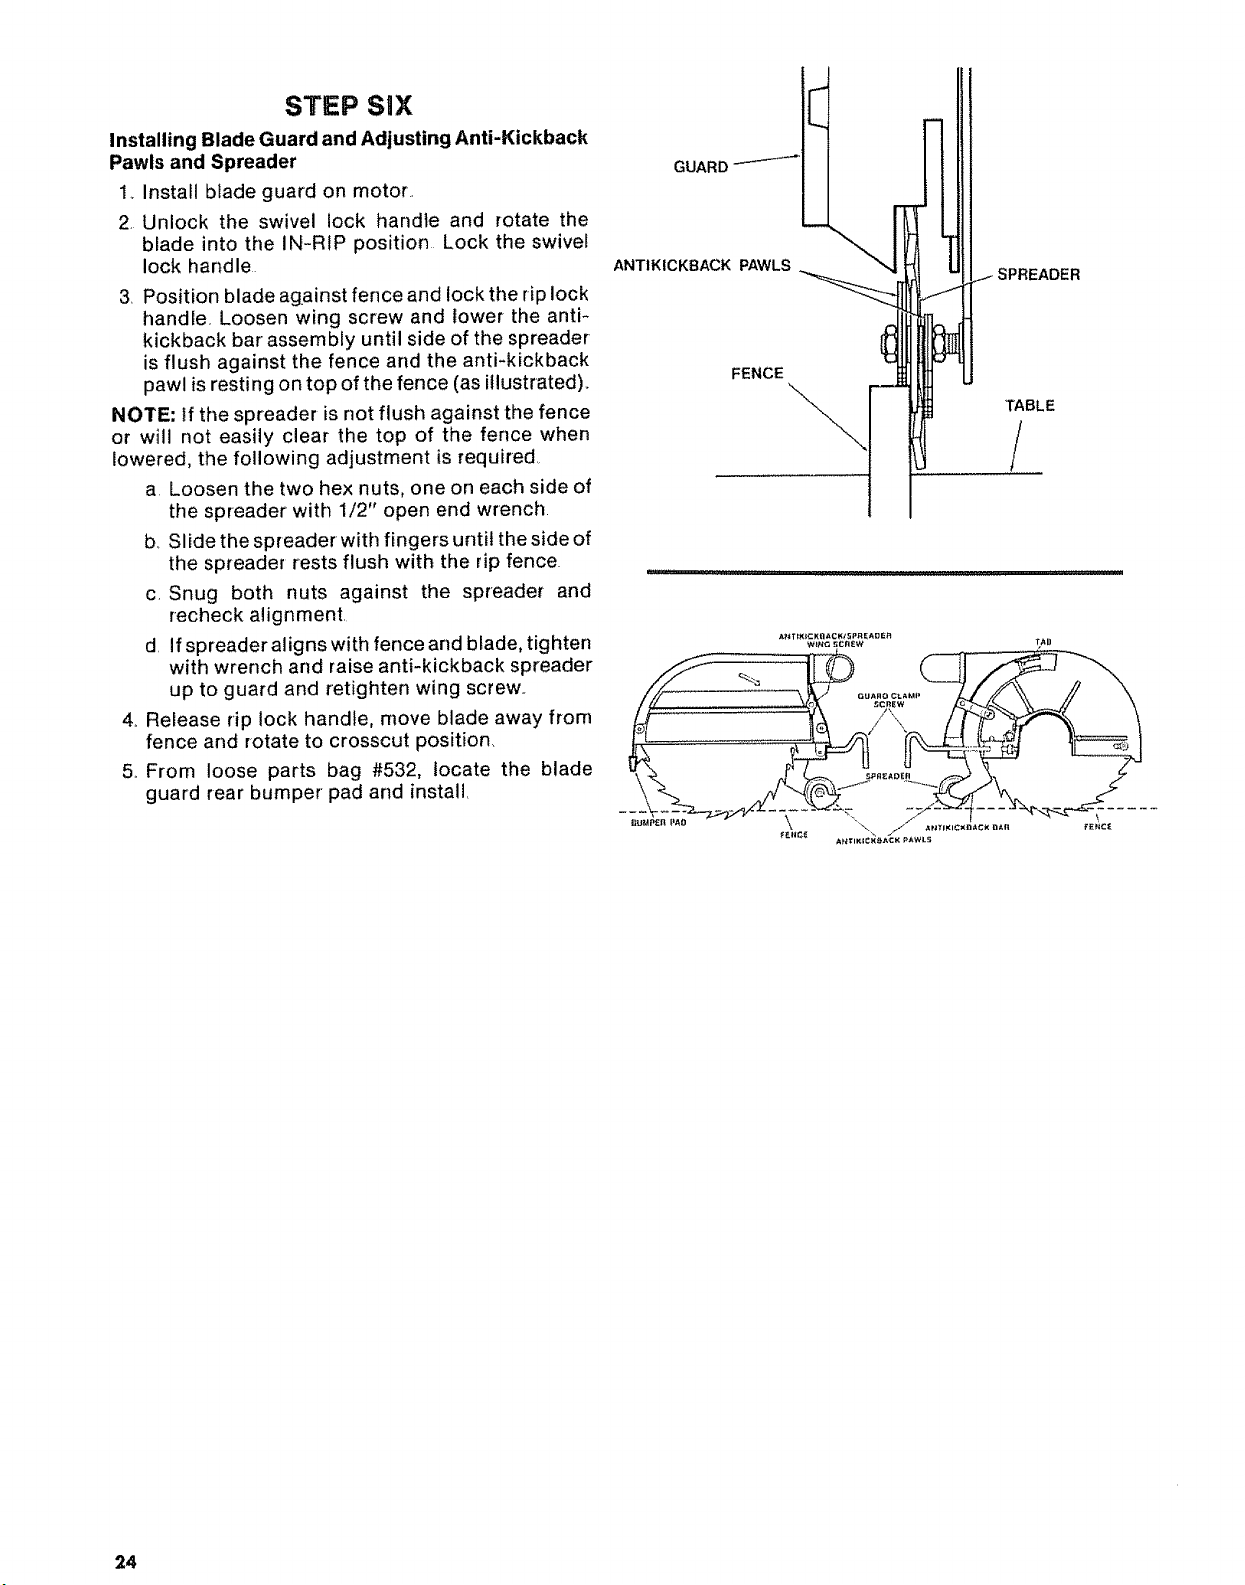
3. Position blade against fence and lock the rip lock
handle, Loosen wing screw and lower the anti-
kickback bar assembly until side of the spreader
is flush against the fence and the anti-kickback
pawl is resting on top of the fence (as illustrated).
NOTE: If the spreader is not flush against the fence
or will not easily clear the top of the fence when
lowered, the following adjustment is required
a Loosen the two hex nuts, one on each side of
the spreader with 1/2" open end wrench
b_ Slide the spreaderwith fingers until the side of
the spreader rests flush with the rip fence.
c, Snug both nuts against the spreader and
recheck alignment.
d If spreader aligns with fence and blade, tighten
with wrench and raise anti-kickback spreader
up to guard and retighten wing screw..
4.. Release rip lock handle, move blade away from
fence and rotate to crosscut position
5.. From loose parts bag #532, locate the blade
guard rear bumper pad and install
GUARD---'-'-'-_
ANT1KICKBACK PAWLS
FENCE
TABLE
A_T_(+_:Kg ACKt 5PRE ADER
24
Loading ...
Loading ...
Loading ...