Loading ...
Loading ...
Loading ...
3736
CULTIVATOR EDGER PRUNING SAW HEDGE TRIMMER BRUSHCUTTER
9. Cutting pattern
• Do not attempt to cut branches exceeding 15 cm in diameter.
• If it is necessary to cut a thick branch, cut it in several stages.
• If the saw chain becomes jammed in a branch during
operation, or if the saw chain becomes entangled with a
branch, shut off the engine before attempting to free up the
saw chain.
• Run the engine at speeds between 5.500 and 8.000 rpm to
suit the working conditions.
• Be extremely careful about the possibility of kickback when
cutting bent or split branches.
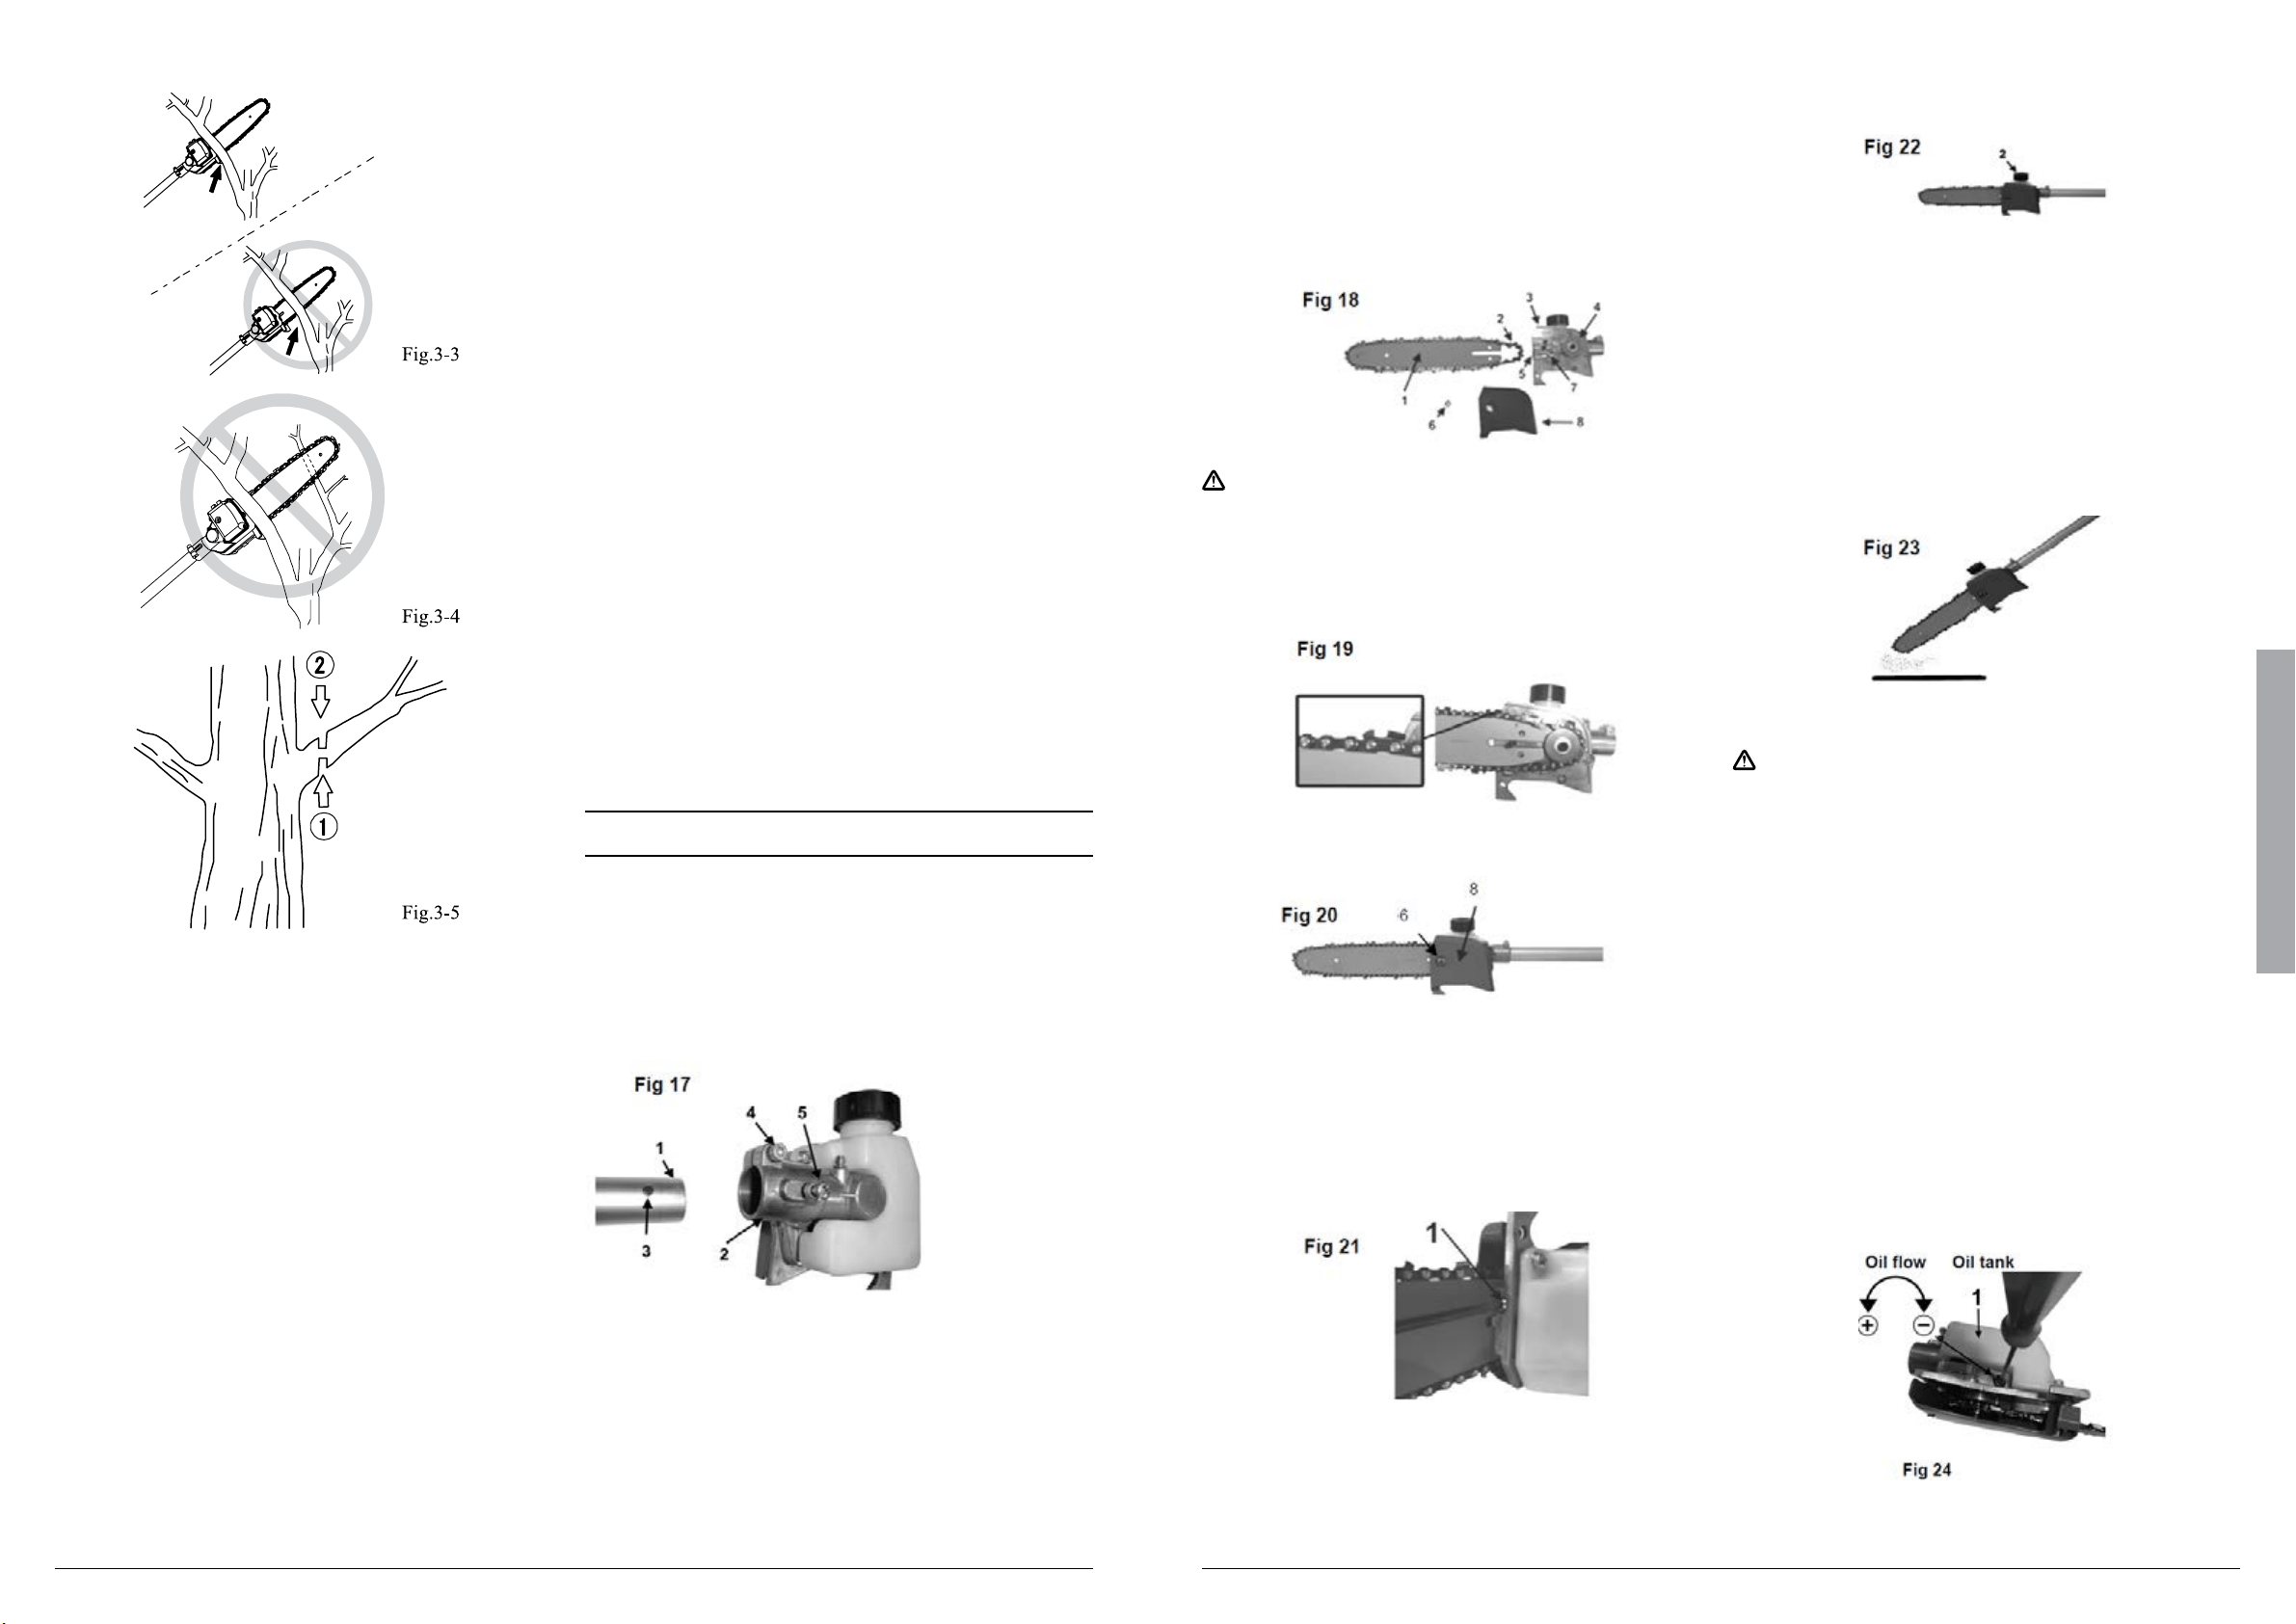
• Press the guide on the gearcase against the branch you intend
to cut. With this technique, the running saw chain will not lurch
forward when the branch has been cut through. Do not allow a
gap between the guide and branch being cut; do not move the
saw chain back and forth. (Fig.3-3)
• If another branch is immediately behind the branch being cut,
use extreme caution. The second branch can cause the guide
bar to break. (Fig.3-4)
• When cutting a branch, lightly push the saw chain against it.
Immediately before cutting through the branch, stop pressing
and hold the chainsaw securely.
• To cut a thick branch exceeding 10 cm in diameter, do the
following: (Fig.3-5)
1. Lightly press the upper side of the guide bar
against the underside of the branch near the
trunk. Make the undercut (1) to a depth of about
1/4 the diameter of the branch.
2. Make a backcut (2) from above the branch, at a
location about 2 to 3 cm outside the undercut.
Once the branch has fallen, cut off the remaining
part near the trunk.
10. Kickback
Never use the leading end of the guide bar (especially not the
leading 1/4 near the tip) to cut a branch. If the leading end of the
guide bar contacts a tree, branch, or other hard object while the
saw chain is running, violent kickback will occur. Kickback is a
violent reaction force that causes the chainsaw to swing back
toward the operator, possibly leading to injury.
11. Special precautions when two or more machines are in
use
When two or more machines are in use simultaneously, it is
essential that all operators use extreme care to maintain a safe
distance from each other, constantly look around, and always
remain aware of presence of the other operators to ensure safe
operation.
12. Abnormal noise and vibration
• If the machine suddenly exhibits abnormal noise or vibration,
immediately shut off the engine.
• If abnormal noise or vibration occur, check for damage to the
saw chain, a loose screw, or other failure. Check the entire
machine for any sign of a problem.
• After the cause has been found, do not use the machine until
you have completed the repair.
Assembly of the Pruner
Attaching The Pruning Mechanism (Fig 17)
• Remove the locating screw (5).
• Using a 4mm Allen key, loosen the clamping bolt (4).
• Slide the drive shaft (1) into the gearbox (2) until the locating
hole (3) in the drive shaft is visible through the locating hole in
the gearbox (5).
• Insert the locating screw (5) into the gearbox (2) and tighten.
• Using a 4mm Allen key, tighten the clamping bolt (4).
Install the guide bar and the saw chain on the gearbox as
follows: (Fig 18)
(1) Guide bar
(2) Saw chain
(3) Gearbox
(4) Sprocket
(5) Chain tension adjust screw
(6) Nut
(7) Chain tensioner
(8) Chain cover
WARNING
The saw chain has very sharp edges. Use protective gloves for
safety.
• Loosen the nut 6, Fig 18/20 and remove the chain cover 8.
• Mount the guide bar, then fit the saw chain around the bar and
sprocket Fig 19.
Pay attention to the correct direction of the saw chain Fig 19.
• Fit the chain tensioner into the lower hole of the guide bar, then
install the chain cover, and fasten the mounting nut to finger
tightness Fig 20.
• Turn the adjuster screw 1 clockwise until the chain does not
sag from the underside of the guide bar Fig 21.
• Tighten the chain cover nut.
• Pull the chain around the guide bar by hand to check that the
chain has the correct tension, without any tight spots.
It is important to maintain the proper chain tension. Rapid
wear of the guide bar or the chain coming off can be caused
by improper tension, especially when using a new chain.
Chain Oil
• Fill the chain oil tank 2 with low viscosity chain oil or 10W30
(Fig 22.)
NOTE
• Do not use waste or regenerated oil that can cause damage to
the oil pump.
• The oil reservoir has a capacity sufficient to provide about 20
minutes of cutting time (when set to deliver the minimum flow
rate). Be sure to refill the oil tank every time when refuelling the
saw.
Checking the oil supply
• After starting the engine, run the chain at medium speed and see
if chain oil is thrown off as shown in
the figure Fig 23.
Adjusting Oil Flow Rate
WARNING
Never fill the oil reservoir or adjust the oiler with the engine
running.
• An increase in bar oil flow rate will speed oil consumption,
requiring more frequent checks on the oil reservoir.
• The guide bar and chain are lubricated automatically by a
pump that operates whenever the chain rotates. The pump is
set at the factory to deliver a minimum flow rate, but it can be
adjusted in the field. A temporary increase in oil flow is often
desirable when cutting hardwood.
Adjust the pump as follows:
• Stop the engine and make sure the stop switch is in the OFF
position.
• Place the unit on its side with the oil reservoir (1) up.
• The oil flow adjusting screw must be pressed in slightly in order
to turn. Failure to do so could damage the pump and screw
(Fig 24).
• With a screwdriver, push in on the oil flow rate adjusting screw
and turn in the desired direction (there are three incremental
settings)
• Clockwise-decrease lubrication, Counter clockwise-
increase lubrication.
Loading ...
Loading ...
Loading ...