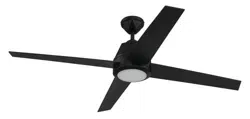
Installation Guide for Patriot Lighting
For model: MEA52MBK4LR, #355-0720
5. Fan Assembly.
Remove hanging ball from downrod provided by loosening set screw on hanging ball. Remove pin and clip. Lower hanging ball and remove stop pin. Then slide hanging ball off downrod. [Refer to diagram 1.]
Loosen yoke set screws and nut at top of motor housing. [Refer to diagram 2.]
Tip: To prepare for threading electrical wires through downrod, apply a small piece of electrical tape to the ends of the electrical wires--this will keep the wires together when threading them through the downrod. [Refer to diagram 2.]
Determine the length of downrod you wish to use. Thread electrical wires through downrod and pull extra wire slack from the upper end of the downrod. [Refer to diagram 2.]
Insert downrod in the motor housing yoke until holes for pin and clip in downrod align with holes in yoke--make sure wires do not get twisted.Re-insert pin and clip that were previously removed. Tighten yoke set screws and nut securely. [Refer to diagram 2.]
Slide yoke cover over the downrod and lower completely (until it touches the motor housing). Then, slide canopy over downrod. [Refer to diagram 3.]
Thread wires through hanging ball; then, slide hanging ball over downrod. Insert stop pin into top of downrod and raise hanging ball. Be sure stop pin aligns with slots on the inside of the hanging ball. Tighten set screw securely. [Refer to diagram 4.]
WARNING: Failure to tighten set screw (on hanging ball) completely could result in the fan becoming loose and possibly falling.
NOTE: The important safety precautions and instructions appearing in the manual are not meant to cover all possible conditions and situations that may occur. It must be understood that common sense and caution are necessary factors in the installation and operation of this fan.
With the hanging bracket secured to the outlet box and able to support the fan you are now ready to hang your fan. Grab the fan firmly with two hands. Slide downrod through opening in hanging bracket and let hanging ball rest on the hanging bracket. Turn the hanging ball slot until it lines up with the hanging bracket tab.
WARNING: Failure to align slot in hanging ball with tab in hanging bracket may result in serious injury or death.
Tip: Seek the help of another person to hold the stepladder in place and to lift the fan up to you once you are set on the ladder.
6. Wiring.
WARNING: Turn off circuit breakers to current fixture from breaker panel and be sure switch is turned to the OFF position.
CAUTION: Be sure outlet box is properly grounded and that a ground wire (GREEN or Bare wire) is present.
Make sure all electrical connections comply with Local Codes or Ordinances and the National Electrical Code. If you are unfamiliar with electrical wiring or if the house/building wires are different colors than those referred to in the diagram to the right, please use a qualified electrician.
Wire the receiver with wire connectors provided as shown in diagram at right.
Tip: While you are wiring, keep in mind that wires must not obstruct receiver from sliding into hanging bracket.
* Wrap each wire connector separately with electrical tape as an extra safety measure. Insert receiver into hanging bracket (flat side up) and gently push taped wire connectors into outlet box. Allow antenna from remote control receiver to hang out of the hanging bracket.
7. Canopy Assembly.
Raise canopy to hanging bracket, aligning slotted holes in the canopy with loosened screws in hanging bracket. Twist canopy to lock. Re-insert screws (along with star washers) that were previously removed (Section 4, page 4) and securely tighten all 4 screws with a Phillips screwdriver.
*Remember that antenna for remote control receiver must rest outside of hanging bracket.
8. Blade Assembly.
WARNING: To reduce the risk of serious bodily injury, DO NOT use power tools to assemble the blades. If screws are overtightened, blades may crack and break.
Time Saver: Washers for blade screws can be set on each blade screw prior to installing blades.
Locate 12 blade attachment screws and washers in hardware pack. Slide blade through one of the narrow, rectangular openings on motor housing, aligning holes in blade with holes in blade arm (located on the underside of the motor housing)--refer to drawing at right. Insert blade attachment screws and washers with fingers first and then tighten screws securely with a Phillips screwdriver. Repeat procedure for each remaining blade.
NOTE: Tighten blade attachment screws twice a year.
9. Light Kit Assembly.
Remove 1 screw from motor plate on underside of motor housing and partially loosen the other 2 screws.
Connect WHITE wire from LED light kit to WHITE wire from motor housing. Connect BLACK wire from LED light kit to BLUE (or BLACK) wire from motor housing. Be sure that molex connections snap together completely. [Refer to diagram 1.]
Align slotted holes in center of LED light kit with loosened screws in motor plate. Twist LED light kit to lock. Re-insert screw that was previously removed and securely tighten all 3 screws with a Phillips screwdriver. [Refer to diagram 1.]
Locate slots on shade and align with nodules on inside of LED light kit. Gently push up on shade and turn to the RIGHT (clockwise) until it slides completely into place. [Refer to diagram 2.]
NOTE: Pull down VERY GENTLY on shade to make sure that shade is secure.
10. Remote Control Operation.
If you wish to use the remote control bracket, install screws, included in remote pack, through bracket and into the desired installation site. The remote control transmitter rests inside the bracket.
CAUTION: The remote control transmitter can be programmed to multiple receivers or fans. If this is not desired, turn wall switch off to any other programmable receiver or fan.
Remove battery cover from back of remote control transmitter. Install one 12-volt battery, size A23, (included) with positive (+) end toward top of remote control transmitter. Replace battery cover.
WARNING: Choking Hazard - Small parts. Keep battery away from children. ["Remote Control Operation" continued on next page.
Restore electrical power. Within 30 seconds of restoring the power, press and hold the "O" button on the remote control transmitter for 5 seconds or until light on fan blinks twice. Test the light and fan functions to confirm the learning process is complete.
NOTE: Remove protective covering from front of remote control transmitter and discard.
IMPORTANT: To prevent damage to transmitter, remove the battery if not used for long periods. Store the remote control transmitter away from excess heat or humidity
Operation buttons on the panel of the remote control transmitter:
- 3 button for fan HIGH speed
- 2 button for fan MEDIUM speed
- 1 button for fan LOW speed
- 0 button to turn fan
- OFF button to turn light ON or OFF
Tap button quickly to turn lights off or on. Hold button down to increase or decrease lights. If you press button in excess of 0.7 seconds, it becomes a dimmer. The lights vary cyclically in 8 seconds. The light button has an auto resume function, which keeps the light at the same brightness as the last time it was turned off.
CAUTION: “DO NOT DISPOSE OF BATTERY IN FIRE, BATTERY MAY EXPLODE OR LEAK.” - When disposing of household alkaline batteries, it is best to check with your local and state recycling or household hazardous waste coordinators concerning the specifics of the program in your area. You may also locate a recycling center by calling 1-800-8-BATTERY or 1-877-2-RECYCLE or visit www.epa.gov/epawaste/index.htm or www.earth911.org for more information. Non-rechargeable batteries are not to be recharged; Do not mix different types of batteries such as alkaline, carbon-zinc, or rechargeable batteries. Do not mix old and new batteries. Batteries are to be inserted with the correct polarity. Exhausted batteries are to be removed from the product.