1
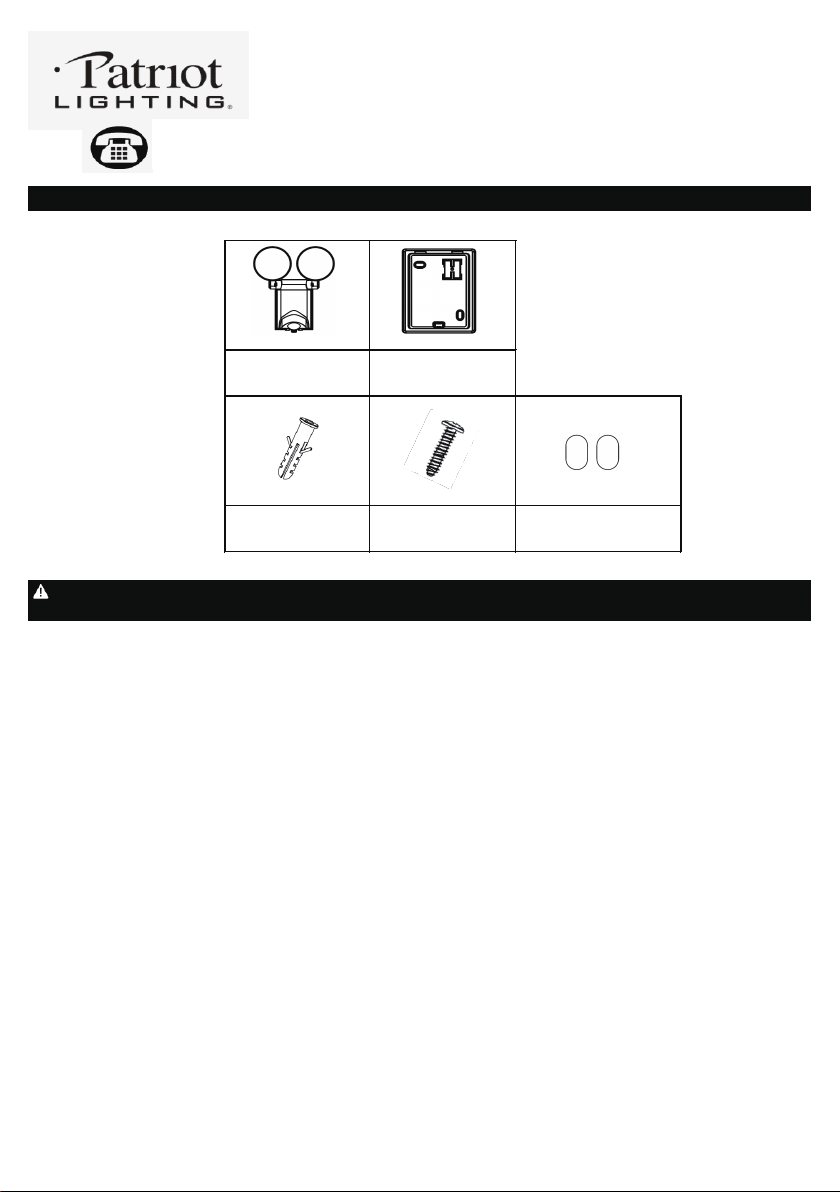
PACKAGE CONTENTS
Anchor x 2 Rubber Seal x 2
CAUTION: This device complies with Part 15 of the FCC Rules. Operation is subject to the following two conditions: (1) This device may not cause harmful
interference, and (2) this device must accept any interference received, including interference that may cause undesired operation.
WARNING: Changes or modifications to this unit not expressly approved by the
party responsible for compliance could void the user's authority to operate the
equipment.
NOTE: This equipment has been tested and found to comply with the limited for Class B digital device, pursuant to Part 15 of the FCC Rules. Their limits are
designed to provide reasonable protection against harmful interference in a residential installation. This equipment generates, uses and can radiate radi
o
frequency energy and, if not installed and used in accordance with the instructions, may cause harmful interference to radio communications. However, there
is no guarantee that interference will not occur in a particular installation. If the equipment does cause harmful interference to radio or television reception,
which can be determined by turning the equipment off and on, the user is encourage
d to try to correct the interference by one or more of the following
measures:
* Reorient or relocate the receiving antenna.
* Increase the separation between the equipment and the receiver.
* Connect the equipment into an outlet on a circuit different from that to which the receiver is connected.
* Consult the dealer or an experienced radio/TV technician for help.
C D E
FEATURES:
Motion sensor:
AUTO pos
ition - At night,turns light ON automatically when motion is detected and turns light OFF automatically after all motion is stopped.
TEST position - The light will operate during the day or night. The light will stay on for 5 seconds after all motion is stopped.
LOCATION: Fixture can be wall mounted.
Recommended installation height: 6 - 8 feet above the ground.
Environment will affects the sensor ran
ge. It is recommended not to mount the fixture near a heat source like an air conditioner, vent, or furnace exhaust, or in
a direction facing a light reflecting object.
CLEANING AND MAINTENANCE:
To prolong the original appearance, clean the light fixture with a soft, damp cloth. Do not use paints, solvents, or other
chemicals on this light fixture. They could cause a premature deterioration of the finish.
Read all instructions before installation, then store in a safe place for future reference. Failure to do so may result in
faulty assembly and potential injury.
Mounting Bracket x 1
A
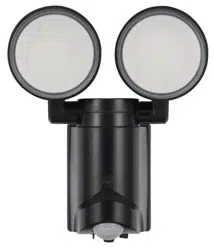
Light Fixture x 1
B
Screw x 2
PREPARATION: Tools required for assembly (not included): phillips screwdriver, safety goggles, power drill and ladder.
Sku Number: 356-4258
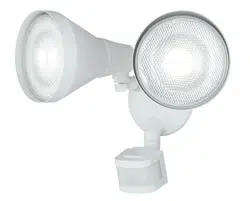
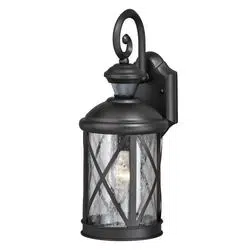
Battery Operated Security Light
Model Number: ES00991G
Questions, problems, missing parts?
Before returning to your retailer, call our customer service at 855-232-6423
Monday – Friday 8:00 a.m. – 8:00 p.m. (EST)
2
BATTERY REPLACEMENT
•
Exhausted batteries are to be removed from the product.
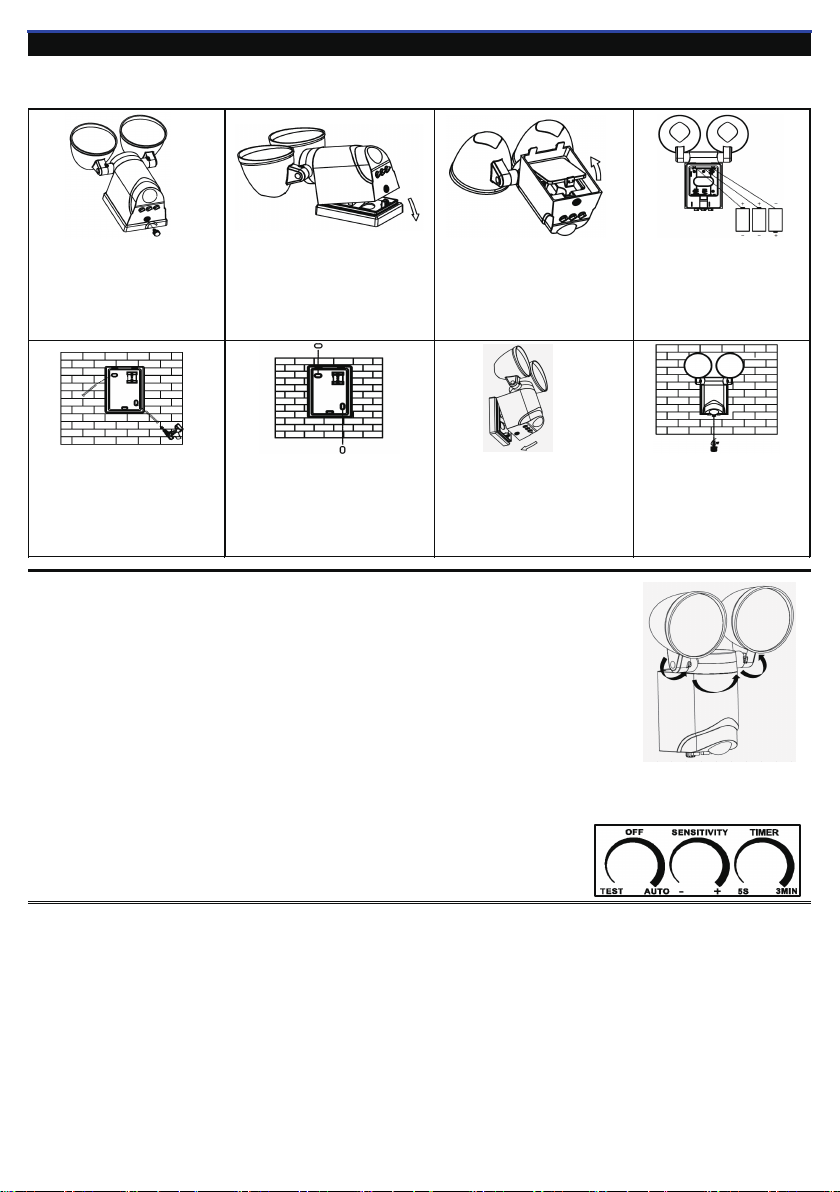
INSTALLATION AND OPERATION INSTRUCTIONS
1. The light fixture and mounting bracket
are held together by 2 locking tabs on the
top and a screw on the bottom. Unfasten
the locking screw from the bottom of
mounting bracket.
2. Open the battery case cover
by finger.
7. Line up the light fixture with the
mounting bracket.
8. Fix the mou
nting bracket to the
light with attached screw tightly.
6. Use attached two rubber seals to fill
the screw hole.
Note: While the batteries are exhausted the light will not turn on.
Use only new alkaline C size batteries with 1.5V rating for replacement.
•
Batteries should be recycled or disposed of as per state and local guidelines.
•
Do not mix old and new batteries.
•
Do not mix alkaline, standard (c
arbon-zinc) or rechargeable batteries.
•
Do not dispose of batteries in fire.
OPERATIONAL INSTRUCTIONS
5. If mounting to wall or brick, drill two
suitable holes using power drill (not
included) into the mounting surface.
Use attached two screws and two
anchors to fix the mounting bracket on
the wall tightly.
•
Gently remove all parts from the package and lay them out on a smooth surface.
INSTALLATION
1. Setting the sensor for testing: Sensor's initial setting switch will be set at the TEST position. After inserting
the new batteries for the first time the light will turn on and enter a "warm-up" period for about 10 seconds,
automatically entering into TEST MODE. The light will operate during the day or night. The light will stay on for
5 seconds after all motion is stopped.
2
. Adjust the head of light fixture toward to left or right direction to get the desired light direction.
3. Adjust the head of light fixture toward to up and down to get the desired light direction.
4. Setting the sensor adjustment rotary switch as your desired setting before use.
SENSITIVITY - To increase the detection distance, rotate the “SENSITIVITY” switch toward the “+”
(high) posit
ion.To decrease the detection distance, rotate the “SENSITIVITY” switch toward the “-”
(low) position.
TIMER - Controls how long your security light will remain on. Rotate the “TIMER” switch toward the “5S”
position to decrease the remain time. Rotate the “TIMER” switch toward the “3MIN” position to
increase the remain time. The remain time range is from 5 seconds to 3 min
utes.
5. Set the switch from TEST position to AUTO position. At night, turns light ON automatically when motion is
detected and turns light OFF automatically in setting time after all motion is stopped.
Sensor Range: Up to 9 m / 30 ft. x 180 degree spread (Varies with various environment).
Lumens output: 1,500 lumens / 5,000K (Max, use three new alkaline C size 1.5V batteries).
2. Remove the mounting bracket
from the light.
•
Batteries are to be
inserted with the correct polarity.
•
Non-rechargeable batteries are not to be recharged.
4. Insert three new alkaline C size
1.5V batteries (not included). Then
close the battery case cover. Do
not mix old and new batteries.
Make sure the polarity are all
correct.

The light does not come on
Check the battery and make sure that it has contact to the metal plate and the polarity is correct.
If the battery is worn out, replace the battery with three new C size batteries.
Light sensor only allows light to activate in darkness at Auto position.
TROUBLESHOOTING
Questions, problems, missing parts?
Before returning to your retailer, call our customer service at 855-232-6423
Monday – Friday 8:00 a.m. – 8:00 p.m. (EST)
3