Loading ...
Loading ...
Loading ...
F'!q,vlvhl_1_ii_[cll
TO AVOID SERIOUS INJURY AND DAMAGE TO THE
JOINTER/PLAN ER:
,
,
,
DO NOT assemble the Jointer/Planer until you are
sure the tool IS NOT plugged in.
DO NOT assemble the Jointer/Planer until you are
sure the power switch is in the "OFF" position.
DO NOT assemble the Jointer/Planer until you have
read and understood the entire Owner's Manual.
4. DO NOT assemble Jointer/Planer if any parts are
missing or damaged.
STAND ASSEMBLY
,
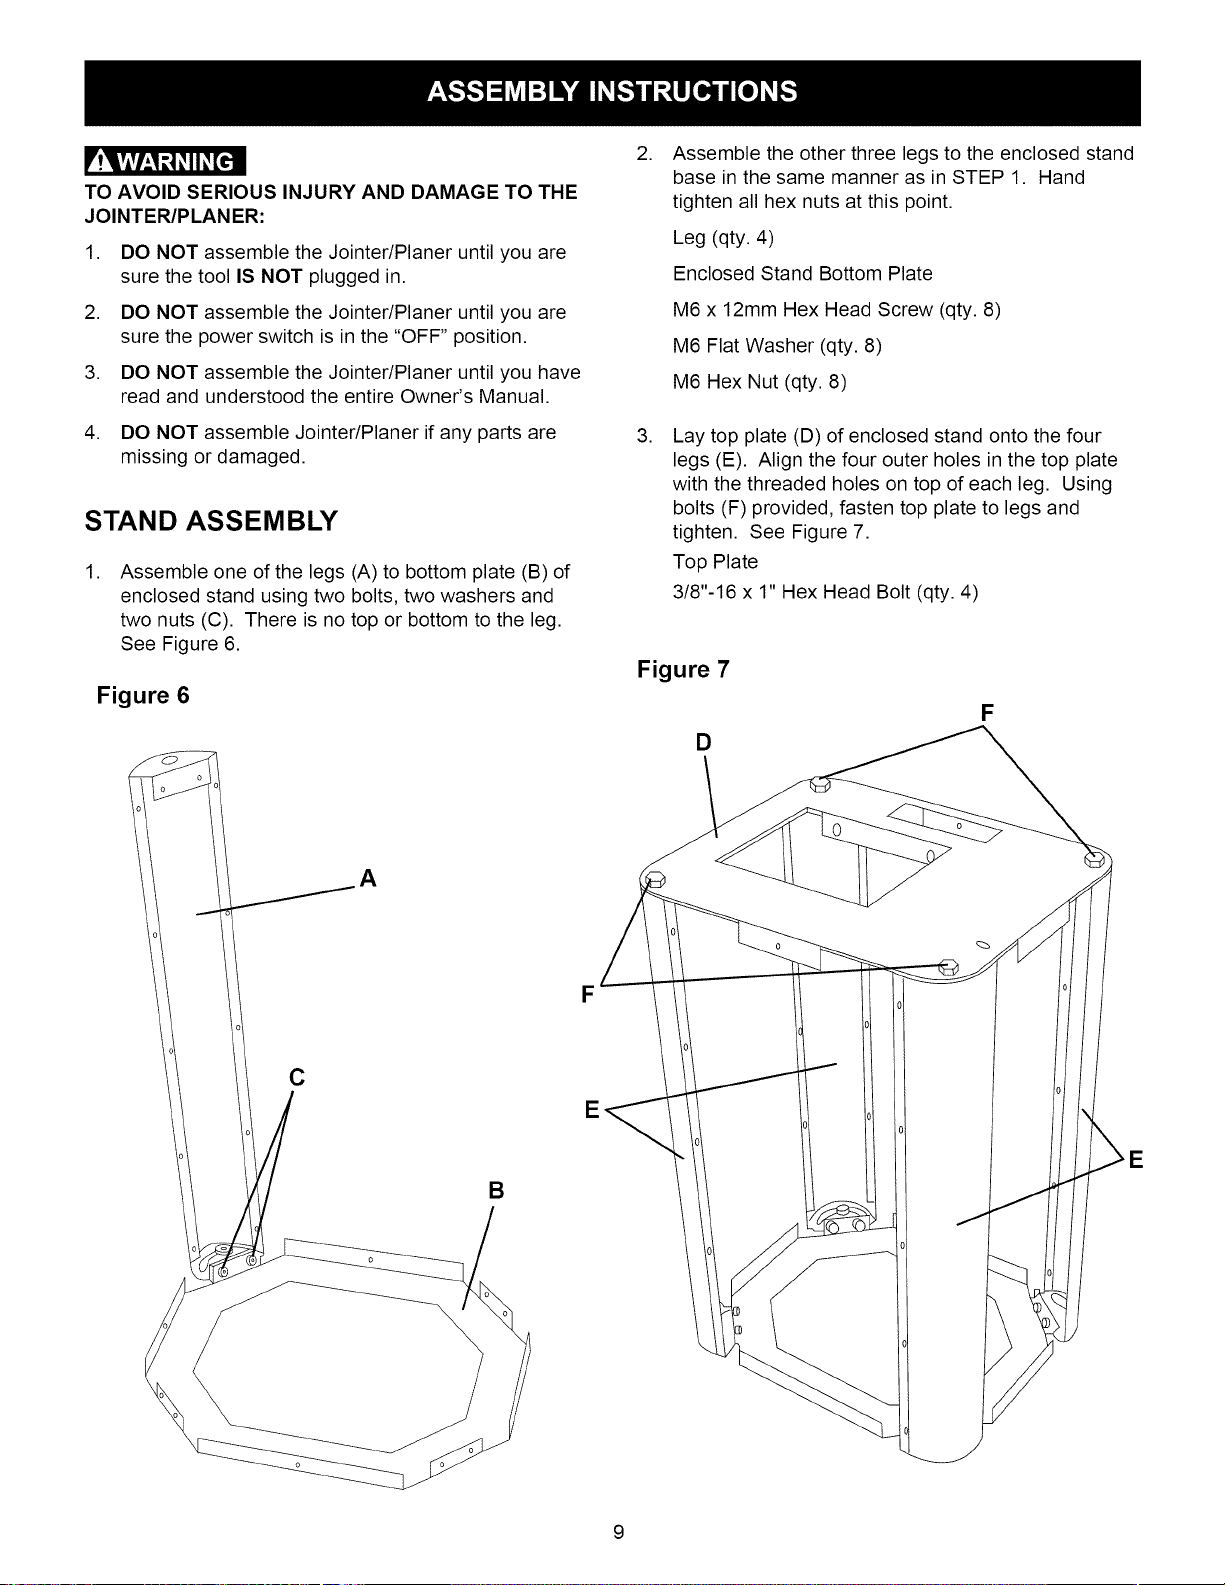
Assemble one of the legs (A) to bottom plate (B) of
enclosed stand using two bolts, two washers and
two nuts (C). There is no top or bottom to the leg.
See Figure 6.
Figure 6
A
F
E
B
,
,
Assemble the other three legs to the enclosed stand
base in the same manner as in STEP 1. Hand
tighten all hex nuts at this point.
Leg (qty. 4)
Enclosed Stand Bottom Plate
M6 x 12mm Hex Head Screw (qty. 8)
M6 Flat Washer (qty. 8)
M6 Hex Nut (qty. 8)
Lay top plate (D) of enclosed stand onto the four
legs (E). Align the four outer holes in the top plate
with the threaded holes on top of each leg. Using
bolts (F) provided, fasten top plate to legs and
tighten. See Figure 7.
Top Plate
3/8"-16 x 1" Hex Head Bolt (qty. 4)
Figure 7
D
F
E
9
Loading ...
Loading ...
Loading ...