Loading ...
Loading ...
Loading ...
ADJUSTING TABLE GIBS
Gibs are internal mechanisms that take up any play
between the base and the infeed and outfeed tables.
Precise gib adjustment is done at the factory and should
not require any further adjustments. However, if
adjustments are required, please follow instructions
below.
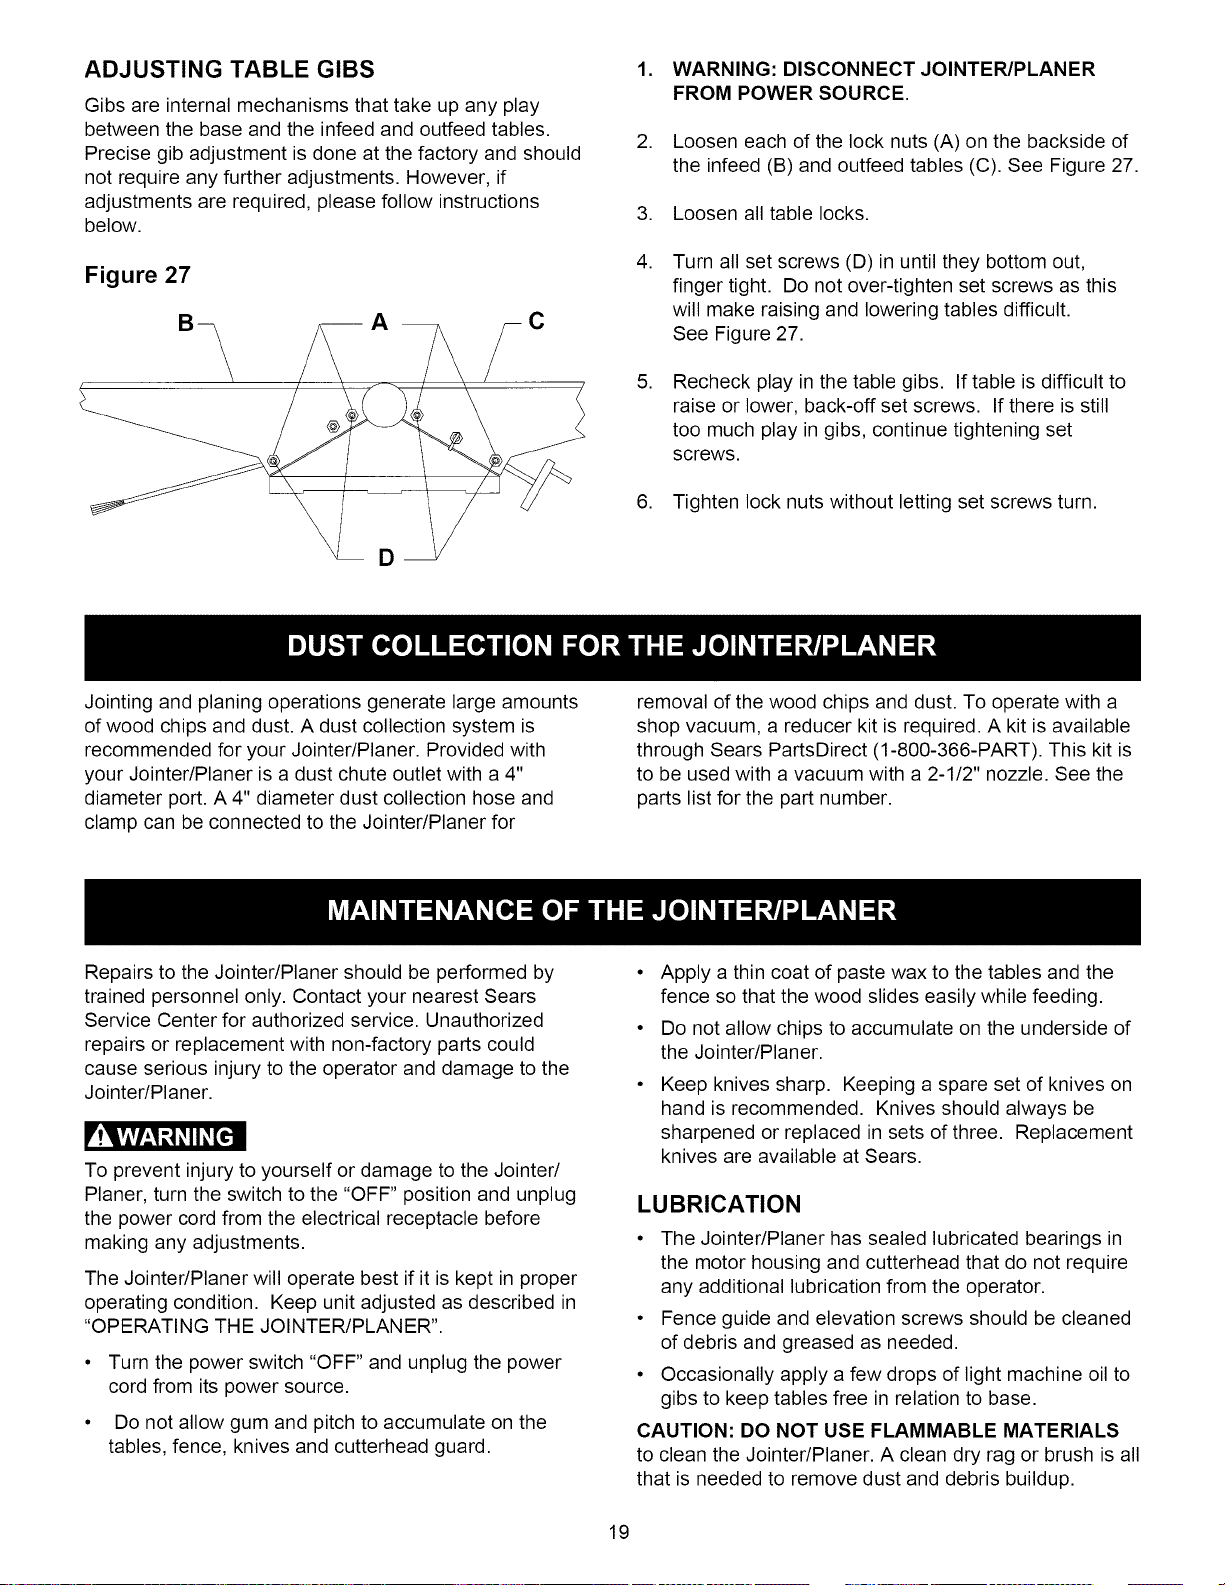
Figure 27
1. WARNING: DISCONNECT JOINTER/PLANER
FROM POWER SOURCE.
2. Loosen each of the lock nuts (A) on the backside of
the infeed (B) and outfeed tables (C). See Figure 27.
3. Loosen all table locks.
,
Turn all set screws (D) in until they bottom out,
finger tight. Do not over-tighten set screws as this
will make raising and lowering tables difficult.
See Figure 27.
,
Recheck play in the table gibs. If table is difficult to
raise or lower, back-off set screws. If there is still
too much play in gibs, continue tightening set
screws.
6. Tighten lock nuts without letting set screws turn.
Jointing and planing operations generate large amounts
of wood chips and dust. A dust collection system is
recommended for your Jointer/Planer. Provided with
your Jointer/Planer is a dust chute outlet with a 4"
diameter port. A 4" diameter dust collection hose and
clamp can be connected to the Jointer/Planer for
removal of the wood chips and dust. To operate with a
shop vacuum, a reducer kit is required. A kit is available
through Sears PartsDirect (1-800-366-PART). This kit is
to be used with a vacuum with a 2-1/2" nozzle. See the
parts list for the part number.
Repairs to the Jointer/Planer should be performed by
trained personnel only. Contact your nearest Sears
Service Center for authorized service. Unauthorized
repairs or replacement with non-factory parts could
cause serious injury to the operator and damage to the
Jointer/Planer.
r'!q,vlvl_,1_1_II_[ell
To prevent injury to yourself or damage to the Jointer/
Planer, turn the switch to the "OFF" position and unplug
the power cord from the electrical receptacle before
making any adjustments.
The Jointer/Planer will operate best if it is kept in proper
operating condition. Keep unit adjusted as described in
"OPERATING THE JOINTER/PLANER".
Turn the power switch "OFF" and unplug the power
cord from its power source.
Do not allow gum and pitch to accumulate on the
tables, fence, knives and cutterhead guard.
• Apply a thin coat of paste wax to the tables and the
fence so that the wood slides easily while feeding.
• Do not allow chips to accumulate on the underside of
the Jointer/Planer.
Keep knives sharp. Keeping a spare set of knives on
hand is recommended. Knives should always be
sharpened or replaced in sets of three. Replacement
knives are available at Sears.
LUBRICATION
• The Jointer/Planer has sealed lubricated bearings in
the motor housing and cutterhead that do not require
any additional lubrication from the operator.
• Fence guide and elevation screws should be cleaned
of debris and greased as needed.
• Occasionally apply a few drops of light machine oil to
gibs to keep tables free in relation to base.
CAUTION: DO NOT USE FLAMMABLE MATERIALS
to clean the Jointer/Planer. A clean dry rag or brush is all
that is needed to remove dust and debris buildup.
19
Loading ...
Loading ...
Loading ...