Loading ...
Loading ...
Loading ...
|0 REMOVING AND INSTALLING SAWBLADE
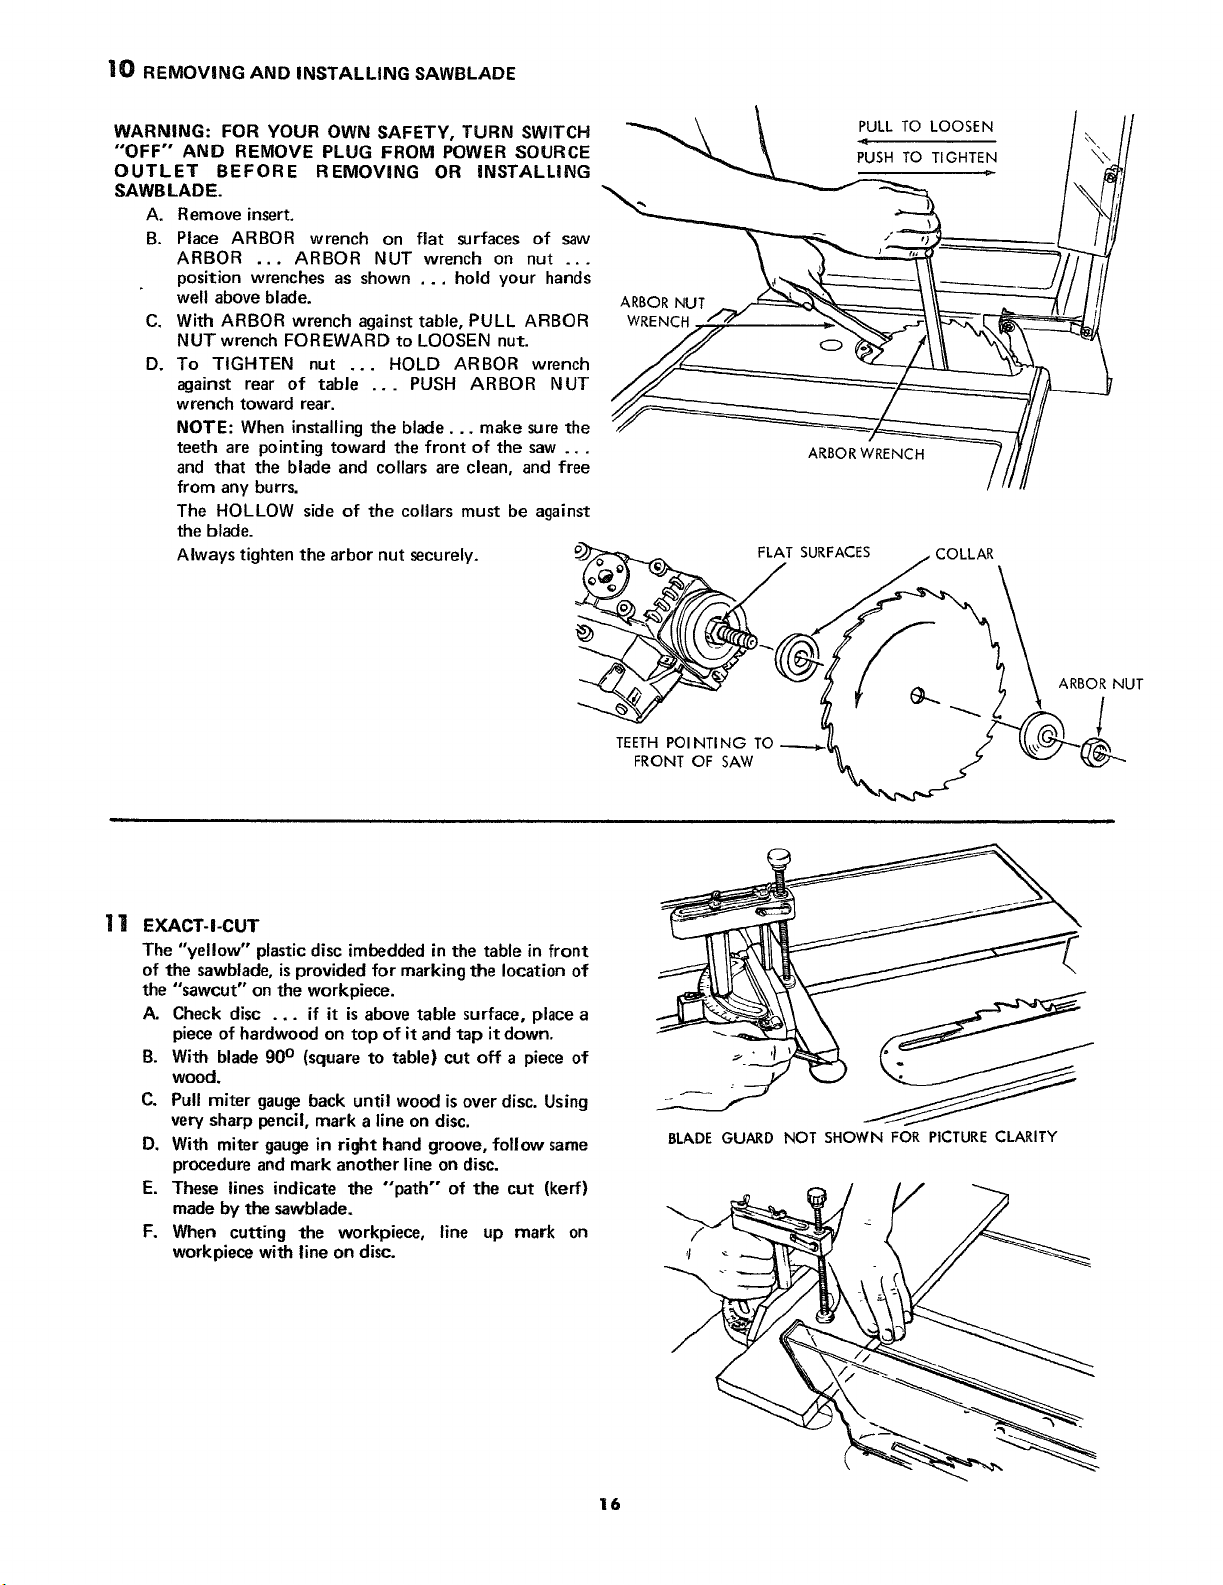
WARNING: FOR YOUR OWN SAFETY, TURN SWITCH
"OFF" AND REMOVE PLUG FROM POWER SOURCE
OUTLET BEFORE REMOVING OR INSTALLING
SAWBLADE.
A. Remove insert.
B. Place ARBOR wrench on fiat surfaces of saw
ARBOR ... ARBOR NUT wrench on nut ...
position wrenches as shown ... hold your hands
well above blade.
C. With ARBOR wrench against table, PULL ARBOR
NUT wrench FOREWARD to LOOSEN nut.
D. To TIGHTEN nut ... HOLD ARBOR wrench
against rear of table ... PUSH ARBOR NUT
wrench toward rear.
NOTE: When installing the blade.., make sure the
teeth are pointing toward the front of the saw ...
and that the blade and collars are clean, and free
from any burrs.
The HOLLOW side of the collars must be against
the blade.
Always tighten the arbor nut securely.
ARBOR NUT
WRENCH
PULL TO LOOSEN
ARBOR WRENCH
FLAT SURFACES COLLAR
TEETH POI NTING
FRONT OF SAW
ARBOR NUT
!
11
EXACT-I-CUT
The "yellow" plastic disc imbedded in the table in front
of the sawblade, isprovided for marking the location of
the "sawcut" on the workpiece.
A. Check disc ... if it is above table surface, place a
piece of hardwood on top of it and tap it down.
B. With blade 90° (square to table) cut off a piece of
wood.
C. Pull miter gauge back until wood is over disc. Using
very sharp pencil, mark a line on disc.
D. With miter gaugein right hand groove, follow same
procedure and mark another line on disc.
E. These lines indicate the "path" of the cut (kerf)
made by the sawblade.
F. When cutting the workpiece, line up mark on
workpiece with line on disc.
BLADE GUARD NOT SHOWN FOR PICTURE CLARITY
16
Loading ...
Loading ...
Loading ...